2000 Bugs Vs 200 Marines - Starship Troopers With Real Tactics
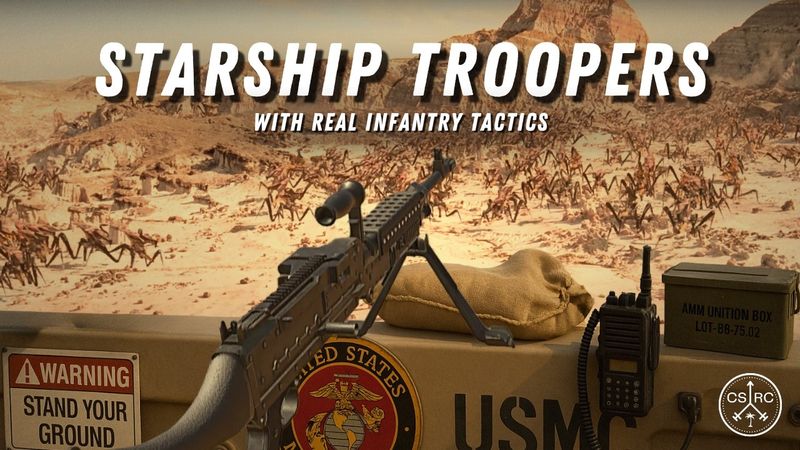
Download information and video details for 2000 Bugs Vs 200 Marines - Starship Troopers With Real Tactics
Uploader:
CSRCPublished at:
6/22/2025Views:
779.4KDescription:
Video Transcription
Sponsored by War Thunder.
Two thousand alien monsters, one lonely outpost.
In Starship Troopers, the mobile infantry fought hard, but they were outnumbered, undergunned, and overrun.
But what if this wasn't a movie?
What if a present-day military unit had to hold Whiskey Outpost for real?
No plot armor, no respawns, just realistic doctrine and the overwhelming firepower of the military-industrial complex.
This video aims to answer these questions by applying the planning tools of military decision-making to this infamous sci-fi battle.
It will also replace the Roughnecks, the in-film defenders, with an outfit that needs no introduction, the United States Marine Corps.
To explore this scenario, we will first analyse the threat and gain as much information about the enemy as possible.
Next, we will deep dive the characteristics and capabilities of our friendly force and the battle space to best understand how to emplace our weapon systems and units, before running a simulation on the likely outcome of the battle.
To set the scene, here's a recap on the events of the film leading up to the battle.
The United Citizen Federation is at war with the arachnids, a hostile alien species from across the galaxy.
After an arachnid-launched meteor strikes Buenos Aires, Earth declares total war and launches a catastrophic invasion on the bug-home planet, Klendathu.
Not long after, the Roughnecks, a battle-hardened platoon from the Mobile Infantry, are dispatched to investigate a distress call from Whiskey Outpost, an isolated patrol base on Planet P. The Roughnecks arrive to find the garrison slaughtered and are almost immediately set upon by thousands of bugs.
With no air support and limited ammunition, the hopelessly outnumbered Mobile Infantry must hold their position until the extraction dropship arrives.
part one enemy force analysis would you like to know more a quick disclaimer before we dive in the 1997 film that features this battle deviates significantly from the original 1959 novel the starship troopers universe also includes video games and comics which provide additional world building however as this analysis is laser focused on whiskey outpost we shall reference the film as the primary source material for the following enemy information the arachnids who
colloquially known as bugs, are an insectoid alien species that operate like a hive, built for war at a biological level.
Their physiology varies depending on the subspecies, however most are armoured with a tough exoskeleton and equipped with claws and mandibles that function as both weapons and digging tools.
Despite lacking advanced technology or individual intelligence, they are biologically optimised for swarm tactics and can coordinate efforts in the collective pursuit of tactical goals.
While lacking a conventional chain of command,
their coordination implies some form of strategic control, likely communicated chemically or telepathically.
The arachnid species is a brutal adversary.
Individual bugs are expendable.
They exhibit no cultural or social behavior, and their sole motivation is survival through expansion, aggression, and violence.
While the film doesn't detail the arachnid hierarchy, the brain bug is implied to be part of the species' leadership cast.
A grotesque, slug-like creature, the Brain Bug is almost entirely defenseless, however has exceptional intelligence and provides the arachnids the ability to evolve tactics through adaptive learning.
It has the gruesome ability to extract human brains through a large proboscis and can temporarily compel its victim into sending verbal messages.
Its strategic acumen was displayed on Planet P as the Battle of Whiskey Outpost was itself an ambush orchestrated by the Brain Bug to draw in human reinforcements and analyze their tactics.
This is explicitly confirmed by Colonel Carl Jenkins, who later reveals that the Roughnecks were deliberately sent into this trap to verify the brain bug's existence.
Order of Battle The bulk of the enemy assault force on Planet P consists primarily of warrior bugs.
The backbone of the arachnid swarm, warrior bugs are fast, durable, and armed with razor-sharp limbs and mandibles.
Warriors operate in massed waves, overwhelming their opponents with speed, aggression, and total disregard for casualties.
At first glance from the film, it seems like tens of thousands of warriors are surrounding the outpost, but it's rather misleading due to the digital effects and how large the arachnids are.
If we manually count the bugs in this frame, we can see between 350 and 400 warriors swarming the outpost, and that's being generous to the piles of dead bugs already against the wall.
This count is consistent across multiple frames, and while it's difficult to ascertain an exact figure from these images, let's assume this volume of bugs is uniform throughout the formation, which we can see thins out towards the rear.
Working with this information, we can plausibly assume the 400 figure is repeated five-fold through the surrounding terrain, leading to a final count of approximately 2,000 warrior bugs involved in the attack.
While the warrior bugs do the heavy lifting in swarm assaults, other subspecies fulfill specialist roles that supplement offensive capability.
The tanker bug is the heavy breacher of the arachnid army.
A heavily armored leviathan, its immense mass allows it to crush enemies and ram through structures and defensive lines.
Its ranged attack is a flamethrower-like spray, capable of melting both flesh and steel out to distances of 50 meters.
Five tanker bugs are shown contributing to the assault in the film.
Light, fast, and airborne capable, hopper bugs serve as reconnaissance and harassment units.
Functionally warrior bugs with wings, they can leap great distances or fly short bursts, bypassing obstacles and fortifications to strike from above or behind.
Although highly mobile, they lack the durability of the ground-based warrior bugs.
They are also seemingly spawned in significantly smaller numbers than Warriors, so we will use 50 as the planning figure.
The arachnid equivalent of long-range artillery, plasma bugs launch high-trajectory bioplasma projectiles capable of destroying starships and fixed positions.
Slow-moving and vulnerable at close range, they rely on Warrior bugs for close protection.
Show on launching plasma bursts into deep space.
They also provide an anti-air capability against capital ships in both orbit and the atmosphere.
Mission.
Compared to a human adversary, the Arachnid mission is relatively straightforward.
Their tactical goal is to destroy all personnel within Whiskey Outpost, with the commander's intent of the brain bug being to analyze human tactics and procedures in order to adapt future Arachnid operations to the threat.
Arguably the most important part of enemy analysis, accurately assessing the enemy's center of gravity can aid in developing optimal courses of action for the friendly mission.
The arachnid's center of gravity differs depending on the level of warfare, with the three levels being strategic, operational, and tactical.
At the strategic level, the center of gravity is the brain bug.
whose ability to craft and execute sophisticated plans is the linchpin of the species' ability to wage war.
In this way, the Brain Bug is the obvious source of strength for the Arachnid army, as without it, their fighting force is unable to conduct elaborate military actions.
At the tactical level, the Arachnid's center of gravity is their ability to execute massed swarm attacks.
The swarm is their decisive instrument of power, and enables them to exploit surprise and tempo by overwhelming defenders with speed, volume, and shock action.
maintain unrelenting pressure by sustaining offensive power despite taking heavy casualties, and conduct multi-axis assaults using complementary subspecies to strike from all directions and saturate defenses.
The core of their doctrine fundamentally differs from that of human military forces, in that bugs don't value losses, but exploit the fact their enemies do.
Critical capabilities are the primary traits, assets, or conditions that support the center of gravity or are essential components of its character.
For example, if we were analyzing a car, we could suggest the center of gravity is the engine and critical capabilities is the supporting mechanisms that make it run.
Without them, engine performance is compromised and the vehicle or enemy force grinds to a halt.
The ability to rapidly force-generate combatants at scale is the key capability enabling swarm assaults.
While the arachnid reproduction cycle isn't specified, it's a safe planning assumption they reproduce at a remarkably faster rate than humans, thus sustaining the numbers needed for such tactics.
The arachnid's locomotion allows them to traverse small cliffs, walls, and obstacles at great speed.
Their rate of movement, even when swarming, is therefore vastly superior to that of human infantry in most terrain.
They can also attack by air and from underground, opening up additional avenues of approach not available to humans.
Employing subspecies such as warriors, tankers, and hoppers in differing roles is akin to using specialist troops in a human army.
These bugs combine their disparate strengths to create joint effects such as airborne harassment, obstacle breaching, and tunneling.
Being able to communicate by telepathy or pheromones creates the instantaneous coordination of all forces.
In a human battle, critical messages are passed up and down a chain of command, further delayed by radio communications and the chaos of battle.
The Arachnid Command has no such issues and can instantly promulgate situation updates or changes in strategy to their entire force.
The arachnids are indifferent to sustaining casualties during combat, be they wounded or killed in action.
This biological drive allows the swarm to relentlessly pursue its mission with no concern to the units lost.
The ability to collectively learn through every encounter with their human adversaries means the arachnids can refine their warfighting skills after every battle.
Supported by strategic assets like the Brain Bug, this allows their entire army to holistically and instantaneously adapt to future threats, in this way sharing felt combat experience even to units who were not physically present at past battles.
Critical Vulnerabilities Warrior Bugs and Hoppers rely entirely on their razor-sharp claws and appendages to destroy their enemy, necessitating close combat engagements.
The range of the Tanker Bug's flamethrower is also comparably short when compared to firearms.
The plasma bug does have significant range, however is shown used more in an anti-air role than supporting ground assaults.
These shortcomings make the swarm vulnerable to prepared defensive positions armed with ranged weapons.
The swarm relies heavily on massed frontal assaults to overwhelm defenders, leading to predictable assault patterns.
While effective against unprepared forces caught in the open, this predictability exposes them to pre-planned kill zones and mass casualties from both direct or indirect fire.
The swarm's ability to project mass relies on throwing as many units as possible at an objective.
Natural choke points or obstacles in the physical terrain slow down their rate of advance and also exposes them to concentrated on-flate fire in narrower kill zones.
Despite their ferocity, individual bugs are vulnerable to concentrated fire from infantry firearms.
As shown in the film, limbs being amputated still leave warrior bugs 86% combat effective.
However, engaging the nerve stem results in near-instant incapacitation.
With the mobile infantry shown using contemporary projectile weapons, much like present-day Earth-borne forces, the bugs are therefore vulnerable to high-velocity rival rounds, such as 5.56mm NATO.
with this caliber even shown penetrating the shell of the tanker bug, their most heavily armored subspecies.
They are also susceptible to explosive and flame damage, as shown during the fleet bombing campaign on Tango Euryla.
Without a brain bug or external guidance, individual arachnid warriors display little initiative or battlefield adaptability.
Once the swarm is committed to an attack plan, it is unlikely to dynamically react to changing enemy tactics without external guidance.
While the swarm can attack instinctively without orders,
The direction provided by the brain bug provides the core nuance to any plan.
This highly centralized strategic asset equates to a single point of failure, and the capture or destruction of the brain bug removes the swarm's ability to execute complex maneuvers.
Speaking of complex maneuvers... No game lets you execute complex maneuvers better than War Thunder, the most comprehensive vehicle combat game ever made.
If you've ever longed to jump in the driver's hatch, cockpit, or bridge with over 2,500 vehicles across land, sea, and air, then War Thunder is the game for you.
And best of all, it's absolutely free and available to play right now on PC, PlayStation, and Xbox.
The attention to detail?
Amazing.
The sound effects?
Sublime.
The graphics?
Fantastic.
And best of all, the highly optimized game engine lets you enjoy War Thunder lag-free even on lower-end PCs.
Featuring 10 major nations and over 100 years of kit,
With 70 million players worldwide, War Thunder delivers epic PvP battles that can be enjoyed by tank buffs, boat buffs, plane buffs, history buffs, or just those who want to experience the bone-rappling firepower of the most fearsome war machines in modern history.
Does this sound like you?
Of course it does.
You enjoy strategy.
So click the links below in the pinned comment or description to sign up today.
And if you're a newcomer to Armored Chaos or been on a six-month RNR from the War Thunder battlefield, never fear, because new and returning players on PC or console get a massive bonus pack.
featuring premium vehicles 100 000 silver lions seven days of premium access but this offer is only for a limited time so click the links below and join the war thunder battlefield
Back to the video.
While we're on the topic of vulnerabilities, let's explore the difference between critical vulnerabilities, or CVs, and targetable critical vulnerabilities, or TCVs, and their relationship to the center of gravity.
In the simplest of terms, CVs describe areas in which the enemy is weak, while TCVs describe areas in which the enemy is weak that can be realistically affected by friendly force action.
Circling back to our example of viewing the center of gravity of a car as the engine, critical capabilities are therefore key parts such as pistons, fuel injectors, and the ignition that function together in order for the engine to run.
Conversely, CVs are the weak points inherent to the engine design.
For example, spark plugs, the fan belt, or the battery.
components naturally prone to failure.
However, not all vulnerabilities are easy to access or attack, and the TCVs are the specific weak points we can actually reach and disable, such as disabling tyres or targeting the driver.
These are the vulnerabilities that are both exploitable and reasonably within reach of both our resources and understanding of the vehicle, or in this case, our enemy.
In the context of the bugs, the arachnid CVs are the aforementioned general weaknesses, such as predictable assault patterns.
Although with the brain bug physically removed from the outpost battle, command fragility is comparably difficult to target, making it a CV as opposed to a TCV.
Their TCVs are the specific weaknesses that can be exploited in battle, such as low individual resilience and lack of ranged firepower.
In short, the CVs describe where the bugs are weak, and TCVs describe where we can actually target their weaknesses.
Also remember that both capabilities and vulnerabilities may be tangible or abstract features of the enemy's character.
Part 2.
Friendly Force Analysis
Would you like to know more?
Before breaking down the friendly force, let's take a moment to critique the mobile infantry, because what they get wrong here is exactly what we'll need to fix later.
Firstly, it's worth noting the Roughnecks were poorly equipped for this mission, as they lacked the heavy support weapons, obstacle equipment, and surplus ammunition sorely needed for such a defensive battle.
They are also shown entering the outpost with at least one mini-nuke rocket launcher, which is bizarrely never used, despite the hopelessness of their situation.
But to be fair, their initial task was to investigate a distress call from the outpost, and not having been forewarned by military intelligence they were likely entering a bug ambush.
their loadout was evidently tailored for foot patrolling in rough terrain as opposed to an extensive defensive battle on entering the compound they promptly establish hasty security by placing two ops manning the fixed heavy machine guns and sealing an arachnid tunnel leading to the chow hall this security footprint seems rather light given the circumstances and costs them precious time later when they must hustle to man the parapet i'd suggest that instead at least 50 alertness would have been more appropriate
with half the platoon manning the walls immediately on arrival, providing more eyes and guns readily trained on the approaches.
Once the arachnid swarm is spotted, Sergeant Watkins hysterically screams, and the roughnecks simply wait, losing precious seconds where squad leaders could be giving fire control orders or allocating sectors of fire.
They wait so long, in fact, that it takes 49 seconds from the bugs being spotted to anyone firing the first round.
which is finally triggered by Lieutenant Radchek eventually giving the order to fire at will, by which time the arachnids have closed to within 50 meters of the outpost.
The Roughnecks predictably react to this order by full-auto mag dumping at the swarm directly to their front, and while I acknowledge they didn't have belt-fed weapons, this still demonstrates poor application of machine gun theory, as they failed to maximize the beaten zones of their automatic fire.
Allow me to explain.
When engaging with machine guns from an elevated position, shooting straight down or to your immediate front causes the rounds to impact in a small concentrated area.
This drastically reduces the cone of fire, meaning fewer enemies are affected with each burst.
Instead, machine guns should ideally achieve grazing fire, where bullets travel just above ground level and sweep across a long stretch of terrain.
Doing so engages the depth of an approaching enemy force and causes attrition towards the centre of the formation, instead of merely targeting the front ranks.
This technique thins out enemy hordes at distance, and any assaulters that clear the beaten zones can be engaged with more disciplined rifle fire.
While we're discussing fundamental skills, let's address the arachnid in the room.
The Roughnecks simply can't shoot.
They're repeatedly shown firing from the hip or not using their sights, but that might also be because the issued Morita Mk1 rifle doesn't have any.
Which I think is a funny chicken and egg type dilemma surrounding their shooting ability and organisational culture.
Do their people suck at shooting because their rifles don't have sights?
Or do they not bother giving their rifles sights because their people suck at shooting?
The more mundane reason is that the film went over budget before the carry handle sights of the Ruger AC-556 bullpup kits could be completed.
But this in-universe theory is more fun.
Either way, their questionable philosophy towards marksmanship speaks volumes about the Mobile Infantry's foundational soldier skills.
And while high in esprit de corps, they are evidently far from an elite outfit.
But to the film's credit, this theme of marksmanship is somewhat addressed within the narrative progression.
On the very first encounter our rookies have with the Bugs, they're absolutely hopeless.
It takes dozens of soldiers hundreds of rounds to down a single warrior, but numerous missions later, the same roughnecks are shown easily downing swarms of bugs with only a fireteam, due to an apparent increase in their marksmanship skills and combat experience.
Or perhaps more boringly, that they're simply plot essential characters.
Let's review the battle by the numbers.
The film appears to show the events playing out in real time, which allows us to ascertain key triggers using timestamps.
At 1 hour 25, they arrive at the outpost.
At 1 hour 28, the arachnid attack begins.
And at 1 hour 33 minutes, their extraction dropship touches down.
This means the Roughnecks had a mere 3 minutes to prepare themselves for the attack, and had to survive the swarm for 5 minutes prior to embarking the dropship.
In terms of their numbers, Roughneck Platoon enters the outpost approximately 30 strong, having previously lost their radioman to a hopper bug on approach to the objective.
Over the course of the battle, they lose.
GASP
These two blokes to decapitation.
This chap by getting snatched over the fence.
This guy to backspike.
Ouch.
This guy to backslash.
This guy to frontslash.
Lieutenant Radcheck to the hole and mercy killing by Rico.
The two tower gunners by melting.
And of course, Corporal Dizzy Flores.
Gone, but not from our hearts.
Just prior to losing Dizzy, marked here in red, this frame shows us 20 Roughnecks boarding the dropship, which brings the final count to 11 kills in action for the mission, or a 32% casualty rate.
I say all this because I think there's two fundamentally different ways I can approach this video.
Option one would give the US Marines the exact same numbers, circumstances, and victory conditions as the Roughnecks.
That is, they have three minutes to prepare a defense and must hold the outpost for five minutes before extracting, with the goal being to sustain less than 32% casualties to improve on the performance metrics from the film.
But I simply don't find this an interesting scenario.
There's ultimately still too many bugs for too few defenders.
There also wouldn't be much change in the firepower output.
with the 5.56mm Marita rifles of the Roughnecks firing the same caliber as the current Marine service rifle.
Further to this, the Marine Corps recently, and somewhat scandalously, did away with belt-fed machine guns at the platoon level, leaving them with only automatic rifles across their squads, which is coincidentally similar to the mobile infantry structure.
Sure, the Marines could apply their superior marksmanship, command and control, and limited explosive weapons to better effect, but given their similar lack of manpower and support weapons, this would only increase the delay by a factor of minutes, and inevitably see them withdrawing, much like the Roughnecks.
The hypothetical question asked of that scenario would therefore be, what would happen if a platoon of US Marines were at the Battle of Whiskey Outpost, instead of the Roughnecks?
This leaves option two, where we ask ourselves a vastly more intriguing question.
How would the US Marines win the Battle of Whiskey Outpost, and what would it take to do so?
What kind of manning, firepower, prep time, and support would they need to hold to the outpost, and achieve a decisive victory over the arachnids?
That's the scenario we're going to craft, and to do that, we'll start by selecting a force that's fit for purpose.
The defending unit is adapted from a U.S. Marine Corps infantry battalion.
With a proud history and decades of combat experience, infantry marines are designed to fight as part of a larger Marine Air Ground Task Force.
Like the mobile infantry from the film, Marine battalions are expeditionary by design and built for rapid deployment from the parent fleet.
They operate with a strong emphasis on small unit leadership, adaptability, and aggression, and their integration of combined arms gives the Marine battalion access to lethal firepower in both offensive and defensive operations.
While I'd like to use the entirety of the 900-strong battalion to ensure a win, we're hindered by the size of the outpost, so we'll need to downscale to a single rifle company plus bespoke supporting elements.
Alpha Company will form the core of the fighting force and consists of three rifle platoons, each with three rifle squads.
The company also has an organic medium machine gun section, which consists of three additional squads with two MGs per squad.
Weapons Company holds the Heavy Fire Support and contains two CAT platoons and more platoon.
Normally vehicle mounted, the CAT platoons employ anti-tank launchers and heavy weapons, however in this case will be dismounted with their machine guns and automatic grenade launchers.
The battalion is also augmented by the Fire Support Team, a small element containing Joint Terminal Attack Controllers and Artillery Joint Fires Observers, responsible for synchronising indirect fire and close air support.
This brings our total manning to 210 Marines, meaning the outpost will be cozy, but also now contain the required firepower and manning to repel the bug assault.
Assets and Weapons The following assets are organic to the Marine Battalion.
The M27 is a 5.56mm magazine-fed automatic rifle, standard issue across the Marine Corps.
It is the replacement to both the previously issued M4 Carbine and the M249 Squad automatic weapon.
and provides the Marine Platoon increased mobility, although arguably at the cost of belt-fed suppressive fire.
The M67 Fragmentation Grenade and M18A1 Claymore Mine are both used at the squad level.
These are both casualty-producing explosive weapons that can disrupt clusters of attackers.
Issued at the fireteam level, the M320 is a 40mm single-shot grenade launcher used in either an under-barrel or stand-alone configuration.
It allows Grenadiers to deliver HE, smoke and illumination rounds out to 350 metres against area targets.
The 84mm Mors or Karl Gustav is a versatile recoilless rifle employed by the rifle platoons for anti-armour, anti-structure and area suppression tasks.
Capable of firing HE and HE rounds, it excels at destroying both armoured targets such as vehicles or tanker bugs and enemy concentrations with airburst fragmentation.
The 7.62mm belt-fed M240 Bravo is the Marine Corps' standard medium machine gun and is employed by multiple subunits within the battalion.
The company medium machine gun section employs six M240s across three squads, and the weapons company CAT platoons use an additional eight M240s, configured for static or vehicle-mounted roles.
The M250 Cal is a heavy machine gun, delivering powerful, long-range fire against personnel, vehicles, and light structures.
It is deployed exclusively by the CAT platoons, with one M2 assigned per section, totaling four guns, with an area target range of 1,800 metres.
The Mark 19 is a 40mm belt-fed automatic grenade launcher that provides high-volume explosive fire.
Like the M2, it is fielded within the weapons company CAT platoons, with one Mark 19 per section, totaling four within the company.
It excels at disrupting enemy formations and has an area target range of 2,200 metres.
The 81mm mortar is the battalion's principal indirect fire weapon, providing high angle explosive fire support out to 5,800 metres.
Operated by three man crews, multiple turn use eight tubes across two mortar sections.
Mortars can be a battle-changing weapon capable of disrupting assaults and inflicting mass casualties among enemy formations.
The following assets are external and provided by supporting units from the Marine Air Ground Task Force.
Supporting artillery batteries provide additional indirect fires to the Marine Battalion.
This may come from either M777 155mm artillery or HIMARS rocket systems.
Aviation support includes fixed-wing close air support from platforms such as the Harrier, F-A-18 Hornet or F-35, capable of delivering guided bombs, rockets and strafing runs.
Rotary wing close air support is provided by aircraft like the AH-1Z Viper and UH-1Y Venom, which offer precision gunfire, rocket strikes, and hellfire missile engagements to support ground maneuver and suppress enemy advance.
The Roughnecks mission was to delay the bug assault in order to hold out long enough to extract, but in this new scenario, the Marines are not settling for mere survival and are instead tasked with holding firm in Whiskey Outpost.
Note that a military mission statement should consist of the who, what, where, when, and why, and use clear task verbs.
These task verbs are standardized, effects-based words that are used in orders to clearly explain what is to be achieved without the risk of ambiguity.
There's numerous suitable task verbs for this mission statement, but in this case, I've opted for retain.
Alpha Company plus attachments is to retain Whiskey Outpost no less than D plus 12 hours in order to degrade Arachnid offensive capability on Planet P. The center of gravity for the Marine Battalion is its combined arms composition.
This enables integration of all weapons and battlefield effects using both assets internal and external to the company.
The battalion's centre of gravity is supported by six key critical capabilities.
Long-range lethality is delivered through the integration of M250 cals, Mk 19s and 81mm mortars, allowing the Marines to engage and disrupt enemy forces well before they reach close combat distance.
This is reinforced by layered suppression, with direct fire weapons interlaced across mutually supporting arcs to ensure continuous and overlapping fields of fire, saturating enemy avenues of approach.
Through its embedded fire support team, the battalion can also access joint fires, enabling the integration of surveillance UAVs, external artillery, and close air support to shape the battle space beyond organic weapon ranges.
Defensive cohesion is maintained through strong coordination, facilitated by sound command and control, and rehearsed engagement plans.
At the individual level, Marines possess tactical initiative and can respond decisively to changes in the battle situation without seeking guidance from centralized commanders.
These characteristics are held together by battlefield discipline, a deeply ingrained cultural capability that sees Marines adhere to the commander's intent even in the face of adversity or friction.
While the battalion is a capable and disciplined force, it carries inherent vulnerabilities.
Among these is its dependence on fixed heavy weapons positions.
Crew-served systems such as M2s, Mark 19s and Mortars take time to emplace and can become liabilities once positions are flanked or breached, unable to rapidly reorientate their arcs of fire.
This is compounded by a finite supply of resources.
The volume of fire required to repel a massed assault consumes ammunition at a rapid rate, with resupply only possible by aviation, but more details on this later.
The enemy's subterranean breaching ability presents a serious risk to static defensive positions.
These tunnels avoid pre-sighted killing grounds and can penetrate defensive lines.
Additionally, the Marines suffer from limited tactical depth, both in the meager available physical space and reserves.
Should the compound be breached, Marines will be forced into close-quarters combat, where they are significantly disadvantaged against the more robust arachnids, and the effectiveness of their heavy weapons are compromised.
Lastly is the unavoidable reality of human fatigue and mental overload.
Prolonged exposure to combat reduces decision-making and physical endurance, creating opportunities for their adversaries.
Part 3.
Terrain Analysis Would you like to know more?
The broader area of operations is the unwelcoming, rocky expanse of Planet P, where Whiskey Outpost is located.
The AO is characterized by harsh, barren desert with jagged rock formations and sprawling narrow ravines.
Whiskey Outpost is itself situated at the end of a broad valley with natural choke points between elevated ridgelines and rocky outcroppings giving way to open, flat terrain immediately surrounding the compound.
At risk of breaking your immersion, a quick reminder that Planet P is not a real place.
It does not exist.
But the filming location of Whiskey Outpost does, and the geology and conditions from Hell's Half Acre, Wyoming, will therefore provide the context for this analysis.
Impact of terrain and weather.
The environment is dusty and dry, which may degrade visibility, especially during windy conditions.
Sand and grit can also reduce the reliability of both weapons and electro-optical equipment used by the Marines.
The climate is semi-arid, reaching 32 degrees Celsius by day, but minimal shade means heat-related injuries must be mitigated and managed.
Observation and fields of fire.
Whiskey Outpost has excellent frontal observation across the valley floor onto the eastern approach, however only out to maximum weapons range through keyholes in the terrain.
The center of the defensive arc is obscured by a large rock formation that hides attackers, but also canalizes them into choke points on either side.
Cover and concealment.
The metal compound walls provide the primary source of cover for defenders, with the rocky terrain also giving some protection from fire through folds in the ground and large boulders or outcroppings.
The absence of vegetation means minimal concealment for both attackers and defenders, but deep valleys can provide concealed movement for infantry or arachnid formations.
Obstacles The compound backs onto a cliff escarpment, above which lies a rocky plateau.
It's not exactly clear in the film why the arachnids don't attack from this direction, but I'd speculate the change in topography means they can't dig into the rocky hard surface, which leaves them exposed to aerial bombardment from the fleet.
This terrain feature is the primary obstacle hindering approach to Whiskey Outpost, and means attackers must approach from the east.
and enter through the aforementioned choke points.
Key Terrain.
The Outpost is the evident key terrain.
It provides its occupants defensive walls and a position of decisive advantage in which to conduct defensive actions.
Part Four.
The Battle Plan.
Would you like to know more?
When creating a defensive battle plan, one of the key tasks is engagement area development.
In simple terms, an engagement area is a pre-sighted portion of the battlefield where a defending force plans direct fire, indirect fire, and obstacles to destroy the enemy on ground of their choosing.
Step one involves determining the likely enemy avenues of approach.
Having done our enemy analysis, we know this will involve ground, air, and subterranean routes.
With the western flank of the base protected by the escarpment, the enemy surface swarm must approach from the east, flowing through the canyons and ravines to minimize exposure from detection and aviation assets.
On final approach, the bugs must split around this large rocky pinnacle, diverging their force to the north and south, before commencing their assault on the outpost proper.
The arachnid airborne approach can come from 360 degrees, however the hoppers in the film are shown also attacking from the east, potentially indicating they too avoid the exposed ground to the west.
Finally, the tanker bugs have the troublesome ability to tunnel, thus creating subterranean avenues of approach that can emerge anywhere the ground is soft enough.
Based on their tactics from the film, we can assess the bugs will commit to a massed frontal swarm, prioritizing speed and volume over finesse.
They will aim to breach the compound by overwhelming the parapet with climbing warrior bugs, using sheer numbers to scale their growing pile of dead.
Tanker bugs are used as heavy breaches, both to attack the wall and to burrow underneath the defensive lines.
Hopper bugs provide aerial harassment, targeting isolated defenders and key weapon systems.
Once a break-in is achieved at any point of the walls, they will exploit it by surging warriors into the breach, aiming to isolate and divide defenders to rapidly overrun the position.
Step 3 involves sighting the engagement area proper, which identifies the key area or areas where the plan intends to destroy the enemy.
This plan sees the majority of the killing occurring within engagement area Rico, located on the eastern side of the clearing approaching the compound.
We could add specific EAs that serve as the choke points, but this area is realistically too small for multiple engagement areas, so we will instead achieve this through target reference points.
More on that later.
Given the durability, strength, and mobility of the bugs, conventional obstacles intended for humans would likely prove ineffective against the arachnid swarm.
This plan therefore leverages the natural terrain as the key obstacle onto which the fire plans are integrated.
But if we theoretically had enough time and heavy plant equipment such as excavators and dozers, a robust obstacle plan could be developed.
First, large barricades such as connex containers or vehicle wrecks could be placed to channel a swarm into the enfilade grazing fire of the guns, further enhancing the kill zone.
Next, counter-mobility ditches could be dug deep enough to disrupt the swarm momentum, slowing them down along the obstacle belts.
Additionally, fields of barbed wire can be added to the channels to further degrade the bug advance.
Wire is an extremely slept-on obstacle, and in sufficient quantities can even be effective against armored vehicles.
It would likely take an obscene amount to slow the bugs, but if resources permitted such an obstacle to be developed, it would be extremely effective.
The near obstacle would be a deep trench or fire moat, which would act as a final barrier to the bugs reaching the wall, and could be filled with fuel and flame fougasse.
Finally, the outpost should ideally be constructed with steel anti-dig mesh built into the concrete foundation, functioning similar to an underground shark net, that would prevent, or at least delay the tankers from burrowing through the surface.
The resources needed to make this obstacle plan happen are well beyond what's available to a marine company, so in our scenario, they will have to rely on the terrain alone.
We're now ready to assign defensive positions and site our direct fire plan.
The aim in this step is to combine the terrain obstacles with overlapping fields of fire to create a tightly coordinated kill zone that creates maximum casualties in the engagement area.
First, our crew served weapons.
CAT platoon will form the backbone of heavy fire support, dividing into four dismounted sections.
The four M2 50 cals will be split into two teams mounted on the southeast and northeast corners of the parapet.
These will be sited onto the choke points and work in pairs to maintain a sustained weight of fire.
Next, the Mark 19s will also occupy the wall with clear arcs into depth.
Also sited onto the terrain choke points to supplement the 50 cal fire.
The eight M240 teams will also be spread evenly across the wall, achieving interlocking fields of fire using a fixed-limits lateral traverse pattern.
To the rear, the 81mm mortar platoon is co-located with all eight tubes online.
They'll have to get cosy to fit all the base plates in, but on the upside, there is no threat of enemy counter-battery fire to worry about.
The mortar offensive support plan will be detailed in the next step.
Reinforcing the Weapons Company guns is the Alpha Company Medium Machine Gun Section.
positioned alongside the cat gunners.
Their three squads will man six additional M240s, distributed in pairs to cover the north, center, and south sections of the wall.
These will cover any gaps in the engagement area, and also serve as backups should the weapons company M240s fail.
Having placed all the casualty-producing support weapons, the priority now becomes creatively putting the remainder of Alpha Company to work.
First Platoon is tasked with security of the north wall.
From this position, they will be able to protect the flank from any bugs that push through the engagement area, allowing the machine guns to maintain their fire on their allocated targets.
Although lacking belt-fed weapons, their concentrated rifle fire should be able to prevent bugs from consolidating at the base of the wall.
And failing this, their claymore mines and fragmentation grenades will assist in disrupting the swarm.
The rearmost squad will also provide rear security in the unlikely event of the enemy advancing from the west.
Second platoon is similarly tasked, albeit with the security of the southern flanking wall.
Third platoon is the company reserve, and is also tasked with internal security of the compound.
One squad will provide dedicated anti-air defence, and will occupy the heavy machine gun tower, the walls, and other elevated positions to best target the airborne hopper bugs.
This allows the defenders on the walls to focus on the warrior bugs, knowing the air threat is being engaged by another team.
This anti-air squad must be tightly controlled to prevent fratricide by accidentally shooting the marines on the walls.
Second squad is the dedicated explosive squad, and will man gaps in the walls with the company's Carl Gustavs.
Their primary task is to engage the killing ground with 84mm HE air bursts.
and their secondary task is to destroy any approaching tanker bugs with heat rounds.
3rd Squad is the dedicated anti-tunneling squad at a position to react to any bugs attempting to breach the surface.
On first sign of an emerging bug hole, 3rd Squad must hastily move to the position and target the breaching tanker using concentrated rifle fire, M320s and frag grenades.
The key is to kill the tanker as quickly as possible, so the corpse falls back into the hole, effectively forming a plug to deny any follow-on warriors use of the tunnel.
This is based on the lessons of the film, when Dizzy destroys a tanker with a grenade and its body slumps back into the breach point.
It's admittedly far from an elegant solution, but there's really no way to feasibly prevent the tankers from achieving their breach.
so the focus instead becomes on managing this risk as practically as possible once it occurs.
Finally, the fire support team will occupy the command post and establish their joint fires communication comms and surveillance network to receive live feeds from supporting assets.
Having allocated each marine a task and position, control measures can also be added to the plan.
Target reference points supplement the larger engagement area, with TRP Dizzy placed on the northern avenue of approach and TRP Carmen placed on the southern choke point.
TRP ZIM is centralized within EA RICO and can be used to realign all weapons onto a centrally focused arc of fire.
TRPs should be sighted on or near obvious reference points and they serve to trigger events, shift fire or enhance target indications on enemy movements.
The final control measure for the direct fire weapons is the Final Protective Fire Line or FPF ACE.
This is sighted within close proximity to the compound and is used to prevent a surging enemy from achieving a tactical breakthrough.
Machine gun FPFs see selected weapons blitz a rapid volume of fire for a predetermined round count or duration, with the goal being to disrupt the enemy's final breach.
The final step of EA development is to integrate indirect fires into the plan.
With both internal mortars and external assets such as fixed-wing close air support, the fire support team is critical in coordinating all offensive support to ensure both its safe employment and maximise lethality.
The first key asset is the surveillance UAV.
This is used to provide both early warning on the approaching bug swarm, and more critically, is used to adjust mortar fire beyond the line of sight of the outpost.
This allows mortar targets to be registered in dead ground and target the highest density of the arachnid swarm in the ground rear of the choke points, with point mortar target Zander to the south and Radcheck to the north.
Mortar target Jenkins is a rectangular target servicing the central killing ground, and the final protective fire mortar target is FPF Zegema Beach, located within danger close limits of the
The external offensive support will be available as on-call contingency fire only.
A HIMARS strike box will supplement the depth mortar targets, while a designated aviation close air support corridor runs north to south in the same area.
Finally, a Viper ECAS lane will complement the primary kill zone, with the gunship's cannons and Hydra rockets able to safely engage closer than the artillery and guided bombs.
how did f-35s and viper helicopters make it across the galaxy to support our company of marines hard to say really but we've got them on standby so we might as well plan how to best employ them this engagement area combines mutual support integration of assets and lethal coverage of the kill zone every weapon is positioned with intent every squad has a clearly defined task and the terrain approaching the outpost is efficiently covered by fire the marines aren't simply hoping to survive but rather shaping the battlefield to annihilate anything that approaches their position
Now, I know what you're thinking.
Do the Marines have enough ammunition?
Good question, glad you asked.
But not everyone cares about the numbers, so I'll blast through this simple math style.
First, our total available ammunition, laid out by weapon system and users, and the total quantity of each caliber and nature.
For example, here we can see that there are 14 total M240s, each with 1200 rounds, rating a total of 16,800 rounds.
Next, let's determine average rounds to kill per bug by species, being the hopper, warrior, and the tanker.
In the film, the hoppers are shown to be slightly less durable than the warriors, and the tankers logically can sponge the most small arms fire.
Reviewing the M240 data again, we can see it takes 15 rounds to kill a single warrior, with this figure being an average including misses.
For example, one bug might have 10 rounds fired at it and die from 5 hits, while another might have 30 rounds fired at it and die after 20 hits, taking into account that our defending marines have substantially better marksmanship training than the roughnecks.
I think these figures are pretty generous to the durability of the bugs, while also considering the chaos of the battlefield, and also disregarding that some rounds, especially the 50 cal, will likely kill more than one bug by overpenetration.
Let's now take our total rounds, or TR, and divide them by our average rounds to kill, or ARK, to give us our TBK, or theoretical bug kills, which will provide a rough idea if we're adequately supplied for the task.
Working with the M240 again, we take our 16,800 total rounds, divide them by 15 for the warrior bug, which gives us 1,120, which is just over half the assessed warrior bug force.
Not great, not terrible.
Putting aside ammunition for a second, we can also use our previous planning figures of 50 hoppers, 2,000 warriors and 5 tankers to calculate the theoretical kills required per user or weapon system.
If we divide the 2,000 warriors by our 14 total M240s, each gun team must kill 142 warriors to deplete the swarm.
Which sounds like a lot, but let's circle back to this later.
Using doctrinal rates of fire, we can also somewhat predict how long we can stay in the fight before going Winchester on ammunition.
These rounds per minute refer to the sustained rate of fire applied by the machine gunners, as opposed to the mechanical or cyclic rate of fire of the weapon.
Ergo, 100 rounds per minute on the M240 might see the gunners firing 6 10-round bursts, with a 5-second pause between to prevent barrels overheating and wasting ammunition.
Using these rates, we can then divide our total rounds by our total guns, and then again by our rounds fired per minute, which will give us our time in minutes of sustained fire, which we can see here for the M240 is 12 minutes.
with some other weapons such as the M320s running out of 40mm grenades after only 2.5 minutes of sustained fire.
At a glance, this meagre amount of time sounds concerning.
However, these theoretical figures don't consider that not all M320 users will be firing at the exact same time, or that the machine gun teams such as the M240s typically work in pairs and fire their bursts in staggered sequence, thereby effectively doubling the time they can support a fire plan.
You might be thinking it's not looking good for the Marines right now, but we haven't yet accounted for our greatest casualty-producing weapons, our high explosives.
Let's assume the Claymores and low-velocity 40mm score two bug kills per detonation, or rounds.
The 84 airburst 5, the mark 19 3 and the 81mm mortars 6 kills per bomb.
Using the mortar lets multiply our total rounds by our average kills per round which gives us the disgusting figure of 2400 dead warrior bugs.
A testament to the lethality of mortars on tightly grouped enemies.
These are pretty conservative numbers and it's perfectly fair to the bugs considering in their densely packed formation I think it's highly plausible a single mortar could kill upwards of 10 warriors per bomb.
Remember before when I said the M240s would kill only half of the warrior swarm?
Well, in practical execution, we can see the high-explosive weapons pick up more than enough slack to destroy the arachnid army, with a theoretical casualty rate of 4,640 warrior bugs from these four weapon systems alone.
And that's without a single of the remaining riflemen firing a shot.
Now, of course, these numbers are speculative, but it lets us somewhat answer the question of, do the Marines have enough ammo?
To which the answer is, kind of.
While perhaps not strictly having enough rifle or machine gun ammo, their fire plan can still succeed due to the integration of high explosives and the nature of the enemy swarm, meaning the bugs sustain mass casualties at an extremely rapid rate.
And let's not forget, this entire video is about providing a force and plan that can actually win the battle.
So if planning reveals the loadout is insufficient, I can simply cast level 10 editor,
This is for you new people.
I only have one rule.
Everyone fights, no one quits.
If you don't do your job, I'll shoot you.
Do you get me?
Part 5.
The Battle Sim.
With the planning out of the way, let's see how this battle might play out.
The scenario begins with Marines pre-positioned inside Whiskey Outpost.
Their mission?
Defend the compound at all costs.
Just to spice up the challenge, they won't have immediate access to their external supporting fires, so will have to hold their own until the aviation arrives.
Maybe the radios are down, or maybe the F-35 pilots are sleeping off a big night at the fleet cantina.
Who knows?
All we know is that friendly help will be fashionably late to the party.
Courtesy of the UAV screen, the arachnid swarm can be detected early, giving time for the defenders to man their positions and steel themselves for the fight.
The bugs swarm through the canyon like a wave, with warriors leading the charge towards the two valley entrances.
Although they're comfortably in range of the mortars, the limited ammunition means every round must count, so the marines need to wait until the swarm is densely packed to achieve maximum bug kills per bomb.
As the swarm flows into the valley, the heavy machine guns begin targeting the choke points.
The 50 cal teams work in pairs, ensuring a continuous stream of fire is maintained and cover each other during reloads or barrel changes.
The Mk 19s also begin their engagement and bombard both TRP Carmen and Dizzy with sustained 40mm high explosive rounds.
Although the arachnids take heavy casualties at these choke points, the swarm is still able to surge into the valley, clambering over the piles of dead warrior bugs.
Flowing towards the compound, the M240 teams begin their engagement.
By interlocking the arcs and firing across their direct front,
The machine gunners can achieve oblique fire onto the arachnid formation, creating more casualties per burst and allowing the heavy machine guns to continue engaging the depth of the swarm.
This engagement plan requires battlefield discipline by the gun teams, as marines place trust in their mates to support their front and vice versa.
Small clusters of warriors that escape the killing grounds can be engaged by marine riflemen and M320 40mms as they approach the walls, leaving the heavy machine guns and AGLs to continue targeting the choke points.
These choke points are enhanced by the heavy guns creating an ever-growing pile of arachnid carcasses, which further slows the swarm as it enters the valley.
Tightening these bottlenecks has the second order effect of tightly condensing the bugs to the rear as they clamber to enter the valley.
This is the trigger for both the 84mm airburst and mortars.
And using the UAVs to adjust fire, they engage mortar targets Radcheck and Zander behind the front line of the swarm, creating mass casualties among the centre of the arachnid formation.
The effectiveness of this fire plan compounds over time, as killing bugs at the back reduces the numbers they can push to the front, and killing bugs at the front enhances the obstacle and hinders the bugs to the rear.
As the barrage of high explosive thins the herd, the arachnids already in the valley lose much needed depth to their swarm, and are easily destroyed by the medium machine guns working TRP-ZIM.
While the bloodlusted Marines celebrate their early success, the arachnids realize they're facing unsustainable attrition and rapidly communicate a shift in strategy, perhaps orchestrated by the brain bug from deep under the surface.
Pushing their tankers to the front, they use the hulking beast as mobile shields and protect the warriors stacked to the rear from fire.
On sighting the tankers, the Marine 84 gunners scramble to reload their Carl Gustavs with heat rounds.
This momentarily pauses the airburst barrage and provides the bugs in depth a reprieve from the lethal shower of fragmentation.
Destroying the tankers at distance is critical, as letting them approach the compound means they can batter down the walls or spray the Marines with napalm.
Having loaded the AT rounds, the Marines engage the tankers, the Karl Gustav gunners launching volley after volley until the four tankers leading the charge succumb to the explosive damage, but not before the beasts manage to punch through the breach and into the open valley.
allowing the massive warriors behind them to swarm once more.
Further capitalizing on their break-in, a wave of hopper bugs begins buzzing towards the compound.
The anti-air squad fire their M27 skywards, and the marines on the tower use their elevated position to engage the incoming airborne threats.
Although many hoppers are destroyed, some manage to close within the compound and dive-bomb towards the marines on the wall, inflicting casualties among the machine gunners with their razor-sharp claws before they can be downed.
As the marines scramble to replace the dead gunners from the reserve squads, the arachnids sense the lull in the heavy machine gun fire, and re-consolidates the swarm inside the valley, ready to press the attack once more.
Although the hoppers are still harassing the personnel on the walls, the machine gun teams stay disciplined, and maintain their sectors of fire in depth.
However, the bugs continue their advance, and the marine riflemen begin engaging warriors closing in on the compound.
As the anti-air squad destroy the last of the hoppers, the Marines take stock of the situation.
They've suffered multiple kills in action from the air attack, noticeably reducing the output of machine gun fire, and as a result, the swarm is thundering towards their position.
With a breach imminent, the Marines make the decision to enact the final protective fire.
This shifts the mortars from engaging the rear of the arachnid formation to dropping a barrage of HE rounds within danger-close limits using FPF Zegama Beach.
Firing on rapid rate, the remaining machine gunners and Mark 19 gunners enact FPF ACE, and a wall of lead and explosives begins annihilating the warriors approaching the outpost.
Although the FPF rapidly consumes ammunition, the densely packed stampede is a prime target for the casualty-producing mortar fragmentation, and hundreds of warriors are destroyed in seconds.
Having regained the initiative, the Marines are afforded a tactical breath, and take the moment to repack fresh dips of Copenhagen, and resume their sustained-rate machine gun and mortar fire plan focused on the arachnid depth.
Dozens of warriors still make it to the walls, but unable to scale piles of corpses, they lack the mass for a breach, and are steadily eliminated by rifle fire, grenades, and claymores.
Just as the tide has seemingly turned in favor of the defenders once more, the ground begins to shake, and the floor of the outpost cracks, as the final tanker erupts through the metal flooring.
The QRF squad races to the breach, grenades and rifles at the ready.
Hastily surveying the interior, the tanker turns its attention to the mortar team, and unleashes a stream of napalm, incinerating the nearest mortar squad before they can race for cover
in the building.
The anti-digging squad dumps magazine after magazine into the tanker on full auto, as the two grenadiers launch 40mm rounds, desperately trying to down the giant before it can escape the hole.
The 40mm grenades eventually find their mark, detonating on the lightly armoured head, and the tanker collapses back into the tunnel.
With the hulking corpse plugging the breach, the marines throw fragmentation grenades into the hull for good measure, putting the tanker down for good, and blocking the entry point to any warrior bugs using the tunnel.
Although they successfully prevented the tunnel breakthrough, the mortar platoon casualties are immense, and detecting the lull in the bombardment, the remaining warriors surge towards the outpost, determined to overwhelm it once and for all.
With many casualties among the key weapon systems, and the swarm closing in, the situation is dire, and the fire support team is now the final hope to save the outpost, and hastily begin working up their integration plan.
First come the high Mars rockets.
Firing the M30A1 warhead, the rockets explode in airburst fashion, showering the depth formations of the bugs with fragmentation.
With each rocket containing over 180,000 tungsten ball bearings, there's plenty to go around, and the densely packed warriors are rapidly thinned out.
Once the artillery barrage lifts, next comes the F-35s, streaking towards the outpost from the north.
Their close air support comes by way of 25mm gun runs, firing armour-piercing ammunition at over 3,000 rounds per minute.
Strafing the length of the valley, they inflict devastating casualties among the surviving warriors from the artillery strike.
With the fixed-wing close air support complete, the Viper gunships are cleared to enter the airspace, and tear through the bugs with Hydra rocket strafing runs, before letting loose with 20mm cannon fire, further wiping out arachnids within the engagement area.
With these supporting fires finally on station and doing the heavy lifting, there's not much left for the Marines to do except cheer and watch the air show.
The air support departs with dozens of bugs remaining, but the depleted and fragmented swarm has lost the critical mass needed to sustain the assault, and the medium and heavy machine guns mow down the remaining warrior bugs.
So there you have it.
The answer to the question, what would it take for the US Marines to defend Whiskey Outpost?
To which I posit, a beefed up infantry company plus air support could comfortably get the job done.
I will concede the biggest tactical dilemma is the tanker bugs and their tunnelling attack.
It's a very prickly action to counter.
So if you've got a creative solution for the tunnels, I'm curious to hear it.
Let me know in the comments.
Also, a final big thanks to War Thunder for sponsoring the chaos that was this video, and a reminder that you can check it out right now on PC and consoles, absolutely free using the below links.
War Thunder is a great way to brush up on your AFV recognition skills, and also remember that if you're new, or if you've been AWOL for six months, you can pick up the bonus pack when you download it today.
If you've stuck around this long, thank you for the gift of your time.
Similar videos: Bugs Vs
I Wargamed with NATO - Inside the Cross-Domain Command Wargame (2025)

ОБНОВЛЕНИЕ STANDOFF 2 0.33.0 - РЕБАЛАНС ОРУЖИЯ, НОВЫЙ НОЖ, НОВАЯ КОЛЛЕКЦИЯ | ЧПС: Новости №3

Джейлбрейк на IOS - превращаем старые Ipad, Iphone, Ipod в монстров развлечений!
БОЙКОТ BATTLEFIELD 6 ПРОВАЛИЛСЯ

Anissa & Lucan Gameplay Trailer | Invincible VS