4L60E Teardown and Inspection - No Fourth Gear: I'm Stumped!
Download information and video details for 4L60E Teardown and Inspection - No Fourth Gear: I'm Stumped!
Uploader:
Nick's TransmissionsPublished at:
3/14/2025Views:
1.6KDescription:
Video Transcription
Hey there and welcome.
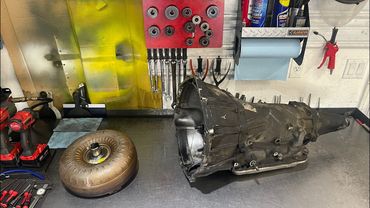
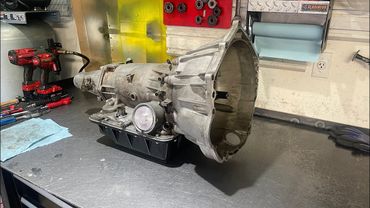
Today we got a 4L60E on the bench.
It's out of a 2006 Chevy Suburban, two-wheel drive.
And the situation here is that this thing was falling out of fourth gear, falling out of lockup, and it also had a harsh one-two shift.
So we're going to take it down, see what's up with it, see what we can find, and then completely overhaul the unit.
So let's get started.
Okay, manual lever position sensor.
It's always a good idea to replace these.
1995 through 2003 had a two connector sensor.
And then 04 and up, they went with a single connector sensor until 2009 where they deleted this in favor of the internal mode switch.
Okay, unfortunately, I think both of these Torx 40 fasteners are stripped.
You can actually take the pan off and overhaul the entire transmission without having to take off your shift cable bracket.
You don't even have to bend it.
The pan will come off, but it sucks that they're stripped like that.
Let me see if I can get that one off.
It's a Torx 40, the one that's kind of partway out.
Okay.
Yeah.
That's kind of a common problem, unfortunately.
So, just be prepared.
But like I said, it's not the end of the world.
You can deal with the entire transmission with that thing still on there.
Now, if you're trying to do a service in the vehicle, this is a little more complicated to deal with if it doesn't come off, but you can still get by.
It may take a pry bar to get off.
I mean, a lot of times what happens is, punch that back, you'll have these little flax mushroom a little bit, just, you know, due to whatever, age, wear, you know, however you want to describe it.
And it will cause the sensor to hang up when you try to take it off.
So we'll take like a wafer pad and kind of just go over these flats so that when they install the new manual lever position sensor, it won't hang up or get caught.
All right, end plate for these units is supposed to be 15 to 35 thousandths as a factory spec.
I like to see between 15 and 25 thousandths.
I can barely feel that.
If you can barely feel it, it's going to be somewhere between 15 and 20 thousandths, which is perfect.
So, that's always good news when you have a case come in that has the correct amount of end play.
Alright, your vehicle speed sensor, 8 millimeter.
So AC Delco GM, that's what you wanna use.
Do not use aftermarket vehicle speed sensors or turbine speed sensors for your 07 and up units that have the turbine speed sensor.
All right, bad things can happen if you use aftermarket electrical or electronic components on transmissions and engines.
Okay, 15 millimeters on your extension housing.
Come on, get on there.
All right, this thing's got all the road grime on it, a lot of grease, a lot of dirt, perhaps.
Had a wheel leak, engine wheel leaks, transmission leaks.
I think the rear main seal was leaking on this, so the tech is going to R&R the rear main while this thing is out.
Now's the time to do it.
So you got a machine cut seal there in the back.
And then this little like oil slinger or what have you just comes off.
So take a pry bar, just gently tap it.
Kind of, you know, different spots.
And then it'll come off.
And then there's an O-ring right here that you'll replace.
All your soft parts will come in the kit.
So, 4L60Us are fairly easy to deal with.
Not too fussy when it comes to kit and parts.
You know, just use good quality stuff, that's the bottom line.
Alright, now we're going to deal with the
bell housing to case bolts.
So I'm going to move the camera a little bit so you can see and then we'll go ahead and get that bell off.
Alright, Torx Plus 50 up until around 2007-2008 and then you're going to have a Motork 4 fastener that replace these Torx Plus 50 though.
As with most transmissions,
You know, you may see the Torx Plus 50 in later model units if someone had rebuilt the unit before and, you know, mixed and matched the bolts.
It's the same, you know, diameter and thread pitch, so don't be surprised if you see stuff like that.
So you really want to get in here nice and tight.
Make sure you're on that fastener because these things will strip out even if you look at them funny.
If you don't do it exactly right,
you're gonna have to cut the bolt or grind the head off or whatever.
And that's a pain in the ass.
These bolts only take about 35 foot pounds of torque, but just over time, they kind of become bonded, if you will, to the threads in the case.
And then that's what kind of causes everything to get stuck.
Especially if the transmission has never been rebuilt before.
You know, years and years and years of bonding takes place and the fasteners will not want to cooperate.
They won't want to come out.
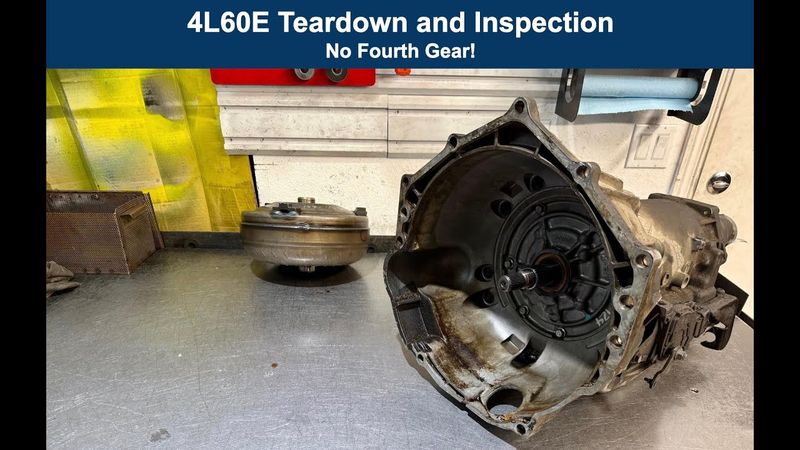
I'm going to put the valve body on top of the bell when I take it off.
Alright, so you have your torque converter O-ring seal here.
Sometimes these will be hardened and this will cause the converter clutch to slip or just simply fall out of lockup.
That felt supple, so I don't believe that was the problem.
Okay, then I'm going to just take the seal off now since we have the entire weight of the transmission to kind of help us.
These pumps changed starting in 2004.
Along with the case, they went to what's called a wedge seal.
So if you have an 04 and up case you're working with, it is not recommended you try to install an 03 and back pump body that has the perimeter O-ring on it because you run the risk of it leaking.
I've talked to a few builders and they have actually done it.
You want to drill this drain back out to 5 16ths of an inch.
That's to allow for more efficient drain back, prevent excess fluid pulling in behind the seal and blowing it out.
Okay, 13 millimeter on the pump to case bolt.
Going the right way.
All right, so this is gonna require a little bit more intervention.
These bolts don't wanna cooperate.
Okay, they are over torqued.
So we're gonna have to look at the threads in the case to make sure that we don't have to do any heel coil repairs.
Somebody has looked like they've been in this at some point, but I can't recall if the customer said that it was rebuilt.
Usually I get service history.
I'm just drawing a blank at the moment.
Okay, shaft seems to spin okay.
And this is in park.
Take it out of park.
Alright, spin bow shafts in the opposite direction.
If they won't spin freely and they want to bind up, that tells me that there's a massive hard part failure inside the case somewhere.
And obviously that's not good news.
Okay, down over here.
Servo, just a screwdriver right here on the snap ring.
You can punch this in.
So, like this.
Kind of loosen it up a little bit.
And then just get in behind it with your screwdriver.
And take it loose.
Just like that.
Alright and then what you want to do is come here.
See if you can get the cover protruded as much as possible.
Just enough so you can get the O-ring exposed and accessible for like a hook style pick.
Alright, get up in there.
Pull it just like this.
And most of the time that's going to happen.
I mean, I can feel this cover is, you know, pretty hard and fast in there.
So that's the case.
Just pull it out.
and then grab some pliers.
You know, pliers like this.
And then just take them off, or take it off like that.
Well, maybe not because this thing is up in there.
Normally pliers does work, believe it or not, but not this time.
Okay, so here's the servo assembly.
Probably gonna have to move that torque converter onto another bench or cart, but this is gonna be your 553 servo.
So last three digits to the casting number are 553.
That's the standard size for all V8 applications.
554 was used in the smaller displacement engines, so your inline 4s, V6s.
The inline 5s of later years, they took a 553 second gear servo as well.
But all my builds receive a Corvette servo.
That's the 093 servo.
So the last three digits of the casting number is 093.
All right, let me see if I can get this cover off here.
Usually you can do this on the bench if the servo itself has not been modified with a shift kit.
You know, there's not additional springs inside the spring.
Okay, this cavity in here is going to be your 2-3 accumulator.
So this is the 2-3 accumulator accumulator for third gear.
So if you have a harsh 3-2 downshift, GM makes a spring.
I don't know what the part number is.
I'll put it on the screen.
But it goes right in here.
It's like $10.
And that kind of mitigates that harsh 3-2 downshift.
So this is your housing.
When you buy a new servo for second gear, it will come with a little housing as well.
So you don't reuse that stuff.
Alright, scarf cut sealing rings and O-rings.
You can buy machine cut or decut rubber seals, Viton seals for all of these positions that take these Teflon sealing rings.
It's a nice little upgrade if you want.
Usually not necessary for stock applications, but for anything high performance or heavy duty towing and hauling, I recommend doing it.
all right wiring harness do not reuse it for all 60s for all 80s notorious for having shorts in the wiring harness uh you know once the miles start racking up there is a special tool you've seen me use it in other videos but to replace the harness just go like this and that will destroy all of the locking tabs and you can get everything
And we'll go ahead and take the pan off.
Thought I had an extension here on the bench, I don't.
13 millimeter on your pan bolts.
There is a ton of grime on this transmission.
been off.
Fluid looks like it's not been drained.
We'll get to see what the pan looks like, you know, as it was when it was in the vehicle.
I hear something.
I hear something.
Okay, so a nice healthy coat of detritus on the magnet.
Okay, this is an aftermarket gasket.
This is actually a good gasket.
O-Matic sells these.
At very least, maybe a service has been done at some point recently.
You know, in an attempt to save the transmission.
Alright, deep pan filter.
Do not install a shallow pan filter in a deep pan application.
If you do, the filter will come loose if this seal is worn here, your pickup seal.
And when that happens, you will either have severe slippage and delayed engagements because there's just no pickup, or you won't have any movement all together.
You know, I've got a couple videos on the channel where folks have used the wrong filter.
shallow pan filter but otherwise put a deep pan on it and that causes problems when you let that drain out.
Alright, solar noise.
Do not reuse them.
You should not be reusing any electrical or electronic components in these transmissions.
Or any transmission for that matter.
Okay, you don't need to be concerned about the tabs.
I'm just going to take them loose.
So this is going to be your 3-2 control solenoid, PWM solenoid, electronic pressure control solenoid, shift solenoid A, shift solenoid B.
And then this is your pressure switch manifold assembly.
This works in conjunction with the manual lever position sensor to communicate range position to the PCM so that the PCM knows what's going on and how to govern and control the transmission.
Alright this is 1-2 accumulator.
Starting in around 06 they changed the design of the 1-2 accumulator housing and they eliminated the larger outer spring and just went with a smaller inner spring.
So curious to see what is in here.
Probably only 1-2
So a little bit of compressed air right here.
Now we've got two springs.
So we've got two springs and we have a third design piston.
So the piston underwent three iterations or versions of this.
There was the large hole piston.
Those were featured in 93-94 units.
In 95, they went with a smaller diameter and it had legs.
And then starting either in possibly 05 or maybe even 06, they went with a piston with no legs.
So Transco has in their instructions interchange rules for these pistons and these housings.
And I believe you can take a third design piston, stick it in a second design housing.
But you don't want to mix and match when it comes to the large hole, obviously.
Okay, 13mm on your decant roller bolt.
Where is that 13mm socket?
There it is.
Alright, and then 10mm as well as 8mm on your pressure switch.
So this is kind of bonded, so just twist it and it'll come off into the trash.
Okay, eight millimeters on these three bolts.
Do not put these three bolts in any other locations other than these three locations, these three holes here, okay?
If you do,
Alright, valve body has a myriad of issues.
Most commonly, you're going to have problems at the AFL valve, the TCC regulator isolator valve,
and the bore plugs and end plugs.
So for your abuse valve, which is going to be located here, this forward abuse, this bore plug likes to leak.
And then your reverse abuse valve, the bore plug here, also likes to leak.
And then you have end plugs here that like to leak.
Particularly this one here, this is going to be your 3-4 relay and 4-3 sequencing valve.
They like to leak.
So Sonix makes O-ringed end plugs and oversized bore plugs to deal with these problems.
And these bolts feel like they're over-torqued to me.
That one was loose.
That one felt normal.
Tight.
A little tight.
A little tight.
So, like I said, I have to maybe chat with the customer again and get a little bit more up to speed on the history of this thing.
see if there was in fact some sort of service worker, you know, somebody had replaced a valve body maybe.
So this is an 05 valve body.
That could be factory or it could be a valve body replacement.
Because I've seen, you know, adjacent years in otherwise untouched
going to use whatever they have laying around.
Seven check bolts in this location here.
This position here is the coast clutch flow control check bolt.
You can remove that if you want, leave that out.
It'll give you a more robust apply when you're manually shifting it.
When the coast clutch comes on, that's good for towing and hauling.
Okay, 10 millimeters on the torque converter clutch lock up solenoid bolt.
should receive between 100 and 110 inch pounds.
Any more than that is considered excessive.
These take filters, the replacement solenoids do not.
Okay, so you have a green connector.
A green connector generally will indicate, well, not generally, always will indicate a non-turbine speed sensor application.
So if you're, you know, not that I'd recommend it, but if you're looking for huge transmissions and you have an 07 and an 08, you don't want to have a transmission, or you don't want to buy a transmission that has a green connector.
You need one that has like an orange and gray connector.
All right, eight millimeter on your reverse hold down plate.
I'm just checking my battery life.
This camera's batteries don't last very long.
It's like a half hour, I think.
That's the most you're going to get out of them.
In warmer temperatures, you get like 20 minutes if you're lucky.
All right, note the white striped gaskets.
All 01 through early 06 receive those.
Anything with a turbine speed sensor is going to likely have a slightly different separator plate, and they
GM started installing the bonded style gaskets sometime in late 06 or early 07.
Okay.
Luckily, those gaskets were not bonded to the plate like sometimes they are.
You want to scrutinize this location here.
This is going to be your 1-2 check ball.
A lot of times, this will wear out so bad that the ball will get stuck in the plate.
You'll have an extremely late, harsh 1-2 shift.
So I was thinking maybe that was the situation here, but, you know,
From what I can see, it's not.
This is going to be your 2-3.
Wallow this out to 93 thousandths.
And then same with your 3-4.
93 thousandths and 93 thousandths on the band release.
This is your 3-2 downshift.
It's not recommended that you do anything with that unless you're high performance.
And then I believe that's the low reverse feed or fist.
Again, not recommended you need to do anything with it unless high performance or very heavy duty carrying and hauling.
So you really don't need shift kits, although the SK-4L60E is a nice corrective shift kit for these units.
It'll come with a TCC valve.
It'll also come with a shimming spring for the actuator feed limit valve.
so that it kind of compensates and somewhat offsets a worn AFL bore.
I'm going to get this O-ring off of here.
Never reuse this piston.
Always put a new one in there.
They like to wear the pin bore and will cause slippage in fourth gear.
In fact, let me look at this, see if I can tell if it's excessively worn or not.
Because like I said, falling out of fourth gear, this could be an underlying driver behind that condition.
It doesn't look overly warm to me, but sometimes it's hard to tell.
Okay, 15mm nut on the detent rooster to selector shaft.
13mm here on your parking pole guide plate.
Remove your spacer with a screwdriver, just like this.
And no surprise that the selector shaft is largely not wanting to come out.
Very, very common.
It's rare that they just come out in their own volition.
Most of the time, you're fighting with it.
So right up in here, there can be burrs.
These flats can be kind of mushroomed.
On this side of the shaft, like I was mentioning earlier, you can have mushrooming as well.
And either way, it's going to cause this shaft to hang up.
So you have the band and that's what you're going to pry against.
You don't want to save this part of the process until, you know, the case is empty because it's going to be a little bit harder to get out because you don't have the whole weight
of the case to help
Another thing you can do is reinstall the nut on the exterior side of the selector shaft and use a slide hammer to pull it out.
I'm just going to get this out now off camera.
It's also a good opportunity for me to change a battery.
Alright, that was the most stubborn, most difficult selector shaft that I think I have ever had to deal with on one of these transmissions or 700R4s.
So you saw a myriad of ways, or you're seeing a myriad of ways and approaches to deal with this problem.
You know, take my word for it,
they're usually not this problematic.
They're usually not this severe.
So let's take a gander at the pump.
See, we're working with 13 millimeter bolts, five of them.
right somebody's definitely been in here before definitely been in here and this is how i know never ever ever in your life use rtv on the wedge seal it is completely and totally unnecessary so somebody did not have a torque wrench or the torque wrench was not calibrated hence why
GM weight to a single spring setup for the priming spring here in this location.
You can retro it back if you want to.
I mean, you know, it doesn't really matter.
Whatever you want to do.
So we can get the support o-ring off of here.
Here it comes.
And you have your support cover.
So O-ring will come in the kit.
The cover will not.
That's part of the, you know, it's considered a hard part.
Part of the slide.
You have pump rings.
Factory pump rings are usually resilient.
There's really two primary reasons why the rotor and slide break up.
The first reason is you have excessively worn pump body bushings.
and a torque converter will allow for, you know, the hub to, you know, I guess, oscillate unduly the rotor, and the rotor will work against the slide, so to speak.
That's not super common.
The other reason is warm pressure regulator valve.
And I guess there's road three.
The third reason would be excessive clearance between the rotor slide and the pump body deck surface.
You need to be between
One and a half and two thousandths, I'm sorry, one and two thousandths for the slide, one and one and a half thousandths for the rotor.
Okay, you see a pump body Teflon bushing, the kind that come in the kits.
So, I generally will machine these working surfaces.
They usually need it.
This one is no different.
I mean, you can see all the scoring.
Alright, on the stator support,
It's a visual kind of score that is going in this direction here, but I can't really feel it.
I will know if this is any good or not until I clean it off and vac test it.
So you're going to vacuum test your pressure regulator valve right here.
You want to see at least 15 inches.
If you don't, if you're like between, I would say 10 and 12, go ahead and use the Trans-Go valve.
It's dropping.
If you're below 10 inches of vacuum here at this location, you're going to need to ream this board with Trans-Go's reamer.
and install their true oversized valve.
So that's kind of the deal there.
All right.
Gasket, kind of bonded to the case.
To get the wedge seal out, all you've got to do is come here with a screwdriver, carefully tap, and then just take it loose.
All right, band anchor.
Sometimes it'll come free.
Other times you'll kind of need to use a magnet to take it off.
You always want to see if you can dislodge it so that the drums come out much easier.
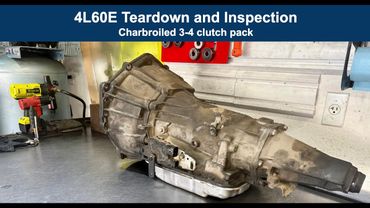
Let's take a gander at the reverse input clutches.
I don't often see these burnt.
Usually when there's a loss of reverse, it's the low reverse clutch pack.
Let's take a look and see what we got.
So four frictions, four steels, and you have your cushion plate, and you have your backing plate.
At first glance, they appear to be, or at least the steels appear to be in good shape, but you can see a little bit of signs of heat on the frictions.
These frictions would have functioned, but you can see here on the inner portion, all the way on the inner circumference of this bottom friction, there was some heat.
Alright, and then your aluminum piston.
Transco has little orifice capsules that fit into the piston.
I actually never use them.
I don't think it's necessary.
Alright, we're going to now pressure test the forward clutch drum to see if it's leaking at all.
I took a quick look at the band.
So the band has the usual amount of wear on it.
I don't think
anything unusual, like anything concerning that would indicate some sort of broader problem, just normal band wear.
Alright, I'm going to reposition the camera and then we will get a good bird's eye view into that area there at the base of the shaft where we will go ahead and fill the fluid, put air into each of the three feed ports there on the shaft to see if bubbles appear, and if so, we will need to replace this drum.
All right, you don't need a ton of fluid, just enough to fill the cavity.
So here's going to be your 2-3 feed.
This is going to be the feed to your 3-4 clutch pack.
This is most often with leaks down here, and what we're looking for is a whole bunch of bubbles where the shaft is pressed into the drum.
So you don't need a ton of air pressure here, and you don't really want to do this with the clutches out.
You want to have the drum fully assembled when you do it.
Okay, all that was because the air was blowing off of my tip.
Okay, do this a bunch of times and then rotate the drum.
Make sure you don't see any bubbles.
Okay, that looks good.
So now we're going to do the forward feed.
That's this feed right here.
Okay, I like the air staying trapped in the circuit.
Release.
No bubbles.
Post clutch is going to be here.
You want to plug the forward feed hole when you do this.
I'm using maybe about 50 psi air.
All right, this drum is healthy.
So good news.
All right, so load release springs have been reinstalled.
The 3-4 clutch doesn't look too bad.
At least, you know, as far as I could tell with the snap ring and backing plates still in the way.
All right, let's take a look.
And there they go onto the bench.
Alright, incidentally, a number 69 washer was installed.
Number 69 is kind of middle of the road in terms of thickness.
The higher the number, the thicker the washer.
The lower the number, the thinner the washer.
Okay, we have what appears to be normal wear here.
I mean, they're a little warm which is normal, but nothing unusual.
Okay, backing plate, apply plate, both look good.
You want to make sure you check here, and now that I'm seeing this,
this is probably what caused or contributed to what we saw with the reverse input clutches.
So I'm actually going to replace this drum.
I have another one good used.
So unfortunately this drum is no good despite the fact that it passed the pressure testing, which is a shame, but you know, it is what it is, I guess.
So when you replace the drum, there's a possibility that you're also gonna have to replace your selective thrust washer there or spacer at the front of the drum.
All right, so here's the rest of your clutch packs.
This is gonna be your coast clutch.
Am I seeing this correctly?
Did somebody put two clutches?
I'll have to look at the footage, but somebody, I think, put two clutches next to each other.
Interesting.
Not supposed to do that.
It's a steel clutch, steel clutch, then backing plate.
Okay, this is sprag rotation.
Free wheels clockwise, locks counterclockwise when you're holding the sun gear, or you're holding the inner element in a two-piece setup.
All right, it's got a snap ring out.
Okay, these hubs will crack in high horsepower, high RPM applications.
Always replace this one-way element in these transmissions.
The low roller clutch is not a high rate failure item, but this one is, relatively speaking.
You want to make sure this surface is mirrory smooth.
If it's not, you'll need to replace, you know, this race slash sun gear.
And then for your outer race,
you want to make sure there's some crosshatching here and there's not excessive wear.
You see how shiny it is on the top and bottom?
If it's shiny like this all the way through, then you'll want to replace this.
I'm going to scrutinize this a little more carefully once it's clean, and if necessary, replace it.
This is going to be replaced.
Let's take a look at our forward clutch.
Backing plate, okay, you want at least 30 thousandths of clearance in this clutch.
These frictions look good.
And then here is your wavy or cushion plate, and then this is your backing plate for your post clutch.
All right, load release springs, I only install them if I'm running the clearance down to like 30 thousandths, which is typically what I'll do.
I do like to run the clearance tight in these three, four clutch packs, about the 700Rs and the four L60Es.
I wanna put all the frictions together, so keep them, them and the bands kind of organized here on the bench.
Slip that under the turbo converter.
So far, I haven't seen anything to really explain the symptoms, but that could change once we get into the case.
There's another little spring in there.
All right.
All right, let me reposition the camera, and we'll go ahead and empty the rest of this case and be done with this teardown.
All right, real quick before we get
If you check your band surface on your drum, this actually looks pretty good, at least visually.
You want to take a little straight edge, like a ruler or something, and a flashlight and shine it.
If it's heavily warped, it'll need to be turned or replaced.
Now we just replaced it.
You want to check these lugs as well.
Check for ceiling ring groove wear here on the stator.
If you can see the witness marks, that's fine, as long as you can't feel anything.
you're good and same with the pump okay you want to check for sealing ring groove wear here in the inner diameter of the stator I don't see it too often until about 07 and up then for whatever reason those model years I see it more frequently and I don't know why I've seen
I've seen these rings, the lands pinched so that the rings are kind of seized in their respective grooves, and that will cut a groove into the inner diameter of the stator.
Another thing about these drums, or specifically these shafts, these shafts, some of them in 2006 were manufactured to take a reluctor gear down here, but the reluctor gear was not actually cast.
You've got to check or eyeball and compare if you're not sure, but you cannot mix and match stators from non-ISS applications with input shafts from ISS applications or input speed sensor.
Likewise, if you have one of those oddball 06 shafts where it was designed to take the reluctor gear, but the reluctor gear was not actually cast into it,
then you want to be able to determine that and make sure that you replace that drum if you have to with the correct drum, with the correct input shaft.
Alright, let's check our planet.
Check here.
Check the vertical travel.
These thrust washers can wear and you'll have excessive play.
This planet appears to be fine.
These take a bearing.
On your reaction shaft there's a step.
Check your splines here.
Check these lugs for excessive grooving by the 3-4 clutch pack.
And then you have a bearing here.
Okay, this pocket changed.
I want to say it was 2004, 2003, 2004.
Somewhere in there, this pocket changed.
The bearings are a little wider than previous years.
So 700L4s and all 4L60Es up through 02, the bearing is slightly narrower.
You know, along this dimension here, 03 and up, they're slightly wider.
So if you put a wide bearing in a narrow application, you won't be able to get the input shaft or the output shaft installed.
Excuse me.
you will not be able to install the output shaft.
The snap ring groove will not be fully exposed.
Okay, this is an aftermarket heat treated shell, kind of the same ones I use.
This one's actually in real good shape.
So yeah, this thing was definitely going through at some point recently.
Not a lot of wear on this sun shell.
Alright, we have a sun gear for the rear.
Check it out.
Okay, this bushing likes to walk, so a wide rear sun gear bushing from Sonix is usually a good idea.
Alright, I'll move the camera just a little bit because it's kind of in my way.
Okay, the builder did install the snap ring for the snap support correctly.
What he didn't do, which is what you don't want to do, is have one of the ends of the snap ring groove overlap the anti-clunk spring.
I don't know, I'm just guessing.
There we go.
All right.
Okay, I didn't want this to crash onto the bench.
Alright.
Let's take a look and see what we got for our low reverse clutch pack and our planet.
And our center speed.
That looks okay.
Here's the offending anti-clunk spring.
Looks like it's bent.
When they're bent like that, you'll have that problem.
You know, they won't allow the center support to pass through.
Okay, these frictions and steels look to be in good shape.
And here is your cushion plate.
Ring gear, check splines.
Check teeth.
This is a second design reaction shaft for the rear.
Bearing seems okay.
This bearing seems okay.
Let's check this planet.
I'm going to scrutinize these teeth, check splines, check structure, make sure none of these pinions are loose.
I think part of the problem is a very, very tight fit between the reaction shaft and the rear set of splines here.
Check these journals, check these splines, check the snap ring groove, check the front.
It's banging on the rear pretty good, but it's not going to hurt it.
These shafts are surprisingly strong.
They can take a lot of power, you'd be surprised.
Six, seven hundred horsepower, they'll actually live, believe it or not.
are a good idea starting it around that power level, but believe it or not, I have seen and built transmissions, these 4L60Es, for like supercharged and turbo LSF bodies, and they're putting out 600-700 horse with the factory shaft.
All right, so I've got to put a compressor tool to get rid of the return spring assembly for the low reverse clutch, take that snap ring out, and then we'll force the piston out with the shop air.
Okay, we have the tool installed.
Put a little light in there.
You can see the snap ring.
It's relative to the belly of the case.
Let's just say the belly of the case is at the 12 o'clock position.
The ends of the snap ring are at roughly the eight o'clock position.
So you wanna orient the tool so you have unobstructed access.
And then all you're gonna do is come with 90 degree snap ring pliers and pop it out.
All right, let me move you aside so I can do that.
And believe it or not, you can compress the spring too far and what'll happen is as you're trying to grab the ends of the snap ring, the pliers will slip past them because there's so much room behind them.
So, that's what happened initially.
And then the spring should just come out.
If not, take a hammer or pry bar and tap on it and it'll pop right out for you.
you know, persuasion beyond just taking the tool away.
Alright, put air right here and pop out the piston.
Alright, you want to have a gander at the casting number.
Okay, this is ending in 550.
If you have a piston that ends in 725, casting number, you know, whatever, and 725 are the last three digits, if you want to replace that piston, there is a technical services bulletin out.
That particular casting, for whatever reason, is weak, and it will like to crack and break up, causing a no reverse condition.
All right, let me get you kind of a better view of the whole bench.
Looks like the neighbor is firing up his fart can exhaust equipped vehicle on his way to work.
Nothing obvious to me as far as a direct cause for the falling out of fourth gear condition.
The harsh 1-2 shift is probably valve body, you know, anywhere from 96 to 06.
You can have worn TCC isolator regulator valve bore, and that will cause a late harsh 1-2 shift.
For 01 and up units, you'll have a PO894 if it's progressed to the point where the computer sees components slipping, particularly in the torque converter.
Sometimes it won't throw a code, but you'll still have the conditions.
So vacuum testing of the valve body and vacuum testing of the pump cover will take place like all my transmissions.
So we'll be able to determine if there's any hydraulic underlying cause for that, you know, no fourth or losing fourth on the highway.
The other thing is you want to really scrutinize the inner diameter here on the piston and cover.
So you can see a pretty heavy witness mark for the sealing ring.
Just out of an abundance of caution, especially if I don't find anything in the hydraulic testing, I'm going to replace that cover.
I have many others.
So we'll look for one that isn't worn.
And then I think I'm going to fit this servo with that Viton D-ring sealing ring kit instead of that scarf cut Teflon rings.
So those are kind of two ways you can mitigate that condition if it's purely caused by the servo.
I didn't air check this thing with the servo and, you know, all installed, but probably should have, just didn't.
Anyway, that's the teardown.
All right, autopsy time.
So let's dig in and figure out what happened here and why.
So as you recall from the teardown portion, and it's the following day, by the way, you had to clean everything up and kind of figure out, you know, just thinking about what I saw and trying to piece everything together as far as what actually took place because I've
While I've seen what I'm going to describe to you before, I've never seen it to this extent, this level of severity.
Maybe you guys that do these all the times have seen this plenty.
And if you have some additional insight, I would love to see and or hear your thoughts in the comments.
So basically, what happened here was, I guess, for lack of a better term,
a warpage or out of rounding of the reverse drum and sun shell due to the band being pushed off of the band anchor pin and digging or excavating a groove if you will into the case and so i don't know how second gear was still being achieved uh and you know maybe you'll
understand a little bit better what I'm talking about when you see what you're going to see.
So when I was pulling the transmission apart, I did not notice this right away.
So just to kind of preface our parts here, everything on this side, on this side here on the left, everything
is all the parts that are not going back in the transmission, including the case.
We have to replace the case.
Everything on the right side is all the replacement parts.
So new band, which I'm going to use as a proxy for the old band because that's in the trash.
I'm going to replace the outer race for the sprag, the sunshell, and the reverse drum, forward drum, and aforementioned case.
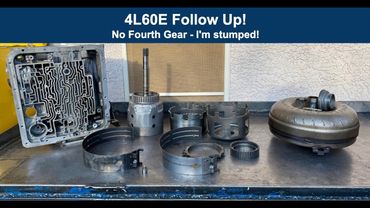
So let's take a look at the drum and the sunshell that came out of this thing.
Alright, do you notice anything different about this drum versus this drum?
Or any drum that's not extremely disfigured?
Okay, you see this lug right here?
Look how bowed out that is.
Look how pushed out and out around relative to the center line of the drum this lug is.
I didn't notice this for whatever reason when I was taking it apart.
I wasn't even looking in that area.
I was just focused on getting the clutch out and looking at the frictions.
Same with the shell.
The shell doesn't look as severe, but this lug or this leg is bowed outward.
Here's what I think happened.
Now I'm gonna get this case so you can see.
Let me zoom in.
I'm gonna actually move the camera so that you can see into the case and I'll kind of explain.
Okay, so I think you have a good view of what's happening here.
When I said that the band was excavating a channel or a deep groove into the case, this is what I was referring to.
So here's the band.
and then you have your seating location for the band anchor pin.
And what was happening is that this band was being displaced, forcibly displaced in this direction such that it became disengaged from the band anchor pin and started excavating a groove into the case as it was moving in a counterclockwise direction relative to the case mount.
So, the question I have is what led to this?
What caused this chain of events to actually happen?
Now, you recall I had to basically go to war with the selector shaft.
I've never seen or never had the selector shaft be that stuck inside the case before.
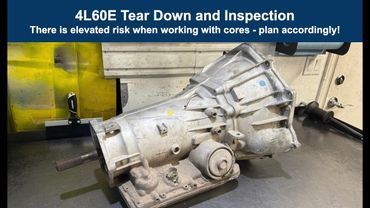
This case was previously worked on.
Somebody had rebuilt it.
We saw a couple of things that we would have done different.
You don't put two overrun frictions together.
It looks like...
this drum here all right it was probably reused it wasn't replaced the sun shell was replaced but the drum was not uh i don't think by that you know in of that itself caused what we're seeing here um you know electronics not being replaced harness being reused you know or maybe maybe it was reused maybe it was a replacement harness i don't know um but the bottom line is um
I didn't see anything, at least in my mind, where I could recollect and looking at the footage, that said to me, ah, that's why this took place.
That's why this happened.
The builder did this or that part failed and then, you know, had a domino effect and caused these parts to do what they did.
I didn't see any of that.
You had some wear on the lugs of the forward drum where the verse input clutch goes.
Again, that's not going to cause this.
I've worked on quite a lot of these transmissions, over 2,000 of them, and I've never seen a situation quite like this where you have this much of a divot dug into the case by a band that's walking out on you.
I've seen bands come out before where they became dislodged from the pin, but it didn't do this.
And so speaking to the customer, it was basically a no fourth condition.
They just had simply no upshift.
So like I said, I'm not sure why they had second gear, but no fourth.
Maybe that's due to the different characteristics of how the servo applies in second versus fourth.
I don't know.
We did test the valve body.
A little weak on the 3-4 relay valve, 12 inches of vacuum.
on the outboard, uh, most side where the, uh, you know, you have the board plug and then the, um, in intermediate land was testing at 11 and a half.
So I'm going to put a, uh, Sonics O-ring board plug in there and see if that changes anything that should fix that circuit.
If not, I'm going to swap the valve body.
But again, that's not our, our cause here.
So I'm at a loss.
Uh, if you guys know, you guys work on these all the time, you know, uh,
Larry, Chakratani, Kevin, anybody else that has a theory or some insight, I would love to hear it.
I'd be grateful for your input.
And Peter, you guys see these all the time.
You've worked on more than you can count, I imagine.
So anyone else that is very familiar with the 4L60Es, I don't know.
It could be a simple materials failure.
The drum itself...
may have been, I don't know, compromised in some way.
I mean, you could see on the case, you know, kind of all around the inner diameter of the case bore groove, you know, where this thing was rubbing.
So I did speak to the customer.
They didn't, they didn't,
make mention of any kind of noises like a scratching or a screeching or you know otherwise sound that you would associate with uh either the drum end or sun shell making contact with the case but you know with all the road noises and other things that you know you hear when you're inside a vehicle plus if you have music playing maybe you don't hear it i would think you might feel it but maybe not i don't know but anyway uh this case has to be replaced it's no good it's scrap um unless somebody can you know
come with a TIG welder and some sort of bore reaming tool, weld this all up, re-bore the band anchor pin bore, and then grind this flush and contour it so it's basically perfect with the rest of the barrel of the case.
Maybe you could save it.
I don't know.
You'd have to be pretty industrious and have a lot of time on your hands to do it.
For me, it's just a piece of scrap.
So we got to replace the...
You know, cable bracket, obviously.
This is all messed up.
I think the case may be a little warped as well.
I don't know.
It's just a working theory, but we'll see.
I'm going to replace my race here.
I don't like the amount of wear I see here in the inner diameter.
I mean, this is really, really shiny.
You know, maybe you could reuse it.
It didn't fail while I was in the vehicle, but I have another...
another race that actually this is the race that came out of here this is the one i'm going to use this race is good i haven't mixed matched but um this is the race that came out you can see how shiny that is it's got some cross hatching here in the you know part where the sprag actually rides so i'm not going to just chuck it but just out of an abundance of caution i'm going to either use this one or another couple races that i have sitting on the other bench
Alright guys, that's the video.
As always, thank you so much for watching.
Greatly appreciate it.
Like I said, if you have any insight into what may have caused this, I would love to hear it and would be greatly appreciative of it.
Until the next time, thank you so much for watching.
Enjoy the rest of your day or evening.
Similar videos: E Teardown and Inspection
4L60E Teardown and Inspection - 5.7 Small Block Chevy Engine
Teardown and Inspection - Smoked 3-4 Clutch Pack
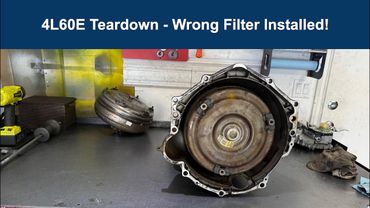
GM 4L60E Tear Down - Wrong Filter Installed!
4L60E Teardown and Inspection - The Frankenstein Monster!
4L60E Teardown - The 1,000 Horsepower "Hill Killer"!