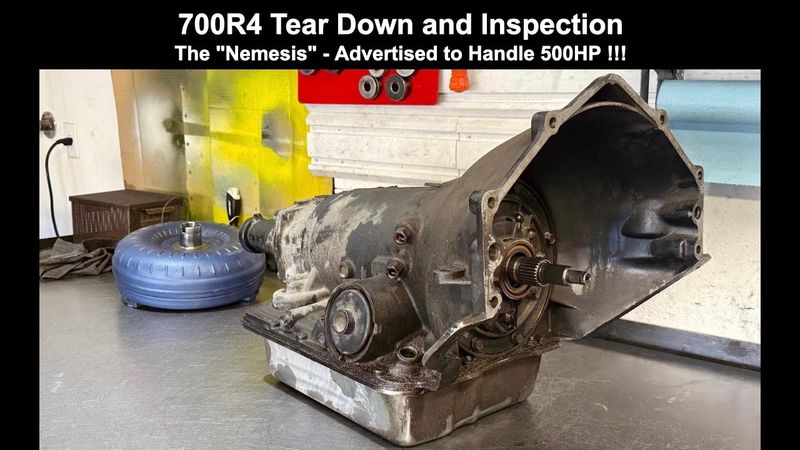
700R4 Teardown and Inspection - "The Nemesis"!
Download information and video details for 700R4 Teardown and Inspection - "The Nemesis"!
Uploader:
Nick's TransmissionsPublished at:
3/25/2025Views:
2.4KVideo Transcription
Hey there and welcome.
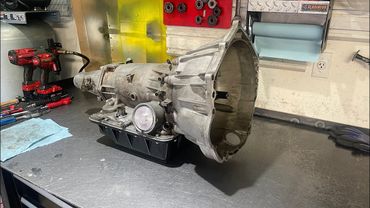
Today we're going to rip into a 700R4.
This is out of a 1988 Chevy C10 with a small block Chevy 383 making about 450 horsepower or so.
Now this transmission is not original to the vehicle.
The customer actually brought me two transmissions, the original one and this one.
The original went out so he went out and searched and found a remand company that was advertising performance transmissions that can handle up to 600 horsepower and this is the model that he bought.
The company dubs it the Nemesis.
So I have my doubts as to whether it's built to handle anywhere near that amount of power but
You know, we'll see once we get inside.
So, let's get to it.
Alright, the first suspect thing here is the presence of a factory servo and cover.
So, if you're going to build one of these transmissions or 4L60E to handle that much power, you want to make sure you install a billet servo.
I mean, it doesn't really matter how the vehicle is to be used, you know, or whatever.
I mean, if the engine is making that much power, you don't want to use the factory servo.
At least, that's not what I would do.
So...
Other things that I would expect to see in here are either an advanced shift kit, something beyond, say, the Terrain Go 700 Junior.
You may also see custom a la carte modifications, but if it's a large reman company, they're not going to be doing that kind of stuff.
Everything that they do is based on a formula, and there's really not a lot of room for arbitrary uniqueness or custom one-off type deals.
Remain companies don't have the same kind of margins that independent shops do.
So they don't really have the luxury of going, you know, one size or, you know, I should say custom.
They take a more of a one size fits all approach.
So either Sonics or Superior Tech is going to be what you're going to want to have.
The Superior Tech servo is the largest ratio servo assembly on the market for either second or fourth gear for these transmissions.
Sonics is slightly smaller but still markedly larger than any of the factory servos such as the 093 Corvette servo in the second gear position or this servo in the fourth gear position which, to my knowledge, are all the same no matter
what year or model or sub model you're working with.
Let's take a look at the second gear servo.
It is a Corvette servo.
Okay, company advertises this as a high-performance Corvette servo.
My interpretation of reading that was that maybe they installed the Sonics version in here.
Sonics does make a Corvette servo that is, you know, a little bit more capable in terms of how it's designed than these servos, which are the, you know, basic 093s that you would get from the factory.
Okay, it's got a three-groove pin that tells me that this is on the shorter side.
So,
I mean, I guess I should have checked beam clearance, but didn't think about it.
It's a miss on my part, I suppose.
All right.
I'm gonna try to remove the cover here for our 2-3 accumulator.
If it's difficult for me, that would imply that there are additional springs in here.
That's what I would expect to see.
If I can get it out,
which I can, that would tell me that there's nothing in here other than the factory spring.
And that's exactly what we have, just the factory spring.
So again, to kind of mitigate the harsh 3-2 downshift that these transitions and 4L60Es are known for, you want to at least install some sort of inner spring to mitigate that, to kind of act as a buffer and soften the engagement.
And I'm having trouble with my scarf cut sealing rings here.
all right so we're we may or may not put the servo back in i mean it seems like it's a good shape uh you want to check in here where it actually seals for the apply side here on the housing and then you want to check the servo itself to make sure it's not somehow scored up or disfigured especially here if you're going to reuse your servo and i wouldn't recommend it under normal circumstances because these servos are typically very worn out by time they come across the bench for overhaul
But this one has, you know, very little miles on it.
So if he wants to reuse it, we can.
450 horsepower is fine.
I mean, a Corvette servo is really good for up to around 500, 550.
So no harm in doing so.
It's just a matter of checking its condition and validating that it can be reused.
All other things equal.
So that's kind of my commentary there.
so again 600 horsepower you got to use a billet servo all right check this o-ring here if you have torque converter clutch lock up issues you know falling out of lock up etc sometimes this o-ring either is very hardened over time or on installation somebody you know maybe a gorilla with the converter and they cut the o-ring so especially if uh you know after overhaul when it goes back in it doesn't have lock up it could be that
Okay, here's your throttle valve cable actuator linkage arm.
So there's tension there, that's good.
On your selector, that's a 15 millimeter nut.
So we'll yank that loose.
Get rid of that.
And this will come off.
Alright, 15mm as well for the extension housing, we'll get rid of that.
Four bolts.
And you'll notice here we have an electromechanical speedometer installed.
The vehicle is equipped as thusly, and that's what you would see on late model vehicles.
Not so much on these early models, they had a pure mechanical speedo setup.
10 millimeter.
These large hole electric speedometers are installed on all 700 R4s from 88 to, you know, into production and then 4L60Es up through 1995.
In 96, they went with a small hole design.
See if I can get this out without totally destroying it.
We would put a new one in here, but you know, still.
I'm not going to bother with it.
We'll get it out once the extension handle comes off.
And that is assuming I can get past here.
Maybe I can, maybe I can't.
All right, that is a little sloppy.
So can I get up in there?
No, I can't.
So this does have to come out.
It's been a while since I worked on one of these transmissions that had these kind of speedometers in here.
Speed sensors, rather.
There it is.
Speedometer, speed sensor.
Like I said, that's not going to be reused, so I'm just going to clean it up in the hot tub.
All right.
Sloppy, sloppy.
Alright, you have your seal here.
It's a machine cut square seal.
And then you have, I guess, an oil slinger or something like that.
You just tap it.
Some of these are on tight.
Some of them are relatively loose.
This one may be of the former variety.
Alright, there we go.
There is an O-ring on the inside, so just make sure you replace it with the one that comes in the kit.
Okay, spin your shaft, make sure nothing weird is going on.
If it's locked up, obviously that would indicate a major gear train or otherwise internal part part failure inside the unit.
All right, this is supposed to have a little retainer clip that goes from here down to here.
It's obviously missing, so we'll put one on when we go back with it.
For your converter cover, you want to be real careful.
You just want to kind of start to, you know, carefully, gently to get the cover, you know, kind of away from the housing.
All right, so the customer added this one after the fact, a TCI.
There is a dimple here.
You can see it.
This dimple controls the inboard and outboard travel of the governor.
The customer did also modify the governor.
Okay, he installed different weights and springs so that he can get it to shift around 5,000 RPM at wide open throttle.
The governor gear is heavily worn here.
So this was, I believe the original governor that was in his original transmission that he transferred to this one.
All right, so to check this,
Go like this with the waste, just actuate them.
You see that valve moving like that?
That's exactly what you want to see.
Alright?
I'm not sure offhand what roll pin size that is.
But...
I want to get rid of that roll pin so that we can install a replacement gear.
Alright.
This was the same roll pin punch I had, I just wasn't 100% sure that it would fit.
All right, so out comes this old gear.
And you can see how heavily worn that is.
So that could have contributed to some of the drivability symptoms in this thing, but not all of them and not even a preponderance of them.
All right.
So front of the case, check end play, anywhere from 10 to 30 thousandths.
This feels like it's about 20,000-25,000 maybe.
30 tops.
At 15,000 you can start to feel it.
You probably won't be able to feel 10,000 especially on a transmission fully laden with fluid and whatnot.
Alright, let's flip her over.
Okay, we got kind of a deep pan here.
Sheet metal.
So 13mm on all your pan bolts.
Now we got some different looking pin bolts in here.
Alright, fluid stinks.
I mean you can tell there is significant salt part damage.
Clutch is burnt up, three, four packs of power toast.
I'm going to suspect the four drums leaking where the shaft is pressed into the drum.
We'll find out in a little bit.
Sorry about that.
Didn't realize I didn't readjust the camera.
All right.
So right away we can see what contributed to the problem.
We have a deep pan, a deep pan, but we have no filter extension tube or pickup extension tube.
So I mean this thing is very loose fitting, so it's a wonder he had any movement at all.
It's a wonder this thing just didn't straight up fall out.
a pickup extension tube unless the pan has provisions cast into its design to retain the filter.
AVs and 4L60Es have a slight interference fit between the bottom of the filter and the bottom of the pan and if you lose
to lose the ability to keep the filter captured and held in place indefinitely, which is what you need to have happen if you want the transmission to function as it should at all times.
All right.
So wiring harness, again, a 600 horsepower build.
Replace the frigging harness.
I mean, they did put a new, probably a Fitzall TCC lock-up solenoid, but, you know, that got spliced in.
I mean, you know, you're going to pay all this money for these things.
The Remain companies should be replacing stuff like this, putting stuff in there that is new versus old and used.
I mean, look at this.
This is, I don't know, 40 years old.
Okay, this is a...
I didn't think this was an auxiliary valve body unit, but it looks like it is.
This might be a 1987 unit, because in 1987, they started putting the auxiliary valve bodies in, and they did not crease the case over by the servo bore.
So, 87 was kind of a change every year for these things.
Yeah, this is a replacement solenoid.
Well, Roster makes a harness for these transmissions.
I'll install them whenever, you know, I'm doing a 700.
So there's a little retention tab here on the case connector, so just pull on it, and that'll allow you to free up the harness.
And then you have your fourth clutch pressure switch there.
Okay, this harness is going right in the trap.
your throttle cable, throttle valve.
Come on.
So you want to check these brackets.
I've seen them bent too.
I mean, look at this one.
It's both of these bolt hole locations are fofuched.
So I had to thread this back out of that one.
I mean, that kind of stuff kind of, you know, doesn't leave a good impression.
I mean, it's functional,
Let's get this tube out of the way.
10 millimeter.
And we have no little retention clip there.
We do have the gold bolt.
A lot of times the gold bolt's missing too.
So this one is shaping up to be a doozy.
I'm very curious to see what is underneath this valve body with the check ball configuration looks like and so forth.
Okay.
You should be able to yank this out and then just carefully wiggle it back and forth while you're pulling out on the pump end.
Once you get it clear of the forward accumulator here, the rest of it should just come out.
Should.
And 10 millimeters on everything else will take the auxiliary valve body loose.
That's eight millimeter there.
So 10 millimeter on everything else but that.
All right, today's a Sunday.
I normally don't work on Sundays, but because I have quite a few units kind of in the queue,
I really can't waste a lot of time or, you know, just sit on my ass.
So that's why we're here in the shop.
So in 91, they captured this check ball.
In other words, it's in a capsule.
So you don't have to worry about losing it or forgetting to put it back on.
See what's in here.
See if any mods have been done.
Come on.
Come on.
I think I rounded that off.
I'll have to get that off later.
I have tons of these auxiliary valve bodies, so I'll just put another one on.
But that is kind of, you know, emblematic of the way the day is progressing.
I tore down a 6.4 earlier today, and one of the bolts holding the little clutch cam, you know, onto the case, rounded off as well.
Common problem.
what you just saw there is common.
I mean, don't get me wrong, I'm not gonna lie, I fucked that up, but it may have already been rounded, and I just, you know, put it right over the edge, so to speak.
Oh well, I know there's one more bolt, gotta take that loose.
The last thing I wanna do is round off any of these bolts.
Okay, how you get these off is, you know, for something like this, just chuck it up into a vice.
You know, use soft jaws, obviously.
And then with a Dremel or a small cut-off wheel, cut a slit or a slot into the head of the bolt.
Then with an impact driver, pound on it.
Between the heat and the impact driver, you know, and you pounding on it should...
take loose this bolt.
So that's going to be my first course of action.
If that don't work, then, you know, just swap it out for another one.
Sloppy, sloppy.
I'm not happy about it, but sometimes that kind of stuff happens.
And this one doesn't want to cooperate either.
Okay, transtech gasket.
There should be two check balls in this thing.
So we have a late model plate.
In this location, if you had two round holes, you would have a check ball underneath here in the case.
If you had a non-auxiliary valve body transmission, you would have a check ball here in the bathtub.
That's the low reverse check ball.
So there's a check ball here and a check ball here, okay?
it out of the way for now.
I don't know where that other chip fall went.
It's probably in the trough somewhere.
Alright, let's see if there's any mods done to the 1-2 accumulator at all.
Okay, so we do have an aluminum large hole piston installed.
That's a good sign.
then upside down, which is fine.
I mean, you know, depending on what you're trying to do and what you're trying to accomplish, you can kind of put the accumulator piston in either upside down where it's facing us, just like you see it there, or you can put it in with the piston going into the housing first, then the spring or springs.
So right here, just blow air.
and we have one pinkish looking spring.
This actually looks factory to me.
Sonic sells two different springs that you can use in these 1-2 accumulator housings.
You can use their standard stiff spring or you can use their super beefy spring.
I wouldn't use that unless you're running at least a 2800 stall converter.
I probably wouldn't install it unless you're above 3200 just to be perfectly honest.
And you want to do that in keeping with what you're doing with respect to, you know, feed hole sizes in the plate.
You know, to what extent you're drilling those out.
All right.
Let's get this manual valve linkage arm off of here.
And this stuff is not cooperating.
Not cooperating.
I already don't like this transmission.
It's already pissing me off.
All right.
Let me get some fluid out of the way.
I'd like to get this done reasonably soon so that I can take care of some errands I've got to do later today.
But we'll see what kind of hand is going to be dealt to us once we get further into this thing.
Fifteen millimeter on your rear transmount bolts.
Obviously, you would replace this mount.
One of the biggest killers of transmissions that nobody really talks about is excessively worn rear transmission mounts.
If it's really, really bad, it'll send all kinds of harmonic vibrations through the entire case.
And in extreme scenarios, actually start breaking hard parts inside the transmission.
So obviously that's no good.
No good.
All right, 13 millimeters.
It can be your parking rod guide or parking pole rod guide plate.
Alright, you have a 15mm nut right there.
Of course, I don't have my 15mm wrench on the bench.
It would have made way too much sense if I did.
We'll look at the plate in a second.
Alright, there's a barrel style spacer here.
I mean, you guys probably know that already.
Just take your flat blade screwdriver, come with it.
a lot of times 4L60E selector shafts will give you grief um you know they have burrs and other imperfections here the flats are protruded this one did not give us any concerns or issues didn't fight us so that's good news small victories but i'll take it okay so nothing remarkable about your rooster comb or your parking rod assembly or you know rod guide or what have you
You don't have issues with them.
In the six speeds up until 2018, the parking rod assembly, the little rivet in the back there would come loose, mushroom out and separate from the rod itself.
And that would obviously prevent you from putting the vehicle in park, which is a major safety hazard.
So you guys working on six speeds, you want to make sure you replace any parking rod assemblies on transmissions that are 2017 and back, at least out of an abundance of caution.
All right, I just want to get some of this crap off of here.
So obvious signs of overheating.
No 3-4 upshift at higher throttle angles is reported.
Indicates a weakness in third gear.
The customer did do a running and driving line pressure test, and he had reported pressures to be normal
at idle, minimum TV, and at full TV, until he got the third gear.
And once he would get the third gear, pressures would go from around 150, 160 or so, you know, normal, as far as what you would expect under load, under throttle, to like 75 or 80 PSI, which is, you know, for a performance transmission, what you would expect to see at idle, at min TV.
So, clearly there's things wrong with this thing.
My goal during this teardown is to find out what those things are so that we can discover it together.
Alright.
Sorry, I'm just trying to do some tidying up here because I don't want to have this waiting for me once I'm done with the teardown.
I want it done now.
Alright.
So this is your piston.
So sometimes the...
pin will do suction want to stay in the bore as you saw let's see what's in here I would expect this to be completely blocked off so I'll show you where you would block it off in a second but they just put what appears to be a 1-2 accumulator you know piston return spring in the 3-4 position I mean
600 where's power come on why is this not why is the accumulator not blocked off now if they did block it off what you saw here is even worse if you're going to block the fourth accumulator you leave this check ball out and you leave this bore completely empty because that will allow oil to flow to through this cavity here this bore and to the rear gear train all right if you put something in there
but it's not an active circuit, you're basically blocking off lube oil to that rear gear set, and that's no good.
Always replace your accumulator pistons.
I'm inclined to block this off completely.
We're not going to use it, but if you wanted to use it in a mild performance application, keep the fourth gear accumulator active, you would put a Sonnax pinless accumulator piston in there.
Let's see the plate.
Alright, so auxiliary valve body plate, okay, you got all your orifices that you need for, you know, for that part of the of the circuit.
Okay, band release one, two, two, three,
I mean, I'll put a diagram that shows, or an image that shows all of your feed and hole locations.
You know, like 3-4.
This is drilled more or less like a factory, you know, like a factory application.
Maybe like a Transgo SK-4L or SK-700 Junior in there.
All right, check ball configuration.
So there is no check ball location here, as I was mentioning.
Okay, in this area, you only have one round hole.
If you had two, you would have a check ball.
Okay, there is a dam here.
So this is telling me this is a 1987 case.
Like I said, in 1987, they started to install the auxiliary valve bodies into these transmissions.
So if it does not have this little dam right here,
Right where my finger is, let me zoom in so you can actually see what I'm talking about.
Right here, if it's missing, then you have a non-auxiliary case.
And that's assuming that the, you know, codification stamped on the pan rail here is missing.
If this is here, then it's auxiliary valve body.
I've seen guys put like a JV weld here to modify a case for auxiliary.
The old cases have nothing here, no cutout for your feed tube to go to the forward clutch.
So if you put air here, this is your forward clutch feed passage.
All right, so let's see if we can get this band anchor out real quick.
I like to remove it if I can, if it'll come out.
This one did.
That's good.
That prevents the band and the reverse input drum from getting caught up when you're trying to take the pump out.
Alright, so let me turn this thing over so you can kind of face the pump and have it face you.
Alright, 13 milli on your pump bolts.
Pump the case.
15 to 18 foot-pounds of torque.
98 to 104 on all of your belly bolts.
98 inch pounds, 100 inch pounds on the pan bolts.
All right.
All right, let me grab the pry bar.
So, get the pump out, just come in right here.
I like to have this portion of the pry bar facing the reverse input drum, so when I wedge against it, it basically keeps the drum in place so that it doesn't try to come out with the pump.
Okay.
As usual, it's going to fight me, so...
Got all my bolts out.
So what I'm doing is I'm trying to work my way all the way around as much as I can where I do have some access to try and wedge it out.
I'm going to get a bigger problem.
Through that entire time I had you zoom too far in.
Wonderful.
So use your pump, pump the case gasket.
They used a thrust washer for the stator.
It looks like it's about a thousand years old.
I'm gonna put a different one back in.
Drums.
So reverse input.
They elected to reuse the round hole drum for a high performance build.
They should have retroed an AC Delco 4L60E spec large square hole style drum.
Let's see what thrust washer is in here.
These thrust washers are selective.
They are numbered.
The smaller the number, the thinner the washer.
The higher the number, the thicker the washer.
All right, I see another major no-no.
You can't see it yet, but I'll show you once I get this stupid thing out.
I mean, this thing has to come out so I can do the pressure test on this thing.
That's what we're going to do next.
So just taking a glance at the clutch pack for 3.4 does not look burnt to me.
I mean, it might be, but something stinks and there's a source of friction material somewhere in this transmission or maybe the torque converter.
69.
That was the washer that was in there.
All right.
So here's what I'm referring to.
See that white plastic seal in there for your input output shaft junction?
Never, ever, ever reuse those stupid white seals.
All right.
They're in the overhaul kits for 700R4s.
I do not know why.
I don't know why.
They don't just spend a little bit of, you know, whatever extra money that needs to be spent to install or to include, rather, the 4L60E Viton rubber seals.
So we're going to put one in.
They go in and out of availability.
So if you build transmissions all the time, 700 or 4s in particular, you want to make sure that you stock up when you can.
All right, we're about a half hour into this thing.
Not real happy with what's been, you know, how I've been progressing through it.
Here's the band.
It says heavy duty on it.
Why would you not use a wide alto band?
I don't know.
This is, this looks like an aftermarket band to me.
I mean, you know, I don't even know if it's high energy.
It just says heavy duty.
All right.
Sun gear.
Those are original bushings.
They didn't replace the bushings in here either.
All right, let me take a look at the pumps and see what they did, if anything, in the pump.
I would expect Trans-Go unbreakable pump rings in here with the updated priming spring.
I would expect a stiffer spring here in the pressure regulator valve for linear increase in line pressure across the entire RPM curve.
Your entire torque curve if you will.
So this is going to be need to have machined.
That's a factory 700R4 pressure regulator valve spring.
Let's see if the boost valve is at least upgraded.
The factory is 420 thou.
I would put a half inch.
They advertise a half inch.
So let's see if things are as advertised.
Come on.
Alright.
So there's the boost valve.
Let's see if it's half-inch.
Let's see if it's a half-inch boost valve.
All right, these look familiar.
They're 472 boost valves and half-inch boost valves.
So it looks like we do indeed have a half-inch boost valve.
That's right at 0.5.
All right, so a little bit of truth in advertising there.
That's always good news.
We're gonna use a Sonix O-ring boost valve for that location.
I'm not gonna mess with the non-O-ring stuff.
So here's our spring, factory.
And here's our PR valve.
So they did grind flats into the valve.
It's best to just grind this land all the way flush to the stem, you know, to the body of the valve.
And that's what I would do.
That's what I'm going to do if I reuse this, you know, this pump assembly.
Here is our lockup valve.
I do not see...
I do not see a Sonix apply valve in here.
That's what I'm going to recommend to the customer anyway.
We'll vacuum test this thing and see if it's in any kind of decent shape or not.
Alright, you always want to check these lands, see if you have any unusual wear.
You know, same with the pressure regulator valve.
Pressure regulator valve, but the inboard lands or the intermediate lands, I can make them dig it out.
Let me show you.
There's that valve.
If these lands here are worn, these two lands right on my finger, if they're worn out, then you will have...
chronic 3-4 clutch failure.
This bushing here will cause all kinds of problems with your converter.
Same with the 4L60Es.
Again, it doesn't appear that it was replaced.
It should always be replaced.
We're going to install a Sonix Teflon coated bushing in this rear stator location.
The nemesis, and this, you know, I will say this.
That company absolutely hit it out of the park with the name because this thing is becoming my nemesis.
I mean, it's kind of making an ass out of me here.
All right, filter has come out, little filter screen.
Don't forget to put the new one back in as an O-ring.
All right, this pump's ready for the hot tank.
Let's take a look at the body now.
So standard dual spring setup, based on what it appears to be, and that's what it is.
A 10-vane pump.
They did put a new rotor guide, so good on them for that.
All right.
Stock pump rings, so no unbreakable pump ring kit.
Let's take a look at the slide.
Slide has a lot of wear on that.
Look at that.
Let me wipe it down.
A lot of wear.
Not good.
So wear on a slide will preclude us from reusing that.
We'll put a pump kit in here.
Just, you know, just go with a rotor and slide 100% full up kit.
So a little pivot pin spring along with the pin itself.
veins you would never reuse them so i can punch this seal out let's see if they widen this to 5 16 does not look like it to me
Okay, this is a 4L60E pump body from 93-94.
You can retro these all the way back.
As far as 1987, I think you may be able to retro them as far back as 82.
The worm tracks are all the same between these pumps and the 732 and the 304 pump bodies or 303 bodies from the late 84 to 87 700R4s.
Alright, this is no good.
Working surface, this does not look like it was ever machined.
I mean, for the amount of miles this thing has on it, it has too much wear, in my opinion.
You can feel it, it's undulated.
Okay, it's got a standard Teflon-coated bushing, which I guess is fine, but again, 600 horse, we would put a Sonix Teflon-coated bushing here, and in the reverse input drum.
The reverse input drum's rear bushing can accommodate a bushing that's identical to the pump body bushing.
I mean, it's exactly the same diameter and fits exactly the same way.
All right, we got more of this on here.
Making a giant mess, a giant mess.
All right, what's next?
Where's that drum at?
Reverse input drum.
Let's have a look-see.
So check for ring groove wear.
We're not going to reuse this drum.
It needs to be replaced.
But if you were, if you wanted to, you were on a budget, you would check for here.
Make sure it's not scored.
Make sure you can't feel any wear.
Witness marks are fine, but wear there is not, like physical wear.
If you could feel it, that ain't good.
So all 700 R4s is best practice to retro the 4L60E standard drum.
This way you can put a wide 2-4 band.
That's what we're going to do.
Alto red band.
So these clutches look normal to me.
They appear to be BoardWarner late model.
So you have your late model cushion plate.
Earlier drums, they had a square hole with a steel piston, and that steel piston is smaller in diameter than this aluminum one, so you can't mix and match.
You have to match the piston with the corresponding drum.
Very worn out here.
That's the front bushing, and then look at the rear bushing.
I mean, that is really worn.
So that'll come out if we were going to reuse this and we would put that Sonix bushing there.
But like I said, I'm not going to bother because this drum is not going to be reused.
All right.
Now let's see if we have any leaks at this drum here.
Okay.
Looks like we have some severe damage.
I literally just noticed this.
Let me zoom in on the shaft.
This drum is no good.
So this is heat driven, lubrication shortage, thermal overload, if you will, due to lack of lube.
So, I mean, all that stems from the fact that the filter did not have a pickup extension tube.
All right, let's go ahead and put air there just for the hell of it.
This drum is going to go in the trash, but let me reposition the camera so you can see into the pocket, and then we'll do our check.
Okay, we have you positioned.
So here are our feed holes.
This is going to be our 3-4 clutch feed, forward clutch, and coast clutch.
So we'll put a little bit of oil, transmission fluid.
That's a little bit too much.
And what I'm looking for is bubbles at the base of the shaft.
Where I always see it is the 3-4.
If it's going to leak, it's going to leak here.
Sometimes I see it at the forward and the coast clutch as well.
So you don't need a lot of air pressure here.
50-60 psi is fine.
Alright, so we see bubbles right there.
Hit it again.
Bubbles galore.
I'm going to zoom in.
Get you a money shot.
Oh, bubble bath.
Got us a bubble bath.
All right.
I'm going to do the coast clutch.
I'm going to put my finger on the forward feed, and we'll go ahead and put air.
Alright.
That clearance seems awfully loose.
Now forward.
Oh, I just remembered another drivability symptom.
He had said that
just before he pulled this thing out, it was not moving forward in drive.
In other words, you know, D on the shifter.
So you have drive or overdrive as some will refer to it as, D3, D2, and manual low or 1.
This would not move in regular drive.
Now that could be due to that filter being, you know, pretty much all the way out, or it could be the sprague.
All right, so I got to change the battery out.
And when I do that, we'll go ahead and we'll rip into this drum, then we'll finish teardown.
Okay, fresh battery in.
Take a closer look at this journal here.
A lot of heat.
A lot of heat sustained.
This is 100% a factory shaft.
So... No upgraded input shaft here.
All right, this looks like it has about...
So let's see if this 3-4 clutch is smoked.
I mean, you would think, but you can see a little bit of the top friction.
Top friction doesn't look burnt to me, but let's see what we have in here.
Should have like Alto Reds or Redux Blues or Alto High Energies at the very least.
Z-Pack, although I don't like Z-Pack, I would expect to see something, some sort of upgrade clutch pack, but let's see.
So here is our backing plate.
Here is our...
I'm sorry, this is our apply plate.
This is the backing plate.
So apply plate has the legs, the backing plate does not.
So this, in fact, is Z-Pak.
All right, so they did include Z-Pak.
I believe that was advertised, and it was advertised by name.
If I'm recalling, they're listing on the website.
Okay, a little bit of heat, but nothing too crazy.
I mean, this is a spacer.
It's got way too much clutch clearance.
You want to run your clearance in that pack down to like, I would say, between 28 and 35 thousandths for high performance.
That is my ideal range, 40 tops.
You go any more than 40, you need to reconfigure it if you're building the transmission for high performance.
That's true of 700R4s and 4L60Es.
So that was my opinion.
Maybe, you know, you talk to other builders, they'll tell you something different.
Who knows?
But general consensus amongst us here in the industry is that this pack needs to have, you know, no more than about 40,000 clearance for high performance.
All right.
Whoo.
Here is the source of all of that burnt clutch material.
So, recall he was saying that he had to put this thing in manual load just to get it going.
And it took a lot of RPMs to get this friggin' thing to move.
Do not fall off the bench.
Alright, that's your cushion plate.
Here's your forward clutch pack.
We see some stress, some signs of heat, especially on this top friction.
But nothing too egregious.
The steels were reused, of course.
It makes too much sense to put a steel module on a 600 horsepower transmission.
Or something designed to withstand 600 horsepower.
Unless, you know, maybe it's just a play on marketing.
Like, yeah, I can advertise this same transmission, build it the same way, and say, yeah, it'll take 600 horsepower.
It'll take a billion horsepower.
It just won't take it for very long.
So this backing plate is selective.
So if you find you have too much clearance in the forward clutch, just look for a thicker backing plate.
Other than that, the steels are the same.
I mean, there's no thinner or thicker steels to my knowledge.
This plate changed in the 700R4s from 86 to early 87, or maybe it was 87 to early 88.
Somewhere in there, they had a thick plate, much, much thicker than this one here.
And they had a much thinner forward clutch backing plate.
And it had little lugs that kind of protruded on the inner diameter.
I think there was three of them.
All right, so this is the source of the stench along with, you know, all the burnt material we saw.
And yeah, Ford's frag is foobar.
So this is supposed to spin clockwise and lock counterclockwise, but as you can see, it ain't doing much spinning.
So the burnt up coast clutch is...
a consequence of this thing failing.
I mean, it's in one piece.
That's interesting.
Alright, so predictably, this is no good.
Damaged beyond repair.
Will have to be replaced.
Looks like it machined a little ring off of it.
A little bit of material there.
Alright, scrap metal.
I'm surprised this thing didn't break to be honest.
Okay, this entire assembly has to be replaced.
We would never reuse anything from this.
Never reuse the inner race or the outer race in the event of a scrag failure.
Do not try your luck with the coast clutch hub.
So this is all scrap metal.
Into the scrap yard it will go.
Maybe the snap ring is good.
I'll probably put another snap ring.
This bearing here, this is for your sprag assembly thrust to drum.
Forward drum in there.
That's no good.
I'm going to go and take the snap ring out and we'll look at the contents of the forward drum real quick.
Alright, so...
Let's take a look at the contents of this drum.
All right, so here's the inside of the drum itself.
We don't see like a Transgo high-rate return spring set installed along with the, you know, their Worfess capsule.
I mean, I know for a fact this is not the high-rate return springs.
That's what I would put in such an application.
That's what's going to go because this one is a complete clusterfuck.
So, aluminum pistons.
this is going to be your forward piston housing this is your forward piston and this is your coast clutch and this is your 3-4 piston if you are building a 700r4 or 93 through 96 4l60e for performance never reuse these stupid pistons in fact never reuse them period even if you're going to put the thing in like a riding mower or a go-kart because the forward piston in particular likes to crack
all along the perimeter here.
I've seen them crack at the lugs.
I've seen them crack here on the sidewalls.
I've even seen a few of them just crack and fracture right here with the base.
So these are junk.
I don't ever see these cracked.
This piston and this piston are usually pretty good, but the forward piston is typically found to be cracked, and that obviously leads to burn up of the forward clutch.
Okay, another thing you need to watch out for, and you really won't know this until you go to put the drum back together and air check it, is you need to watch out for wear here.
Okay, wear will show up when you go to air check the drum itself, in other words, putting
about 40 to 50 psi air right in here and hearing hissing deep within inside the drum.
If you hear that, then you know that this forward piston housing is no good.
And the presumption here is that you are installing new molded steel and rubber pistons.
If that's what you're doing and you use assembly lube like you should to put them all together, then you should hear basically no hissing whatsoever.
All right, I'm gonna reposition the camera so we can see into the belly of the case.
We're gonna evacuate the rest of it and then we're gonna be done with this thing.
So the company advertises a five pinion rear planet to be installed in these things.
However, they did not advertise a five pinion front planet.
So no surprise to see a four pinion version staring back at us.
That's perfectly fine.
Planets are usually not a source of problems with these things.
Although this one may be an exception given what we have already seen.
And so let's take a look.
So our bearing, snap ring and one will come in the kit.
So check this bearing here, it's captured.
And of course, check your pinions, check vertical travel, check for side play, spin them, make sure that they're not making any kind of noise.
This one appears to be good.
Check this journal.
Make sure it's not all damaged or scored up from lubrication shortages or whatever.
Check these splines.
Check for bluing and heat silking here on the structure, on the pinions themselves.
Again, make sure nothing's wobbling around.
If you have side play that indicates the needle bearings in here, inside on the inner diameter of each pinion gear, have worn out.
So we have...
an 82 to 2002 reaction shaft.
I would have expected to see an 03 and up reaction shaft because that allows you to install a bearing that GM started to put in the 4L60Es in 2003.
For 600 horse, I would have expected to have seen a heavy duty 4L70 reaction shaft that have induction hardened splines.
I do not see that.
So check the engagement splines here.
These happen to be in good shape.
I often see the splines heavily worn.
I mean, you could start to see a little bit of wear there,
But I wouldn't have qualms reusing this in a stock to mild performance application, but we're not going to reuse that here.
At very minimum, we're going to put an 03 and up reaction shift in there.
Check these lugs here.
You don't want to see any deep grooves cut in by the 3-4 clutch pack.
If you do, then they might get hung up and you'll have either a flare shift or no apply situation or some odd drivability symptoms in third gear.
Sunshell.
Okay, let's see.
We have a standard heat-treated sunshell.
Okay, the shell appears to be in good shape, but it is standard, meaning it's what you put in a stock-level transmission, a stock-level build.
At very minimum, you want a sonic smart shell in here.
I mean, I guess that's maximum too because I don't know of anything better than that.
But, you know, you have really three choices.
You have the factory shells.
I think ACDelco still makes them.
You have this shell, which is perfectly fine for a stock to mild performance build.
And then you have the smart shell, the TCI Beast Rollerized Sun Shell, which is basically the same exact thing.
And then I think there's like one or two other companies that make shells, but I don't know offhand exactly who they are.
Alright, let me go get my other implement that I use now to get that snap ring for the center support out of the case, and then we'll go ahead and remove that thing using the technique that I was made aware of by one of my viewers, Larry Shum, who uses air in combination with snap ring pliers to pull that support out of there.
Alright, so I've been using this thing
Snap-on gigantic pick.
Get the sunshell out of the way.
Let's see if they put the...
Yes, they do have the snap ring correct.
So when you go to back with it, you want to have the snap ring ends on either side of the anti-clunk spring.
You do not want that snap ring overlapping the anti-clunk spring because then you run the risk of this thing popping out on you.
All right, watch out because you'll see fluid splash back at you.
I was on the side.
It didn't get me.
At least missed most of me.
So now what we're going to do is I'm going to take these pliers.
I'm going to put it between the case lug and the anti-clunk spring.
I'm going to spread it so that it collapses the spring inward.
And then I'm going to go ahead with my air and put it right here on the lower reverse feed to push the center support forward.
Basically, we're going to apply the piston, and that's going to push everything in front of it forward and bypass the anti-clunk spring.
All right, I have to make sure I have a good grip on it.
Yep.
Alright, so just grab everything up.
Our entire rear gear set along with our low reverse clutch.
Your ring gear superficially, or at a glance I should say, looks good.
You have your rear case thrust bearing.
Check it.
That one appears to be okay.
You have your rear planet to ring gear thrust bearing.
Check it.
That appears to be okay.
And then you have the planet and the sun gear.
So we do have a five pinion rear planet.
So we're going to transfer this to the other case.
And I want to tear that one down.
Since these are both auxiliary valve bodies, what I may do is just clean this case up completely because the other one is a complete and total pigsty.
I mean, it is caked with hard-coated mud.
So, I may just tear that down, transfer what I can from there to here, and, you know, between two of them, make one good transmission.
So, I mean, that's a possibility.
The other possibility is I just reuse this case.
because neither of these transmissions are going to have the upgraded parts that we want to install.
So I guess it really doesn't matter.
All right.
So here's our low reverse clutch pack.
700 R4s, you got to be wary.
They were two different return, excuse me, two different applied pistons.
And the earlier 700s did not have a cushion plate.
Those pistons were taller.
Okay.
There's also a selective in terms of the steel plates.
So notice here,
These steels are not all the same in terms of their thickness.
This one is selective.
And it has a number 4 on there.
Alright, hopefully you can see that.
I don't know, I can't tell.
So anyway...
You want to make sure you keep all of your selectives, you know, kind of aside so that you, you know, lose track of them.
You don't accidentally chuck them out if you're going to be doing a steel module in the case of the Louisverse clutch pack.
So that over there and those steels will get washed up.
We're going to put a steel module in here anyway, but I want to make sure I don't lose track of that selective.
All right.
And this clutch looks fine.
Louisverse is burnt when you have...
hardening of the innermost machine cut seal in the lower reverse piston or on the lower reverse piston.
So roller clutch rotation is one way, freewheels clockwise and locks counterclockwise.
So this will get a brand new low roller clutch assembly.
These are not high rate failure items.
Very rare do I see them bad.
Every once in a while one will come in.
It'll be a total grenade job and this roller clutch assembly will be destroyed.
But it's very, very rare.
It doesn't happen often.
The forward sprag, that's relatively common.
I see that one out of every, I don't know, maybe 25 transmissions.
$700 for all 60Es.
Okay, checking here too for wear.
I mean, I can't tell.
It's filthy, but you want to make sure that these cam lobes are not excessively worn.
If they are, then you'll roll the roller clutch.
The roller clutch will roll.
It'll roll over, and that will be that.
And if the roller clutch fails back there, you won't have any forward movement no matter what you do on the column shifter, no matter what position you put the shifter in.
All right, so check your worm drive gear, check splines, you know, splines on the output, check this journal.
Right up in here is where you will have some lubrication issues or your lubrication driven wear because of that dumbass plastic seal.
I don't know, like I said, for the life of me, I can't figure out why it's still included in those kits, you know.
I mean, the aftermarket should strive to address things like that and not perpetuate potential for failure.
Because if somebody that's building a 700R for the first time may not know not to use that dumbass seal.
All right.
Let's get some of the fluid out of here.
I've got a whole bunch of check bowls.
So, I think we're gonna put a Transgo 700P plate in here.
That other plate looks a little worse for wear.
Plus, the 700 plate is just a beefier plate.
All right, we got that low reverse piston that's still knockout.
Check our rear planet.
I don't think I did yet.
Be wary of aftermarket planets.
I did have one fail on me years and years ago.
I tried them.
I'll try whatever as long as its face looks decent.
Something like three months after the transmission left and went out the door, a customer called and said he was hearing kind of a growling noise coming from the transmission.
So I took it back, took it all apart, and sure enough, one of the pins was loose.
So, no good.
All right.
I'm waiting for fluid to drain.
I want to check the governor bore in here too, speaking of reusing the case.
I have a test tool that I put in here, and I'll put air in the test tool, and that will tell me if I have blow-by or not.
You can ream and sleeve this bore if you need to.
I do see some wear.
It's not common by any stretch of the imagination.
So, like, don't panic.
Or if you don't have these tools that I'm talking about, don't worry.
Most transmission shops will have them.
You know, both the checking tool and the reamer and cutter or whatever.
Along with the repair bushing.
And so, you know, you should be able to find someone that will do it for you if you need it.
Okay, check this pin too.
The guide pin.
You want to make sure it's not bent.
Alright, governor problems can be caused by these kinds of things.
And you will have drivability symptoms like...
You know, everything from stack shifting, no upshifts, no fourth gear, you know, maybe missing gears.
Again, because your governor is what ultimately regulates shift timing, you want to make sure it's not impaired in some way.
Okay, this case connector is not new.
I mean, look how old that is.
Okay, I'm assuming they painted the case, but look at that.
This thing is about 45 years old.
or however old this case is.
I don't do math on the fly, but you get the idea.
All right, let me go ahead and install that tool.
We'll pop out that piston.
I want to inspect the case.
Anytime you have a soft part failure where, you know, the friction discs are ground down to the metal, you want to make sure that no metal got in between that low reverse piston and the sealing surfaces back there because if so, then the case goes to the scrapyard.
Alright, we have the tool in position.
I don't think this spring was put in correctly because off camera, I literally had to crank down, reset, crank down, take this big pry bar,
and kind of position it, you know, a few different spots all around the return spring and smack it a little bit with the hammer to get the spring to bypass the snap ring groove.
Now, sometimes you have to do that just because, I mean, it's just what it is, but this one initially was really, really stubborn.
So let's see if the snap ring comes out or not.
All right, I think we got it.
Sometimes these will fight you, I'm surprised this one didn't.
Alright, this thing was under a lot of tension.
I mean, normally you don't have to spend any time looking at these, but this one is a little bent.
See that?
I mean, I may have done that, I don't know, but...
So just stand the case up on its end, invert it, and then pop the piston out at the low reverse feed port.
So it's this machine cut seal that often goes bad.
The rest of them, I mean, don't get me wrong, any one of these seals can go bad, but I most often see this inboard-most seal bad, and that results in a burn-up of the low reverse clutch.
Alright, I'm going to get you in there because I want to scrutinize the sealing surfaces.
Because like I said, whenever you have a soft part failure, it's real egregious.
A lot of times you'll have scoring on all those ceiling surfaces.
And if you have that, unless it's super, super light, like really superficial, so to speak, you know, a lot of use of the word super there, that you can clean it up with some sandpaper.
You know, as far as I know, there is no cure.
So that would mean you'd have to scrap the case.
All right, we have the tool in position.
I don't think this spring was put in correctly because off-camera I literally had to crank down, reset, crank down, take this big pry bar and kind of position it, you know, a few different spots all around the return spring and smack it a little bit with the hammer to get the spring to bypass the snap ring groove.
Now sometimes you have to do that just because, I mean, it's just what it is, but this one initially was really, really stubborn.
So let's see if the snap ring comes out or not.
Alright, I think we got it.
Sometimes these will fight you.
I'm surprised this one didn't.
Alright, this thing was under a lot of tension.
I mean, normally you don't have to spend any time looking at these, but this one is a little bent.
See that?
I mean, I may have done that.
I don't know, but
So just stand the case up on its end, invert it, and then pop the piston out at the low reverse feed port.
So it's this machine cut seal that often goes bad.
The rest of them, I mean, don't get me wrong, any one of these seals can go bad, but I most often see this inboard-most seal bad, and that results in a burn-up of the low reverse clutch.
Alright, I'm going to get you in there because I want to scrutinize the sealing surfaces.
Cause like I said, whenever you have a soft part failure, it's real egregious.
A lot of times you'll have scoring on all those ceiling surfaces.
And if you have that, unless it's super, super light, like really superficial, so to speak, you know, a lot of use of the word super there, um, that you can clean it up with some sandpaper.
You, you know, there's as far as I know, there is no cure.
So that would mean you'd have to scrap the case.
All right.
Again, I apologize if it's not real clear, not real evident as far as the ceiling surface and what you can see and can't see.
You want to just take your finger and run it along.
You're going to do this when the case is completely cleaned up, but you'll run your bare finger, no gloves, just bare finger with the case fully cleaned.
and just run it along the sealing surfaces.
This is your inboard surface.
This is what I would refer to as intermediate, where that middle sealing ring or machine cut seal goes.
And then this is the outer sealing surface.
I didn't feel any grooves or anything like that, so I'm hoping it's okay.
Check your, you know, pump to case, bolt hole locations for stripped threads.
Check the pump bore for anything unusual, scoring, wear.
Worm tracks should be sanded.
Alright, you want to sand your worm tracks down.
You may have cross leaks here.
So, all in all, the only thing this company really did right, in my opinion, was the naming of this transmission on their website.
I mean, this truly was my nemesis today, and it's the nemesis of my customer as well.
I mean, he paid all this money for this thing, and with the expectation that it could stand up to 600 horsepower,
I'll be honest, I can reassemble this transmission as is, put new clutch module in there, maybe even be generous and throw a steel module at it, install it in my John Deere riding mower, and I don't know that it'll last even a few passes down the street.
This thing was slapped together as if it was done by a flat rate shop.
Nothing about it, to me, says upgrade, says durable, strong.
Nothing about it.
As far as what was chosen in terms of part selection and build procedures, it says performance.
Like I said at the beginning, these large-scale reman companies have razor-thin margins for the most part.
And they have a ton of non-prod overhead.
Overhead such as, you know, CEO, executive leadership team salaries and benefits and compensation.
You know, non-prod plant overhead for corporate headquarters, non-production facilities, marketing, advertising, you know, social media outreach.
I mean, you name it.
Chances are they have a line item on the income statement for it.
Something has to give.
The cost of parts are what they are.
Granted, they're buying parts in the lots of hundreds, if not thousands at a time, so they're going to get discounts, but it's not going to be enough to offset just the overall cost structure that they have to deal with, that they're saddled with.
They've got to find ways, creative ways, so to speak, to meet their target profit margins.
And unfortunately, a lot of times, that means skimping on the products themselves, the product being the transmission that they're building and selling to you.
I've never been a fan of remand companies.
I don't believe that, uh, you know, if you're serious, you want to purchase something that's more or less off the shelf cookie cutter.
You need to find a competent shop that knows these transmissions and doesn't have all of the, um, you know, the, the burdens of the costs associated with running a large corporate conglomerate.
So here we're talking about monsters and jaspers of the world and rovers,
Like I said, I'm not going to name the transmission company here.
But suffice to say, they really didn't build this thing to handle much beyond a grocery getter.
And that's kind of what we're left with.
And unfortunately, that means the customer didn't get anywhere near what he paid for.
Alright, all of our sloppy teardown on my part.
So, I apologize for that.
But it's all a part.
And...
I got to clean it up and really inspect it to see if this is something I'm going to build on.
The nice thing is that it is an auxiliary valve body unit, so we can build on it like as if it was a later model 700R.
This drum is an 097 drum.
That's what I'm referring to when I say 097, the casting number.
The architecture of the drum is consistent with the 716-4L60E drums.
So if this was like a 152 drum or even an earlier drum than that, then we absolutely would not be able to use it insofar as if we were going to reuse it.
But obviously with the shaft and the condition it's in, we would never reuse it anyway.
So this is going to get a brand new drum.
It's going to be a 716-4L60E drum.
That's what they manufacture.
And those will retro back to any year 700R4 as long as it has an auxiliary valve body.
If you want to learn more about drums and interchangeability and all the different changes and the differences, check out my 700R4 4L60E deep dive on input drums and it'll take you through all that stuff.
As always, guys, thank you so much for watching.
Greatly appreciate it.
If you have any questions, comments, go ahead and leave them below.
If there's anything else you want me to cover when it comes to 700R4s, go ahead and put it in there, and I will prioritize a video as soon as I can get to it.
Until then, enjoy the rest of your day or evening, and we'll chat soon.
Thank you again.