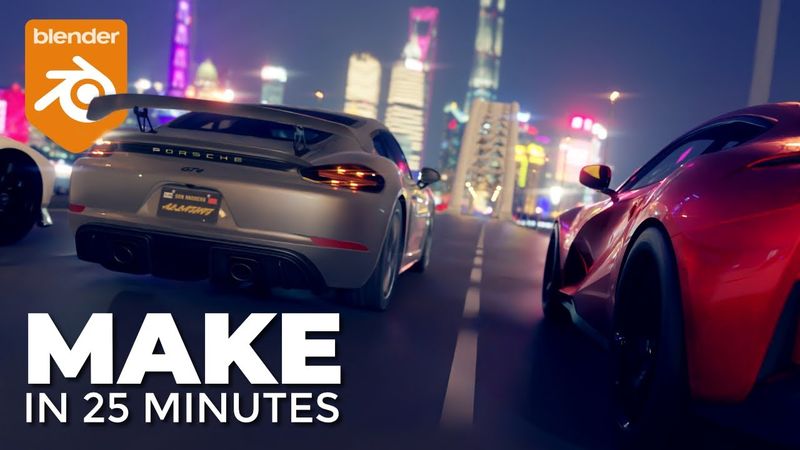
Create a PRO CAR ANIMATION in Blender in just 25 minutes! Complete Blender tutorial - see every step
Download information and video details for Create a PRO CAR ANIMATION in Blender in just 25 minutes! Complete Blender tutorial - see every step
Uploader:
MediaWayPublished at:
7/28/2022Views:
510.6KDescription:
Video Transcription
Hi guys, I'm Leo from Mediaway and today we're going to create a fantastic animation with some of these beautiful cars using only free assets and free software.
I know you love car animation tutorials so I'm going to go all out this time to make my best tutorial ever.
We're going to cover using drivers, HDRIs, where to get free models, using empties to control the camera and adding some secret sauce in the compositor to turn your renders from this to this.
Here's the default Blender scene.
I've got my shortcut keys down in the left hand corner over here so you can see what I'm pressing.
So just press A to select everything, X to delete everything and just click delete.
Okay, the next thing I'm gonna do is press N and this will pull out your side panel.
And from here you can see we've got the BlenderKit add-on installed.
If you don't have it installed, hop on over to the BlenderKit website and get it installed.
Just quickly click on import settings, make sure this is set to append and not link, must be set to append.
You can actually search pretty easily so if we just click on search filters we'll click free first and then we'll click on the categories for transport and then click on car and then click on supercar.
You can see here everything that's listed here is free.
Anything with a little lock icon you have to pay for but it's fantastic value and definitely worth doing.
I'll put a link in the description below.
So we'll start off by dragging in this Porsche Cayman.
So this is the Porsche 718 Cayman.
You can also search using the search field here.
So we're gonna add in a couple of more cars.
So let's get the Aston Martin in.
Okay, so it's Aston Martin Victor.
And we'll also search for a Ferrari 812.
Just drag that in.
For some reason, this Ferrari's coming a little bit small compared to the other cars.
So just click on the empty.
That's this sort of shape with lines along every axis.
And if you just press G to grab, you can actually see this moves the whole car.
Press Escape to cancel that.
So make sure with this axis selected, press S to scale.
And just scale it up.
You can just eyeball it so it looks about right.
That looks okay to me.
Okay, so we've got all three cars imported.
Now we're gonna add in a road.
So back in BlenderKit, you can just type in road into the search bar.
this one here procedural two lanes road is the one we want so just drag that in just drop it into some space over here just roughly near the cars okay so what we're going to do we're going to use this as a basis for the road it's procedural if you look over here in the scene collection and just toggle this little arrow down you can actually see we've got all the different parts of this road here and if you click on the one that says road shape you can see it's actually a path and
Now if you press tab to go into edit mode, let's press seven on the number card, and press A to select all, you can actually see this road's made up of three points.
So what you can do, you can actually press G to grab the points, R to rotate the points, and you can actually make this road any shape you want really.
So what we're gonna do just for the purposes of this tutorial, I'm just gonna grab them and we're just gonna have the road fairly straight.
So I'm kind of eyeballing this and using the center grid line here as kind of a reference to get all these points in the right place.
So G to grab, R to rotate, that looks okay.
So we've got a nice road here.
The other thing we want to do, perhaps make the road a little bit wider because I want to fit all three cars along the side of the road.
So what we'll do, press tab to come out to object mode.
Click on this here, which is called the road profile.
Press tab again.
Press a to select all and you can see Actually see underneath.
It's easier because he basically this is the profile that makes up the road So we'll press this button here.
This is x-ray button Press 7 on your number pad to see it from the top view And what we're going to do is just go in edit mode.
We're just going to select and drag and
These points here, press G to grab, X to constrain to the X axis.
We're just gonna make it a little bit wider, just about like that.
Press tab out of edit mode.
Okay, from here we can see the road markings.
You can just click on those and you can see the road painting is selected.
If you actually click on this little empty here, what the cross has, it's called road base point.
Just press G to grab that, X to move on the X axis,
And that more or less will give us three lanes.
Okay, final thing we need to do is just move these street lights.
So select the street lights first.
Press tab to go into edit mode.
Make sure you're still in X-ray mode.
Select all of this street lamp on the right.
Press G to grab, X to move on the X axis.
And again, just eyeball it so it's in the right place.
So now we've kind of got all our streets set up, ready for the cars to race.
This is a good time to save your work, so let's do that next.
So it's file, save as.
Okay, from here we're just gonna move our three cars into rough position.
So the cars usually have an empty for each car, so you can kind of see the empty by just clicking on the crosshair sort of underneath the car.
So select the empty first, seven for top view, G to grab, just move it into the right lane.
Quickly do that for all three cars.
You can see all three cars just punch through the road a little bit which means the road probably just needs to be a little bit lower.
If you click on the base object for the road profile and just press G to grab.
We'll do this while it's underneath actually.
G to grab, Z to move on the Z axis and just drag it down until those tires just all disappear.
Perfect.
Next we'll add in the camera.
So move to kind of somewhere behind the cars.
Press Shift A, add in the camera.
If you press Control Alt and zero on your number pad, it will automatically put your camera to the viewpoint.
We'll just quickly tweak some camera settings, so click on the camera.
Click on the camera icon here to change the settings.
We're going to have a wide angle camera, so something like 28mm, 27mm is fine.
We'll also add in depth of field.
If you click on the viewport display and show the limits, you can actually see that crosshair there represents where the focus distance is of your camera.
So we'll set up the view first and we'll adjust that.
So press zero to get back into your camera view.
If you press shift and tilde on your keyboard, you can actually control the camera with the mouse and move forward with the W, A, S and D keys, move forward and backwards, left and right.
And you can also move up and down with the Q and E keys.
So just for now, I'm gonna position the camera roughly around there.
We can also add a bit of a tilt on the camera if you just tweak the Y rotation.
This is called a Dutch angle.
Gives a bit more drama to the scene.
Right, we're gonna add in a bridge, I think, at the end of the road.
So again, hop into Blender Kit, search for a bridge, and if we select this one that's called Suspension Arch Bridge,
Pop it in about the right position.
Click on the suspension arch bridge, sort of the base object in the scene organizer.
Press seven for top view.
S to scale.
We're just gonna scale the bridge up so it's the same width roughly as the road.
G to grab.
And we'll move it, scale it just a touch more.
We'll pop it at the end of the road just there.
Let's just zoom in.
We might tidy this up a bit.
bit later we also need to move it down so it's level with the road so press g to grab z to move it down and just eyeball it so it kind of lines up with the road about like that to light the scene we're going to use a hdri so again blender kit has got all the hdris built into it you just have to search for them so i already picked one for this scene but there's millions to choose from so this one is called shanghai so if you just type that in
You'll see we've got this great night scene.
So drag that in here.
It asks you what resolution you want to import it in.
Obviously the high resolutions will take longer and use more memory on your computer.
2048 I think will be fine for the purpose of this demo.
So obviously we can't see anything yet because we're still in viewport shading mode.
So if you hop over to your camera settings, we'll change the render engine to cycles.
Make sure the device is set to GPU compute.
Noise threshold is basically how many times blendable sample before the noise is deemed acceptable.
0.01 is quite a high setting, so if we just change it now to 0.5, and really same for the viewport, that'll be 0.5 will be fine.
And we'll denoise the new viewport as well.
Now, if you click back into viewport shading, press 0 to get into your camera view, and already you can see the scene is looking pretty good.
Okay from here if we click on the car let's click on the Porsche and push your period key and that will zoom into the Porsche.
Just rotate around to the front of the car we can see the Porsche headlights aren't on so we'll just need to fix that.
Let's do that quickly now.
So with the headlight selected pop into the shading tab click on here to get the rendered view and press your period key on your number pad if you want to zoom into the headlight.
If you see headlight is selected, all we need to do is turn up the emission strength.
Let's set it to 250.
We can do the same with the tail lights.
Just click on the tail light.
Turn that one up to 250 as well.
Okay, to do the same on the Ferrari, it's a slightly different process.
Click on the rear headlights.
Drop down until you can find light emission texture.
Just turn up the emission strength on that to 250.
Okay, for the headlights, we're just going to do slightly different process.
If you just search for the one that says headlight 02, I'm going to add in a new material.
It can be an emission material, strength of 250.
And then we'll just delete the other materials.
That basically will assign the emission material to those parts of the car.
Finally, for the Aston Martin,
zoom out, click on the Aston Martin, press the period key on your number pad.
With the car body selected, if you hover over your scene key and press the period key, it'll actually find the Aston Martin for you straight away.
Just scroll down, TC Headlight L, pump up the emission here to 250, scroll down until you find Tail Light L, and again, pop the emission up to 250.
There we go, headlights on all the cars.
Let's hop out back into layout view, press 0 on the number pad to get your camera.
Let's hit F12 and do a render.
Okay, if you get any out of memory errors here, just close your render view, switch this back into wireframe view and hit F12 to render again.
I think the HDRI is a little bit bright, so we'll turn that down as well.
Let's sort that out first.
So click on your world settings.
We're gonna turn the strength of the HDRR down to 0.5.
For the road, make sure you've got procedural two lanes road selected.
Press G to grab, Z to move up and just tweak it up just a little bit.
Right, we're gonna do some work in the compositor to kind of improve this image a bit more as well.
So let's do that next.
So go into your compositing tab.
Click on use nodes.
So we'll just move these apart so we've got a bit of space.
Press Shift A and we're going to add a viewer node.
We'll pop that down there.
You also want this to be linked from here.
A nice little shortcut if you've got Node Wrangler enabled is to hold down the Shift key and right click and draw a line across those two.
Makes a nice little junction there, neatens it all up a bit.
Right, so we're gonna add in some glare tabs.
So Shift and A, search for a glare node.
and drop that in there.
We'll change this one to Fog Glow and we'll change the mix down just to maybe 0.9.
With the glare node still selected, press Shift D and drop it in again.
We'll change it from Fog Glow to Streaks and we'll have two streaks
to kind of get that slightly anamorphic look that you can see across there.
Again, reduce the threshold.
We don't need to go mad with this.
Maybe even reduce the mix a bit more, minus 0.95.
So just a bit more subtle.
Final thing I'm gonna do to add to the image to really make it pop is to add a color balance node.
So press Shift and A, search for a color balance node.
Drop that in there.
And basically, this splits into shadows, mid-tones, and highlights.
So we're gonna make the shadows bluer, and we're gonna make the highlights more orange.
That really gives a much more dramatic look to the scene.
If you want to make the shadows a little bit lighter, you can just tweak this up very, very slightly, but don't go too mad with that.
Okay, this is looking really cool now.
Okay, for the animation, hop back into the Layout tab.
So we're gonna have all the cars driving along this road and we're gonna use a couple of different cameras to take some different angles of the cars.
So the first step is to get the wheels moving.
Now normally for this you'd use a proper rigged car.
I've already done a tutorial on car rigging and I'll link to it at the top right here.
To save time, we're not gonna rig the cars properly, we're actually just gonna make the wheels rotate so it gives the impression that they are rigged.
So basically click on the inside of the rim and the outside of the tire.
Press Control J to join them together.
Now if you press R,
and X, you can see the car will actually rotate the wheel on its X axis.
So if you hop up back into the item view here, we know that the X axis controls the rotation of the wheel.
So instead of using key frames, we're going to use drivers.
So click on here where the X rotation is, type in hash frame,
times two.
And what this basically does, it'll take the frame number, times it by two, and apply the result to the degrees of rotation.
So now if we scrub through the timeline, you can see that the wheel is rotating.
It actually looks like it's rotating backwards.
So let's just finish that.
So right click, delete drivers, press hash frame times minus two.
and now the car wheel should rotate in the correct direction, which it does.
Basically, now all you need to do is repeat this process for all of the wheels, all 12 wheels on all the different cars, which I'll do now and get back to you in a second.
The Porsche already has empty setup for the wheel, so just click on the empty and repeat the same process.
Okay, at this point, you should have all the wheels on all the cars moving when you scrub the timeline.
To get the cars moving, we're gonna move them all from the start to the finish of this road.
So we click on the first one, make sure you click on the empty of the car, so the whole car moves when you press G, press escape to undo that.
Move to frame zero, press G to grab the car, press Y to constrain to the Y axis, move it to the start of the road there.
Press I to add a keyframe and click location to set a location keyframe.
Move to the end of your timeline 250 frames.
Press G to grab, Y to move all the way to the end of the keyframe.
Press I and press location.
So now we can see the car moves all the way from start to end.
At the minute, these keyframes are kind of Bezier keyframes, so that means the animation starts off slowly and speeds up, and then slows down again at the end.
But what we're going to do, we're going to actually have this as a constant speed.
So while you're hovering over your timeline, press T, change the interpolation so it's set to Bezier by default, but click on linear, and now you'll see that the car moves at the same speed right through the animation.
Okay, we're going to do that for all three cars.
So go to frame zero, zoom into your car, click on the empty, seven for top view,
G to grab, Y to move on the Y axis, I to insert a keyframe, location keyframe, move to the end of your timeline, G to grab, Y to move on the Y axis, move to the end of your timeline, I to insert a location keyframe, and T to set it to linear interpolation.
So now you can see we have all three cars moving pretty much simultaneously.
And if you want one car to speed up or go faster or come from behind, what you can do is click on the crosshair of the car.
You can actually just move this keyframe, the last keyframe, a bit further back.
So now you'll see that the Porsche starts to slow down or if you want the Porsche to win, you can move the keyframe forward and the Porsche will start to lead.
through the timeline.
So that's basically the animation setup.
So if we zoom in to the Porsche, you can actually see the wheels are moving and all the cars are moving.
So now, actually, let's stick the camera in and render a frame.
Find a nice view to render from.
Control-Alt-0 to move the camera.
Oops.
Make sure the camera's selected.
Give it a bit of a Y tilt.
We can actually increase the depth of field by changing the F stop number.
So if you want it more blurry, let's just go into render view and you can see this.
You can actually see the distance with the limits here.
Let's focus it on the back of the Porsche.
And we'll actually,
By decreasing the f-start number, it increases the amount of blur you get in your shot.
So let's leave it about 1.2.
And the other thing we can switch on is motion blur.
That's in the render properties setting.
Let's do another quick render.
and actually you can see from this that all the cars are blurred and I guess really that's kind of obvious because the camera is actually stationary while the cars are moving.
So what we want to do is actually have the camera moving at the same speed as the cars and then basically everything else will be blurry and the cars will be nice and sharp.
So let's set that up now.
So if you click on the Porsche
Then do a shift and right click on your mouse.
It'll actually put the 3D cursor on top of the Porsche.
Press shift A and add an empty.
We'll do a different shape just so we don't get confused.
We'll do a cube empty.
That's the scale.
Okay.
And if we actually call that camera empty, we won't get confused.
So then what you want to do is select the camera, hold down shift, click on the camera empty, press P to parent the camera to the empty and keep transform.
So now this basically means wherever the empty goes, the camera will follow.
and we want the camera to follow the car, so we need to parent this empty to the car.
So if we click on the empty that we've just created, then click on the car empty and press Control P, parent that.
Now you'll see that as the car moves, the camera follows the empty and the empty follows the car.
So now the camera is moving at the same speed as the car.
So if we render this again now, we should see something slightly different.
So now we're getting a nice motion blur on the road.
And although you can't see very well, you can actually see that the wheels are spinning around.
So essentially from here, we've kind of got the animation set up with the car sort of chasing on the Porsche.
And the other thing we could do to add a bit of interest is to have the camera kind of jiggling about as though the chase car is struggling to keep up with the camera.
So we can do this by swiveling open the camera empty and clicking on the camera.
You can actually see by adjusting the Z mount on the camera, we can actually move the camera up and down.
We can actually add noise to the Z parameter to make it jiggle up and down automatically.
So if we go to the start of the animation,
Right click on this and insert a single keyframe just on the Z location.
Then if we go to animation tab, we change this mode to the graph editor.
If you press period on your number pad, you can see we've got just that single key for the Z location.
It's a tiny little arrow here.
Just click on that, you can actually see we can add something called a modifier.
So if we add a noise modifier, you can see here now on the graph editor, let's go back to camera view over here, that the camera basically wiggles up and down now as we play through the animation.
Now this is probably a little bit too much.
So we can actually decrease the scale
This kind of makes it happen a little bit slower and decrease the strength to just be a bit more subtle.
So now we kind of just get, let's decrease the strength a bit more.
So now we just kind of get a subtle movement as the camera chases the cars.
A couple of other little cool tricks.
So we can actually use this empty on the Porsche that controls the camera.
to control the camera view.
So by selecting the empty, pressing S to scale, we can zoom in and zoom out.
And by pressing R to rotate and then Z to rotate on the Z axis, we can actually rotate the camera around the car.
So you could start off the animation at frame zero with the cube empty selected, press I and insert a location, rotation and scale keyframe.
And then at the end of the animation, we could actually scale the cube.
So we could get zoom in a bit.
We could rotate the cube on the Z axis or really any way you want.
And then we press I again to set another location rotation scale keyframe.
And you can see through the animation, the camera is actually animated around the car.
So really the last thing to do is to render out a few of these sequences with different camera angles and then stitch them all together in an editing package to make a video.
So I'll just quickly go over your render settings.
If you go to the render tab, you can set your resolution here.
Now, if your computer is very slow or a bit older, you can actually change the percentage size.
So 50% will basically render at half 1920 by 1080.
So it'll render basically twice as fast or maybe even more.
The other thing you can do is change the output settings down here.
So change the file format to FF MPEG video.
The encoding needs to be set to MPEG-4.
You can change the output quality to perceptually lossless.
And choose somewhere to save the video file.
If your computer's really struggling with that and you're getting crashes, you can actually change the file format to JPEG.
and then basically render out a series of frames and then stitch them together back in your editing package.
So if your animation stops working at frame 57, you can just render from frame 58 to 250 and it'll render out the frames that you haven't got.
Okay, I'm gonna work on this some more and I'm gonna show you the finished thing in a few seconds.
So what I've done here, we've got a few different camera angles and I've rendered the animation several times.
So I'll just show you the different angles.
So the first one you've seen already, it's kind of panning behind the camera using the empty to control the camera.
The second one is a fixed camera, so it's literally just a short animation just of the cars going by from a fixed camera.
The third one is the camera fixed to a car.
So basically we're just using the car as a parent for the camera and just following the animation through like this.
The next one is a side camera.
So again, we're just using an empty on the car and just panning the camera around the car as we move along.
It's just a short one.
It's just a camera passing over the cars as they whizz by.
So basically, we've got five different cameras.
By the way, I'm using this handy add on here called render set pro.
It lets you set up different cameras in the same scene, and then render them all in one go.
I'll put a link in the description below.
So what I did, I left this rendering overnight.
If you don't want to use render set, you can achieve the same result by just saving out your blender file five different times with different camera angles.
Okay, let's show you the final result.
Similar videos: Create a PRO CAR ANIMATION in Blender in just

Beginner Blender Tutorial (Donut Part 1)

Create a Realistic Card Deck Shuffle in Blender 3D!
Retopology for Beginners (Blender Tutorial)

Beginner Blender 4.0 Tutorial - Part 5: Shading

How to Create a Vector Logo in Affinity Studio 3 | Beginner guide