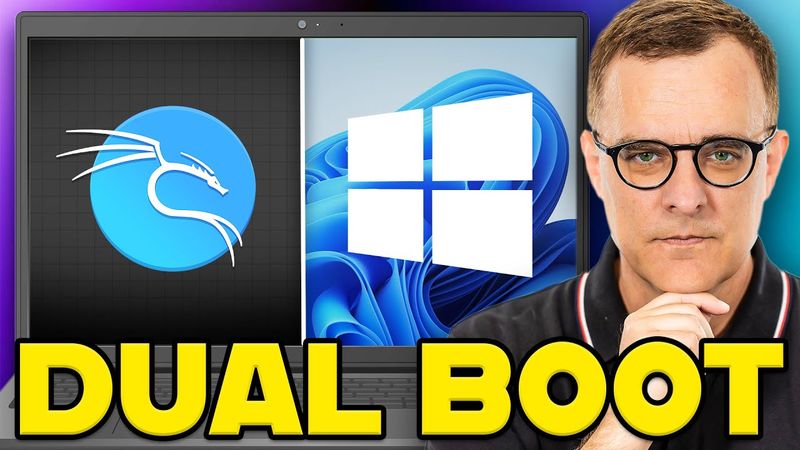
How to Dual Boot Kali Linux and Windows (in 10 minutes)
Download information and video details for How to Dual Boot Kali Linux and Windows (in 10 minutes)
Uploader:
David BombalPublished at:
8/11/2023Views:
1.3MDescription:
Video Transcription
Here's a Windows laptop, which is very nice, but you know what's a lot nicer?
The ability to reboot this laptop into Kali Linux.
So I've installed both Windows and Kali Linux onto this laptop and I can dual boot between them.
So I can boot into Kali or I could boot into Windows.
So once again, what I've done here is taken a Windows 11 laptop,
and installed Kali Linux on the laptop and then I have the ability to either boot into Kali or boot into Windows.
In this video, I'm gonna show you how to do that.
I've got another laptop here and I'll show you the full process.
Same principle applies if you're using a Windows 10 laptop as an example, very easy installation.
Okay, but without further ado, let me show you how to dual boot between Windows 11 and Kali Linux.
Okay, so here's my Windows 11 laptop that we're going to set up for dual booting.
We need two pieces of software.
We obviously need to download Kali Linux.
So on the kali.org website, I'm gonna click on download.
I'm gonna go to the installer images, and I'm going to download the 64-bit installer.
I've actually already downloaded that.
In preparation for this video, you can see
It's about 3.8 gig in size, but I'll click Save just to show you the full process.
Next thing we need to download is Rufus.
You may prefer using other software, but we basically need something to write the ISO image to a USB drive.
So I'll plug this into my computer, and what I'll do on the Rufus website is download Rufus 4.2 for Windows 64-bit.
You could use the portable version, but I'm simply gonna use
that version of software.
I'll double click on the EXE, say yes to run it.
What it's done is pick up my USB drive.
I've actually previously installed Kali on this drive, so that's why it's showing up with Kali.
I then need to select my ISO image.
So I'm gonna select the image that I previously downloaded.
What I'll do actually is stop the current download because I've already got it downloaded.
Very simple, you download the ISO image for Kali, you download Rufus or some other software, and then what you do is you select your USB drive and you select the image.
We're told that we could either use an ISO image or DD image.
I'm gonna use ISO.
and then we warned that everything will be overwritten on the USB drive.
I'm okay with that, so I'm gonna press okay and write the image to the drive.
You can see the drive is being formatted and then the image is being written.
Okay, so while that's been done, what I'm gonna do in Windows is right click on the Windows icon and then go to Disk Management.
So here's my Disk Manager.
At the moment, I don't have any free space on my hard drive.
because the Windows partition is taking up all the free space.
What I'm gonna do however is right click on my Windows NTFS partition and I'm gonna click shrink volume.
Now you don't need that much space to run Kali and Linux in general.
But what I'll do here is specify about 60 gig.
That gives us plenty of space.
You could obviously allocate much more space or perhaps as little as 25 gig.
More is generally better.
I am only gonna specify 60 gig here, so I'm gonna shrink the Windows partition.
This is the amount remaining for Windows, and that's more than enough.
I'm gonna click shrink.
So there you go, 58 gig in size.
Now you could obviously,
give a lot more space to Kali, especially if you're not doing a lot on Windows.
But just for this demo, I've got about 178 gig for Windows and 58 for Kali.
I'll just show you this.
If you wanna allocate more here, you could shrink this volume again.
So what I could do as an example is allocate another 10 gig.
and click shrink, and there you go, 68 gig of space is now available.
We just need to wait now for the writing to the USB drive to complete, and then I can show you what you need to do to go into the BIOS of the computer.
Now there are two ways to do that.
You could,
power this down using shift and I'll show you that method in a moment.
Otherwise, you just need to reboot the computer and then press the right control key.
This depends on your laptop.
So this is an Asus laptop.
I could just do a search for Asus BIOS key and we're told here to enter the BIOS configuration on an Asus laptop, press and hold F2 while the computer isn't powered on and then press on the power button.
That depends on your laptop.
For instance, with this Dell laptop,
different keys used, F8 if I remember correctly.
So you just need to find out which key to use for your specific laptop, or you can do the following, which I'm gonna show you in a moment.
Either method works.
Okay, so the writing to the USB drive has completed, I'll click close, I'll close this, and then what you can do is press the shift button down,
click on Power and click Restart.
Okay, so notice what happens.
We can go to Troubleshooting, Advanced Options, and then we can go to UEFI Firmware Settings, or if you're old like me, the BIOS, and click Restart.
Okay, so there's a few things that you need to do here.
First thing we need to do is go to security.
So this really does depend on your specific brand of laptop and laptop, but I'm gonna select secure boot, and you're going to want to disable secure boot.
Make sure that you have that disabled.
Now, as always with these videos, you do this kind of thing at your own risk.
For this to work, you're gonna wanna disable secure boot, so that's something that you're just gonna have to decide to take the risk on.
But that isn't really a concern of mine, so I have disabled secure boot.
Next thing we wanna do is we wanna specify the order of boot.
So I wanna set the computer to boot off the USB drive first.
So I'm gonna set that up.
Make sure that you disable your secure boot.
Set your boot order to USB, and then I'm gonna say save and exit.
And I'm gonna say yes.
So hopefully what should happen now is the laptop should reboot and then boot off the USB drive.
Okay, so there you go.
We can decide how to install Kali Linux, either using graphical installation or just a standard installation.
For this example, I'll just go with a standard installation, so no graphical install.
Graphical is nice in some ways, but
I'll just use the standard installation.
Okay, what language are you gonna use?
I'm gonna use English.
Which country are you in?
In my example, it's the United Kingdom, so I'll specify that.
Which English are you gonna use?
British English.
Okay, so we need to connect to the internet to download files.
So in my example, I've got this laptop connected via a USB to the internet, so using ethernet.
You could connect to a wifi network if you like, but I'm gonna just specify ethernet.
I'll press enter.
It's getting IP addresses from DHCP.
Next thing you need to do is specify the host name.
So in my case, I'll specify Carly.
Domain name I'm gonna specify as none.
Now again, this is not best practice.
I'm just showing you a demo.
I'm gonna specify username of Carly.
Password is gonna be Carly, just like you get when you download the pre-built VM.
Again, not...
an example of good passwords.
But just to show you the demo, so I've put in my username, I've put in my password, I've verified the password, and now it's gonna start the partitioner.
Now to keep it simple, I'm just gonna use guided, and I'm gonna use the largest continuous free space.
Press Enter.
I'm gonna install all files in a single partition, so keep it simple.
And I'm gonna say finish partitioning and write changes to disk.
If you're happy with the changes that are listed, say yes.
It's now installing the base operating system.
Okay, we now need to select the software to install.
So you can just go with the defaults.
I'm gonna show you a problem I've had and a way to solve that, but I'm gonna simply go with the defaults and press continue.
Notice this issue.
So I've had that on a few of these installations.
So I'm going to select and install the software again.
And what I'm gonna do to get this to install is uncheck top 10 and uncheck default.
I found that I had problems.
It might be something with this image or something else that's causing problems.
But if I unselect those two options and then go continue, the installation passes and then I can just install all the software later.
once this is installed successfully.
Okay, there you go, installation is complete.
So it's time to boot into your new system.
Make sure that you remove the installation media so that you boot into the new system rather than restarting the installation.
Choose continue to reboot.
So what I'll do now is remove the USB drive and then press enter to continue.
You can see the system is rebooting now.
And there you go.
Now we have the option to boot into Kali or into Windows.
It automatically boots into Kali.
And I can log in.
So my username, Kali, password, Kali.
And I've successfully booted into Kali Linux on this laptop.
Now before I update the computer, I just want to show you that it works properly.
So I can restart Kali.
the Kali Linux installation.
And if I press down arrow now, I can select Windows.
And as you can see there, it's starting to boot into Windows.
And there you go, we've got a Windows installation.
So I can log into Windows.
So there's Windows 11.
And once again, I can simply restart Windows
and I'll be able to boot into Kali Linux.
So in other words, boot from one operating system to another.
I've now got dual booting working on this laptop.
I'll press Enter to go into Kali.
I'll show you a few more things in Kali just to get your installation up to date.
You don't have to do this.
You may wanna get things updated.
So I'll boot into Kali again, and what I'll do is start a terminal.
So I'll type sudo apt update.
To update my references, I'll put in my password.
Now one of the things you may wanna do is upgrade your Kali Linux installation, or as mentioned, you may wanna install the default packages.
So what you could do is simply paste that in here and that will allow you to install the various tools that are missing.
Again, that's not required.
Depends what you want to install.
I had issues during my installation process where it didn't want to pass the installation when I selected the default tools and top 10 tools.
So this allows you to install those.
You probably also want to upgrade your Kali Linux installation.
So you may want to do that first before installing the default packages.
I'm not gonna bore you showing you all those options now.
This is simply gonna install the software.
What you can see is I have got various software tools installed.
This will allow me to have more tools than what I've got here.
And it's probably something that most people wanna do.
Okay, so there you go.
I've shown you how to get Kali Linux running as a dual boot with Windows 11.
It's not that difficult to process.
Just be aware of secure boot.
You're going to want to turn that off.
Very important to do that in the BIOS.
Make sure that you've got enough disk space to install Kali.
Make sure that you've got a USB drive.
You can download the image and then install it from the USB drive.
Now, if you enjoyed this video, please consider subscribing to my YouTube channel.
Please like the video and click on the bell to get notifications.
I'm David Bombal and I want to wish you all the very best.
Similar videos: How to Dual Boot Kali Linux and Windows

How To Install Arch Linux in VirtualBox (2023) | Arch Linux Installation

Dual Boot Arch Linux Hyprland and Windows - installing Arch using archinstall script

How to Install Kali Linux GUI on Android Using Termux | Full Tutorial for Beginners (2025)
Install *NEW* COSMIC DESKTOP ENVIRONMENT On Pop!_OS

Install Rust & Mold (+ Quick Start Guide) for Linux | Arch/Manjaro/EndeavourOS