I went from No 3D Experience to THIS in Only 8 Weeks!
Download information and video details for I went from No 3D Experience to THIS in Only 8 Weeks!
Uploader:
Jackie DroujkoPublished at:
3/21/2025Views:
156.5KVideo Transcription
I went through hell over the past few months.
I've been working until midnight, almost every single night.
My eyes were permanently bloodshot from being on the computer for 15 hours a day.
And people are noticing.
And now my hands look like this.
Why did I put myself through this, you might ask?
Well, of course, for the hunt of knowledge.
As some of you may know, I've been taking Azusa Tojo's Blender course over the past few months and went from a 2D artist who has been trying to learn Blender for the past five years.
I started modeling the credit scene in 3D in Blender.
for no apparent reason other than I thought it would be cool.
But like I've been looking up tutorials all day and like trying to figure it out and it's just taking forever and I'm so mad.
To a 2D artist who can now convey an idea in 3D.
As some of you may also know, I've been feeling very down about my art for a very long time.
And during this course, I've actually felt really proud of what I've created and what I've accomplished.
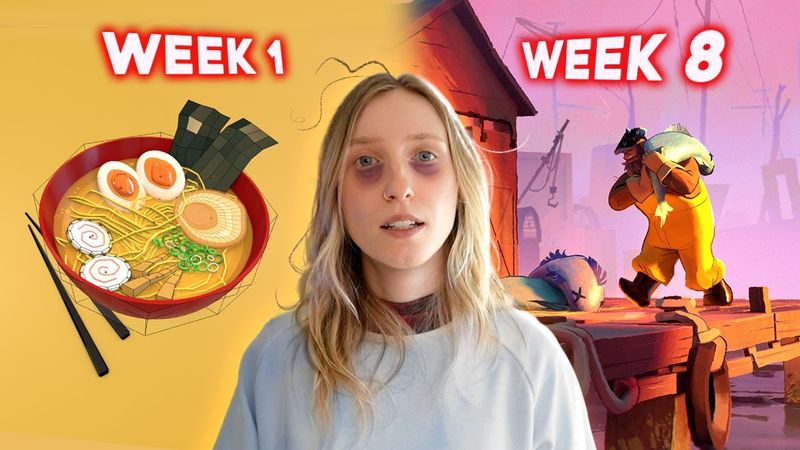
So I wanted to compile my entire experience of this course so you could see my progress from zero understanding of Blender to like a little bit more understanding of Blender, because I still have a lot to learn.
So let's start from the beginning.
Eight weeks ago.
Okay, so before the class started, all the students had to complete the ramen bowl following Azusa's online tutorial.
It's basically to start understanding Blender's interface and keys.
And like a good student, I started making this bowl.
And geez, if I'm not pissed off the entire time, learning something new is so annoying.
And it is so difficult, especially a new program.
It's like learning a new language.
I wanted to give up so many times.
I hate using my mouse for this.
I feel like a baby trying to use tools beyond their comprehension.
But after like probably like four hours, I finished my very first ramen bowl.
and then I do my second bowl.
This one's a little quicker, but I still have to pause the video every minute, and honestly, it's pissing me off, but it actually feels nice to be slightly more competent than my first attempt, which is nice.
And then I start my third bowl, and then I stop halfway through, because I don't wanna do this anymore.
I'm sure I'm fine to start the class.
Okay, my first official assignment.
Another exercise in learning basic modeling skills and using basic materials.
I wanted to make a cute, almost isometric beach moment.
The emphasis on the class was to rely on references rather than sketching anything in advance.
i didn't go off on a sketch and because this i feel like my size hierarchy and composition lacked a little bit but i gathered some fun references and i'm sure some of these rests are ai but you know i guess i guess that's life now it was really slow going since everything i added had to be considered and thought out well what would go on this island i made sure not to like really get caught up in the details until all my big shapes are blocked
It's easier to change my big shapes early on than when there's a bunch of clutter on the canvas.
I wish I could just liquefy the entire thing in the end, but I don't think it's that easy.
I also always have my camera view visible so I can see the composition and only work on what will be seen.
I'm not focusing on making this a 360 degree model.
It's just going to be mainly seen from the front, so I want to focus on getting that composition.
strong from the perspective of the camera.
So in the end, I think it looks great for just being a model with some materials.
I did a draw over to show what I'd like for my piece to look like, like adding a waterfall out of the shark's mouth, making more Ghibli like water texture on the surface, adding more rim lights on the edges of the surfaces and having some like painterly strokes in there.
I've got time yet, but I'm planning to rework all of these pieces now that I know a lot more.
I was most excited for this assignment because I love painting movie studies.
And now I get to 3D model a movie still.
This assignment was to learn about lighting and to replicate the lighting in a film still.
So I don't know how to model characters at this point.
And honestly, I remember at this week, I couldn't even imagine being able to model characters like in just a few weeks from now.
So I just used cubes to imply their form since it didn't really matter.
It was about the colors and the light.
I picked out like dozens of movie stills and ended up choosing this first study from Parasite.
I thought the lighting would be interesting since it's an overcast day and mostly light from the outside, but man, was this hard.
This took like two entire days to do this study.
Modeling took so long and lighting was incredibly difficult.
It's definitely a practice makes perfect scenario, but doing it for the first time was very rough.
Azusa took a look through my file and gave some advice and feedback.
And her lighting looks much closer to the reference.
And she pushed to keep the simple cubes so the planes would reflect the light closer to the film ref.
But you know, I just wanna take things further and sculpt out those faces.
But you know, I think I still am gonna do that.
I'm gonna go back and do that.
I don't know, we'll see if I have time.
Okay, then onto my next movie study.
So my last study took way too long and I got caught up in the details way too much.
So I wanted a piece that was simpler to model, but still a challenge when it comes to lighting.
This still from Salt Burn has this cool lighting scenario and a very hot man.
So I was excited to get started.
It was a real challenge to figure out how to make the materials allow for the light to pass through, like through the curtains and the edges of the skin.
I really pushed the subsurface scattering and in the end it doesn't quite look like the reference image's values, but I only know what I know so far, right?
I received some feedback and this looks much more accurate.
The light through the curtains is much more similar, and the darks and the lights on the character are also closer.
I have to study a bit more on what changes in materials there are, but we moved on so quickly to the next assignment, I barely had time to process my feedback.
The next assignment is to create an interior while learning how to use the shader tool.
I gathered way too many AI references of sci-fi underwater submarine locations on Pinterest and started building aimlessly with only the idea that I wanted a big round window looking into the water and I want the color scheme pretty green.
It would have saved me a lot of time if I had planned this project out a little bit more and I could have, perhaps using today's sponsor.
XP-Pen's Magic Notepad is a digital notebook that helps me plan, sketch, and organize everything in one place.
With the XP-Pen Notes app, I can drop in images, map out ideas, and build my project, all in one space and without clutter.
So I can actually figure out what this concept is going to look like, dragging in images that hopefully aren't AI, thumbnail-ing possible composition, and much more.
And with three color modes, I can switch from distraction-free notes to full color visuals whenever I need.
The X3 Pro Pencil 2 feels just like a real pen with zero lag and no need for charging, which I very much appreciate.
And the screen itself is very bright, very clear, and very crisp.
This tablet is super light and feels very durable.
You can bring it anywhere to jot down ideas whenever you're inspired.
So whenever you have an idea, be efficient and get that written down before you forget.
You can get the XP-Pen Magic Notepad today through the link in my description.
Now let's get back to making some 3D art.
So it was cool to find textures online for the ground and the metals, but it was a bit hard to find the balance to keep it looking 2D.
I don't want any of my pieces to look too 3D by the end of it.
So I kept most of the things little poly with like hard edges.
This assignment probably took the longest because I didn't know what I wanted to do.
At first, my camera was pretty zoomed out to see the entire room, but it was like so overwhelming to fill this room with stuff and tell a story and keep that focal point.
So I took Azusa's advice and I made a tighter camera frame so I can have a better focus.
The story was starting to develop at this point.
It was turning into like a scientist's underwater lab with like tentacles and jars and then even like a monster outside the window.
Tentacle monster.
I don't know.
So I'm finally able to start detailing and refining ideas and figure out the lighting.
Lighting is still something that I'm struggling with at this point.
It's so hard to get it to look the way I want it to look.
And there's like literally endless possibilities and no correct answer.
And it's very overwhelming.
So even at this point, I feel like my lighting doesn't have like a real focus.
I'd like to go in and kind of play around.
around with it more now that I know more.
So I went in with Photoshop and did a paint over to make it look a little bit more like a visual development piece and try to kill some of that 3D look.
I wanted to add a character, but I didn't have time, but I'm still planning on it.
I still wanna add that character.
So I think I'll probably block it out in 3D and then paint it.
Just give me time, please.
Finally, we start designing characters.
The last video I posted was all about this assignment.
So if you want to hear a very detailed account on my process, then definitely check that out.
But TLDR, I felt like I unlocked something deep in my psyche.
Something that I never thought I would have unlocked inside me before.
Making these sculpts engage me creatively and like,
such a way that I'm immediately hooked.
The learning curve was definitely steep, but I feel like my design sensibilities transferred really well into this new medium.
My first character pushed me to learn how to make organic shapes and apply 2D composition when I felt a bit stuck.
My second character taught me to go out of my comfort zone since I didn't really feel pushed enough with this one.
It also taught me to know when to pull back.
And my third character pushed me to explore more push shapes and I learned how to sculpt hands and to simplify when I can.
I love cowboys.
I love women.
I've had this cowgirl in my head the entire time of this class.
I knew exactly what I wanted to create for my first full character model.
So I gather my roughs and I do a quick two minute sketch.
I knew this final design would be 10 times better with like at least the jankiest sketch I can make.
So that's what I did.
With so many loose pieces, it's hard to change proportions later on since
you have to basically individually scale everything separately and move everything around.
So it was important for me to follow set proportions.
So I began with blocking in all her basic shapes, keeping it pretty blocky and loose since I'll be posing her later.
And if I was too precious, I would definitely have to change parts of the design to make each pose work.
So everything is pretty low poly and her face is super simple.
I definitely made her hair too polished at this point since I never actually have her hair look like this in any of her poses.
And the hair was my biggest hassle in the entire process.
You know, since most of the time I had a hat on her head.
So why did I do it like that?
I gave her a cape that we only see once.
I gave her two types of guns that we only see once.
And you know, I went ham on these props.
I was way too excited.
I was only a quarter way through the assignment and I don't know when to quit.
So if you get caught up with details and take an hour to design something that'll only be seen in the background once, drop a comment in solidarity.
and then might as well give this video a like, and it'll help support me.
Thank you.
Okay, so I start posing her, which seems like it'll be hard, but after you get her basic pose out there, it's just about refining and pushing that pose, which I really enjoyed doing, and it was pretty therapeutic.
I left the scene to kind of look like a dusk moment, and I painted some features with grease pencil.
I move on to the next pose, which I fought myself about for a really long time, since I think running poses can look very overdone and lame, but I thought I'd give it a shot.
I actually love how this pose turned out.
It's so pushed.
There's so much story and it's actually my favorite pose.
So there you go.
I do my third pose, which I end up hating.
She's stiff.
She doesn't look natural.
It feels weird.
I scrap it and I move on to the fourth pose.
It's a simple standing pose since I don't actually have that in any of my poses yet.
So I think it'll compliment them nicely.
I ended up changing the lighting to like a high noon light, which is way better for the scene.
I think it looks way nicer.
But I already did all the pencil lines with the dusk lighting.
So it stands out in a weird way because you have to do grease pencil with that final lighting.
That's the struggle.
And then I spend honestly like a full day trying to figure out how the camera moves work.
This is my first time moving the camera.
It was very complicated to try to get it nice and smooth for the very first time.
And I exported like 10 versions of each pose.
It was a nightmare.
And I ended up keeping that sitting pose since, you know, it was already done.
It was nice to have a different vibe for the pose.
And I kind of like hide it in the back, so it's not really in focus.
This was definitely my favorite assignment.
I'm a character designer, so creating these characters in 3D gave a whole new dimensionality to my designs.
And I've learned so much since this character that my next characters will be even more pushed, which I'm very excited about.
Why did he see me this happy?
How dandy.
Do you know how close I was to making this cowboy ride a fully animated horse?
You have no idea.
Even as I was posing her, I was like, maybe I'll animate a horse.
I thank God every day that I had some sense that moment that I didn't do it.
This assignment was to learn the animation basics of Blender and how the timeline and graph editor works.
So I made my character ride a bull-like floating motorcycle thing.
And after blocking out my initial design, I did a draw over to try to find more interesting shapes.
And then my husband gave me suggestions in the draw over since he said my design looked like a fish, which I agree.
So I pushed and I pulled this design until it kind of looks like this.
I think the shape works a lot better and it's honestly cooler than a horse, so that's a plus.
I was looking up how to do this cool rim light that the Marvel rival characters have and I found this YouTube video that has a free shader download.
So I put that on parts of my mech and it has such a cool effect now.
I tried customizing it a little bit, but can really only go as far as picking colors.
I'm not that smart yet.
Then it's time to make everything look like it's flapping in the wind.
which really started making this piece come to life it's cool you could just like shake something in blender and blender like picks up the animation and records it and then i animated this huge sphere to look like the ground is moving back in space and the illusion is really starting to get there once i added those flame effects coming out of the engine and some like low poly dirt flying and grease pencil speed lines which now i know a much better way to make the speed lines look nice to
Then I could start playing around with the compositor, which was fun to learn for the first time, adding some cool film grain and RGB split effects.
It really brings the piece together.
And once I added the camera moves, it looks so full of life and energy.
Like, you can't even tell she's barely moving.
There's so much suggestion of movement, it looks like I animated everything.
It's so cinematic, and I wish I could make a movie out of this someday.
For this assignment, we learned procedural stuff to make natural looking grass and leaves and stuff like that.
And I also learned how to make water look cool.
So I gathered way too many references because I didn't know what I wanted.
I was thinking it'd be cool to have like a hillbilly kid by an old pond, maybe lounging by a swamp.
Then I saw so many beautiful colors in these lily pad paintings.
And I thought maybe making something pretty
prettier than swampy would be nicer.
So I set up my camera and added a boat, but I wasn't sure what the story was supposed to be.
I modeled a man in a boat and I thought it'd be cool if he's looking into the water and there's like a scary mermaid that wants to kill him.
So I started to go in that direction.
And then I thought the colors and the light would be the ones to invoke that creepy mood, right?
So I kept building the scene thinking, well, that's a problem for later.
I focused on only using shaders to making interesting textures to start.
And I think I ended up figuring out some cool things to keep the piece stylized, but still 3D, like how I approach making the willow tree leaves, like vines.
I swear, I felt like a genius after figuring out these shaders.
I always have the camera view on screen since I wanted the piece to mainly work from the camera angle only.
But I see now as I tried to make more dynamic camera moves, I could only really show a specific area since the rest of the world wasn't built.
And I didn't really make the mermaid's face.
So as I played with lighting, I had more and more trouble trying to keep it creepy since I was making the colors so pretty.
It was looking so ethereal and magical.
So the vibe was definitely different.
I also had trouble with lighting since I really wanted this like strong angled light coming through the trees.
I couldn't get the volume to do what I wanted it to do.
I don't know, by the end of the composition, like it didn't have much depth.
and the story wasn't what I wanted and the values and the contrast was a bit off.
And so many people commented that they thought the mermaid was a penguin at first.
So I definitely messed something up in there, but I don't really care enough to like change this piece.
I think it's cool as my first try at like an exploration illustrated piece.
And I'd rather, I'd really rather create something new than trying to go back and fix this one.
I have other priorities.
Our last assignment is to make a final key frame illustration, focusing more on like that final draw over.
So basically using Blender to create like a visual development piece.
I felt a lot of pressure about this one.
It had to be my very best work.
You know, I was looking at all types of locations.
I was thinking of doing like a busy market with lots of
overhead drapery and light poking through, but my pond illustration had that focus on the big overhead moment, and I wanted such a completely different composition and vibe to this piece.
I was looking at a bunch of cool illustrations that I loved and trying to find something to be inspired by, and cool colors, cool settings, but I was really all over the place.
Eventually I thought it'd be very cool to do like a busy fish market.
So I started with that.
Not too sure on any of those details yet, but I wanted just to get started on something.
So I build some really basic blocks and I set up my camera to get an idea of the composition.
I build a little tugboat without further idea of the settings since I know I would definitely be using it.
And then I was super slow at building the set, like, experimenting to see what shapes work and what doesn't work.
I built out the props and the elements of the world, and once again, without, like, a strong idea of the composition.
Then I started working on the character, because I figured that once the character's done, then the story will reveal itself.
So I made this fisherman carrying, like, a big fish, because yes, that's what would happen on a fishing dock, right?
So I block him out, and I spend way too long on his beard that no one will see.
And then before building the world more, I had to figure out more of the lighting so that I could feel some immediate satisfaction, right?
I had a rough idea and I really thought it would eventually work out.
So I kind of ignore things like my issues with the light and the composition until much later.
Azusa gave me some advice and sometimes it's really about being encouraged and bouncing ideas off of someone.
I was feeling really directionless, but then I caught some inspiration from her and I found a way to stylize the piece again and make some fun values and contrast and make it work a little bit better.
I started to add some details, playing with the shaders, putting some wet spots onto the dock, making sure the composition always looks strong from the camera view.
And then I spent all day working on this paint over.
I experimented with a lot of ways to kill the 3D look and making it look like I painted the entire thing from scratch.
But I was really happy with where it was.
But you know, then I saw that the story isn't clear since I moved the position of the boat and now it doesn't look like he's got anything to do.
Is he bringing the fish back into the water?
I don't know.
And then I got some feedback and here's my real final 3D model.
My confidence?
definitely took a hit after this, where my color choice is stupid.
Am I dumb?
Am I bad?
Oh, now I have to repaint the character again.
And now he's not in the light.
But once my ego is settled, I see that the new color scheme and the character posing works way better as a visual development piece.
You know, I've never really made a VisDev piece before, and I have a lot to learn.
And I was really lucky that industry professionals gave me encouragement and feedback to make this piece so much stronger.
So it's time for my second paint over.
I played with the acting of the fisherman, either having his arm up to open the silhouette, but it was kind of awkward, so I kept it down.
Then I painted it over like I did with my previous one.
Now I have a super cool VisDev painting, and nothing's stopping me from becoming a VisDev artist.
So that's the story of how I started from being someone who's terrified to even open Blender to a somewhat competent 3D artist.
I'm really looking forward to see where this takes my art, how I'll implement 3D more into my sketches, and hopefully I'll just keep getting faster and faster and maybe one day I'll get a job from it, we'll see.
So which piece was your favorite of mine?
Please tell me.
Please, please tell me, because I need to know.
Not because it makes me feel good, but because it makes me feel good.
And if you're inspired by my progress, you can sign up to Azusa's newsletter, find out when her next class is, and the link is in the description for you.
And you can check out my Instagram to see my updates on these pieces that I promised to you.
Because now that I said it in a video, now I actually have to do it.
Accountability.
All right, thanks everybody, and I'll see you next time, bye.
Similar videos: I went from No

This. was. CHAOS. - AMD $5,000 Ultimate Tech Upgrade
I Turned This Broken Phone Into A Home Server
SFM| Evil Never Feels Guilty |music by: DAGames - I'm The Purple Guy
Digitize 35mm Slides and Negatives - Slide copying with a digital camera
ASMR - 6 ROLE PLAYS IN 9 MINUTES! (Eye exam, sleep clinic, dentist, lice, ear exam, make over)