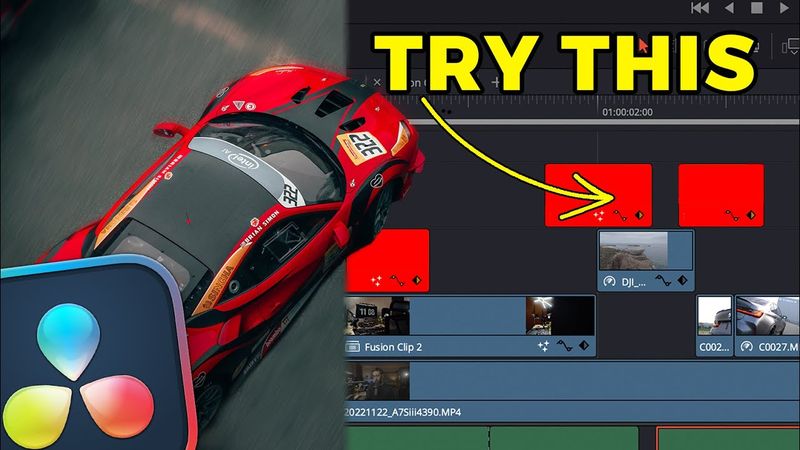
My Secret To Smooth Speed Ramping Transitions in Davinci Resolve

Download information and video details for My Secret To Smooth Speed Ramping Transitions in Davinci Resolve
Uploader:
Jamie FennPublished at:
2/10/2023Views:
1.1MVideo Transcription
I've made a lot of videos this year, and a bunch of you guys have asked me how I do the transitions in between the clips.
And to be honest with you guys, it's just speed ramping.
But there is this little bit of sauce I like to sprinkle on the top that's kind of been like my secret that I've never seen anyone else do that will just make your transitions extremely smooth.
Speed ramping in DaVinci Resolve is super easy.
What I do is I scroll through the footage and I want to find a spot where I want it to be fast and then slow and then potentially fast again.
So I'm going to come right to this point where I want it to be slow.
Right click on the clip and select retime controls.
Click on the drop down arrow next to the 100% and click add speed point.
Scrub just a little bit forward with the footage and then click on the drop down arrow to the next 100% in the clip.
Select add speed point.
Now what I'm going to do is click on this upper speed adjustment and drag it to 25%.
And the reason I'm selecting 25% is because I'm in a 30 frames per second timeline and my footage is at 120 frames per second.
25% of that clip is as slow as it can go.
So then once you've done that, right click on the clip and select retime curve.
come down here to where you see retime frame and select it and select retime speed then what you want to do is come to the start of the clip go to the top left hand corner and you will see a double arrow appear go ahead and click and drag it so you see the speed percentage increase then towards the end of the clip go ahead and do the exact same thing but then drag it
in instead of having just a linear change in speed we want to smooth these points out so click on the first point that we created and come up here to this little curve option and as you can see it smooths out the first time adjustment go ahead and do that on the second point as well now i'm going to play this back and see if it looks good
The slow motion is a little too long so what you can do is drag on this specific speed adjustment and drag this up so the slow motion part is not as long.
Now that looks good but I'm going to make just a few more adjustments.
I'm going to make the last part of the clip a little bit faster and I want to actually click on this point and open this up to smooth it out.
I'm going to do the exact same thing for the first point.
Come up here to the right hand side under the inspector and click on the stabilization.
Now it has a few modes, so what I've learned with gimbal shots is that sometimes you'll get some distortion and that's what happens with perspective.
Maybe it won't happen on your clip, but usually it does for me.
The best option that I find is similarity.
Go ahead and turn up the smoothness about halfway, turn the cropping ratio all the way down, then select stabilize.
So with that all said and done, we have an awesome speed ramp.
So real quick, before I show you my secret sauce, it's really important to note that you need to be able to have good footage in order to make your speed ramps and speed ramping transitions look dynamic and smooth.
Therefore, let me show you a few tips and tricks on how to get badass footage.
So if anybody's wondering, I'm using the Sony a7S III with the new Sigma Art 16-28 lens.
Very small lens, super lightweight.
And this is the DJI RS2.
I'm not sponsored.
I'm just letting you guys know this is what I'm using.
You're just being a good guy.
Just spitting truth.
One thing you always want to do, at least for these types of transitions and big ass speed ramps, is I like to put my gimbal in FPV mode, which means the gimbal will turn any direction you point it.
That way it doesn't look super robotic and it has more of like a natural look to it when you film.
Okay, so let's pretend like this X is the subject.
It could be a car, a person, a piece of camera equipment, whatever you're doing the speed ramps on.
So when you start filming, you wanna make sure you do big open movements like this, and you wanna obviously be facing your subject, but you wanna keep a consistent speed as you're filming.
Also, you wanna keep in mind what you're doing with your hands with the gimbal.
You wanna keep the consistency across all of the shots, the same speed, the same movements,
And when you start doing these giant movements with the camera, you have to understand something.
We're going to speed this up.
So this is going to be way exaggerated.
Don't try to do some crazy things with the gimbals.
That's not how this works.
This is going to totally up the shot.
So just focus on getting big open movements, whether it's turning the gimbal or turning away from the subject.
No matter what you do, just try to make it nice and smooth and consistent across all of your shots when you're filming.
So once you have your footage and you do some speed ramps on the clips, the next really important thing is to find another clip that is going in the same direction of the speed ramp of the previous clip.
Alright, so here we have the clip that I did the little speed ramp on.
And as I scrub through the footage, it kind of twists and goes a specific direction.
It's going backwards and kind of twisting.
So then here I have same kind of camera angle and it's going backwards and twisting out.
So when you put them together, they flow really well.
But do you guys notice something that's just really not good about the transition?
It just is really harsh and it doesn't look good.
So this is where my secret sauce is going to come into play.
And that secret sauce is motion blur, but not just any kind of motion blur.
I'm not just talking about directional blur or the actual motion blur options.
None of that shit looks really good.
So what I do is I will come up here to the left hand side under the effects and then go ahead and drag an adjustment clip over your speed ramping clips.
Drag the adjustment clip a little bit before and after the speed ramps because the curve of the speed still is speeding up and slowing down.
Then select the adjustment clip, select fusion.
Hold down shift and press spacebar and type in optical and then select optical flow by pushing enter.
Then hold down shift and press spacebar and type in vector, scroll down to vector motion blur, select enter.
What's also really cool is you can adjust the optical flow in the vector motion blur to make your own personal taste as far as what you like for speed ramping motion blur.
so with optical flow selected under the advanced tab you can click on the drop down arrow and just turn up the smoothness and really create a buttery looking effect or you can go over to the classic side click on the drop down arrow turn up the smoothness and you can mess with the edges you can just do all of these adjustments you can create really crazy looking motion blur then go back to the edit page
And something that I like to do is I fade in the adjustment clip sides so it doesn't just like attack the footage with motion blur really quick.
So then what I like to do is actually turn that off and then copy this over to other places I want motion blur.
So I'm going to drag this over like that, fade it out.
I'm going to drag this over, duplicate that, and put that there like so.
The reason I turn this off is because it's really taxing on your CPU and GPU for your computer.
Keep them deactivated until you're done with the project.
Then right before you go to deliver it, activate them and you're ready to go.
So here's the first example with no motion blur.
Looks really hard and jarring.
Doesn't look that good.
Now the second example, this has just motion blur in the fusion page with an adjustment clip.
Now, if you do decide to use this type of motion blur, always make sure to select better and select the specific motion range that you want.
They're small, medium and large.
Keeping it at medium works pretty well for most of the time.
And then you can actually adjust the amount of motion blur that's applied to the clip.
And this is what it looks like.
And it looks okay.
The only thing I don't like about this is that it kind of does this like weird thing in between clips and it creates like these weird artifacts.
I'm not really into that.
This may be a stylistic choice if you do like that.
And then here's my secret sauce of doing it.
And as you can see in the transition, it looks way smoother.
It almost like creates this buttery looking motion blur.
And I freaking love it.
Similar videos: My Secret To Smooth Speed Ramping Transitions in Davinci Resolve

Don't Overlook This Slot

High-End REEL Editing Style You Must Learn in 2026

Dolby Atmos Demo 5.1.2 SOUNDCHECK

How I Turn Spec Projects Into Paid Campaigns

4L60E Pressure Regulator Valve (Boost Valve) (Part 2 of 3) (4L60E Line Pressure)

