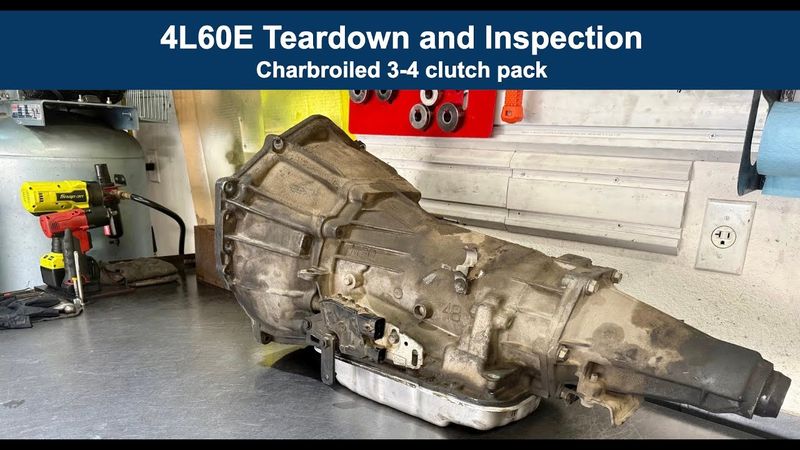
Teardown and Inspection - Smoked 3-4 Clutch Pack
Download information and video details for Teardown and Inspection - Smoked 3-4 Clutch Pack
Uploader:
Nick's TransmissionsPublished at:
3/19/2025Views:
1.2KDescription:
Video Transcription
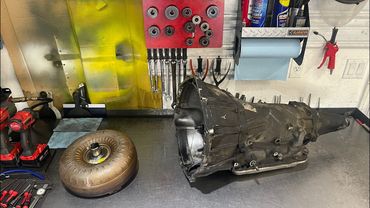
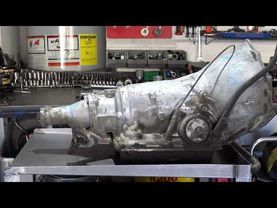
hello and welcome to another video today we're going to tear down a for all 60 yet of a 1999 chevy tahoe two-wheel drive and the situation here is that this transmission starts slipping in third gear which is all too common so we're going to take it down see what we could find and go from there so someone will get a complete overhaul and uh you know get a few upgrades as well so anyway let's go ahead and get started
Okay, 15mm on your selector shaft to linkage arm and then 13mm for your manual lever position sensor.
I always recommend changing these out whenever you go through a unit because a lot of times the connectors here will get damaged during the removal of the transmission.
I mean, you know, this thing's probably been sitting on there since it left the factory.
Most of the time folks don't replace these.
That one was loose.
Sometimes you'll have an issue with these not wanting to come off.
If so, it's usually because the flats here are a little bit mushroom.
If that's the case, a little angle grinder with a wafer pad or a file will clean it up, and you'll be able to kind of put the new one back on without too much difficulty.
No big deal if you break the old one coming off, but you don't want to obviously have any problem
All right, like I said, always a good idea to replace these.
If for whatever reason this fails, you will not be able to start your vehicle.
All right.
So all of your legacy small block Chevys will have the piloted input shaft 298 millimeter.
End plate for these units is 15 to 30 thousandths.
And this is kind of right on the edge of what would be a max specification.
So let's see what we find once we get it apart and see if there's any concerns about the condition of the bearing, either for the stator to input drum thrust or the bearings in the front planet, either the captured bearing or the thrust bearing behind the planet to ring gear.
Okay, pump.
We'll get the bell housing off in a second.
Alright, these feel normal in terms of, you know, how tight the bolts were torqued.
Previous 4L60E I had in here, somebody had gotten way too over-aggressive.
actually left loose.
All right.
So when we do the bell housing, you want to make sure that you have the transmission stabilized.
You don't want it walking on you because if it shifts or move just a little bit, you're likely going to strip these bolts.
Torx plus 50.
1⁄2 inch drive.
This particular socket extension is from Harbor Freight.
It's got a 1⁄2 inch female end and a male 3⁄8 drive male end so that you don't have to use an adapter.
And I like that because it delivers a little bit more torque or preserves, a little bit more breakaway torque than using adapters.
And that every little bit helps.
So just make sure it's fully stable.
Alright, last thing you need is to have these stupid bolts stripped.
Got a lucky bounce on that one.
All right, I got a lot of questions on the forums about interchangeability of four L60Es between the Gen 1, Gen 2 small blocks and the Gen 3 and up versions.
So bottom line is the bell housing changed, the input shaft changed, the stator changed, and the flex plates and torque converters changed between the Gen 1 slash Gen 2 and the Generation 3 and up small block Chevys.
As is, they are not interchangeable.
Now that said, it's fairly easy to adapt one, you know, version or vintage of transmission to work with the either earlier or later engine depending on what you're trying to do.
So, not the end of the world if, you know,
you need to swap in a later transmission onto an earlier engine.
You just need to either buy the adapter kit or, you know, kind of finagle your own to make it work.
8mm on the speed sensor.
Always replace your vehicle speed sensors.
These things can sometimes fail in such a way that it will mimic 3-4 clutch pack failure.
I have a 4L60E video out there where it was like comeback 4L60E 3-4 or something like that where I actually thought the 3-4 clutch had failed but it turned out to be an aftermarket speed sensor that was installed into the unit
and that caused it to false neutral in third gear.
Alright, he's obviously going to need a new rear transmission mount.
So that's another thing you want to make sure that you pay close attention to.
Anytime a unit comes in for overhaul, chances are it has, I'd say at least 70,000 on it, most likely twice that.
and you want to make sure that you replace this mount.
If not, then believe it or not, a bad mount can actually destroy the rear gear train in the transmission.
All right, extension housing is going to be 15 millimeters all the way around.
In fact, let me get rid of this seal while it's, you know, I still have a whole weight of the transmission to help me take off the seal.
All right, seal's off, so now for the extension housing, 15 millimeters.
Get on there.
Now you got your machine cut square seal.
Try to take out the servo.
Fairly straightforward deal.
I always go back with these by installing a Corvette servo or 093 servo if you will.
093 refers to the last three digits of the casting number on the second gear servo.
And I just carefully wedge the cover away, and then once you get the O-ring groove exposed, you can grab up the O-ring using a hook style pick.
So get in there, grab up on it, and it should allow you to take the cover off.
Okay.
Scarf cut Teflon ceiling rings here.
You can install a Viton style rubber decut rings.
You know, they're a nice little upgrade if you want to go that route.
All right.
Check the inner diameter here for excessive wear.
It's not common.
All right.
And you also want to check in here as well for where at the, you know, in where the pin
Alright, so here's your second gear servo.
Most of these are 553.
That refers to the casting number there.
Last three digits.
So, all scarf cut Teflon sealing rings and a red O-ring.
So there's always going to be wear in this inner diameter.
That's why I never use these.
They're always worn out.
The servo pins themselves are selective.
The most common one you'll see is the two groove pin.
It's medium in length.
If you see a three groove pin, that's going to be shorter.
A one groove pin will be a little longer.
And then a pin with no grooves is the longest possible pin that is available, at least from the factory.
If you buy the Sonic Super Rolled Servo for second gear, they come with a pin that's technically oversized.
In other words, you will have to grind on the end of the pin to get your band clearance.
Otherwise, you'll never be able to install the entire assembly into the case.
I just want to get this free.
So you have one main spring and then most shift kits will give you either one or two additional springs to install in here.
And what that does is it softens the 3-2 downshift that part throttle.
These are notorious for what they call, you know, 3-2 bump slide or 2-3 bump slide.
And that's because the, you know, the third gear accumulator, which is what this is, is a slightly miscalibrated
And in most of these transmissions, the shifting will be harsh at times.
And, you know, from a drivability perspective, you know, customers will often cite concerns there.
Okay, so the piston for second gear and the cover will not be reused.
They will not be reinstalled.
So I just clean them up because, you know, when I send all the aluminum to the scrap yard, I don't want it dirty, filthy like that.
But that's the only reason why they're going into the bin for cleaning.
All right, this thing just comes off.
You can wiggle it.
There's an O-ring in here that will need to be replaced.
It's a lot easier, though, if you just tap it off.
Here's the o-ring.
That thing is quite hardened.
Quite hardened.
Okay, I'm hearing kind of funny noises in there.
So, who knows?
Maybe we'll see a little bit more than just the usual conventional Burke 3-4 clutch pack with this one.
I don't know.
Okay, eight millimeter on this wire loom bracket.
Insofar as wiring harness, there's a special tool that if you wanted to try and preserve your harness, you can.
I never do.
So just punch it with the hammer and that will allow you to remove it once you take loose the two TCC lock solenoid bolts.
All right.
13 millimeter on the 16 pan bolts.
2008, if you're trying to match your transmission version based on the identification sticker with the number and three-letter character code and it's missing, you can also find it right here.
I mean, there's a whole bunch of grime, so you're obviously not going to be able to see it, but should you clean the grime off, it'll be visible here.
I think in 2009 and up, they stopped doing that, and nothing's there.
For 700R4s, you look up in this area here on the pan rail in the case, you know, just above the pan, and that will also give you your identification code insofar as determining the year of production for that particular unit.
So it's like seven, and then there'll be like three other characters.
Say, you know, the integer, I'm just using seven as an example, would indicate a 1987 model year case.
So that's for 700R4s.
All right, so we see the usual amount of clutch material in the pan.
I do like the fact that the gasket came off nice and easy.
This is a rubber gasket, probably bought at either AutoZone or O'Reilly's or one of the chain parts stores.
I would not recommend you use such a gasket.
They are notoriously leaking.
Okay, here's the magnet.
Just put the pan right there.
All right, deep pan filter.
Never install a shallow pan filter in a deep pan application and vice versa.
If you're going to be working on a 4L60E that came from one of those inline application vehicles where the engine's like a 3.7 or a 4.2, they have a different pan and they take a different filter than either of the early or late or shallow versus deep pan style filters for the V8 application.
So just be aware of that.
And they're not interchangeable, to my knowledge, with the V8 filters.
Alright, just trying to get by the camera so I can grab a paper towel.
Alright, wiring harness.
So this is shift solenoids A and B, your EPC, your electronic pressure control solenoid, your 3-2 control solenoid, your PWM solenoid, and your pressure switch manifold assembly.
09 and up, they eliminated these two things plus the 3-2 control valve and spring.
So those valve bodies are not interchangeable with anything prior.
2003, they went to a silver style EPC with a different connector.
The resistance and frequency value in terms of the EPC's function itself did not change.
So as long as you match wiring harness and electronic pressure control solenoid between 1996 and early 2006, you won't have any functional issues.
Okay, detent roller 13mm.
And then 10mm on your 1-2 accumulator housing.
for the 1-2 accumulator are plastic.
It is my recommendation that you replace this with an aluminum version of that piston.
There are a total of three different housings in production.
The first design housing took a large diameter accumulator piston.
The second two had this piston, which is considered the small diameter or small hole piston.
I've got to turn the shop air on to take that out.
We'll do that later.
You can...
interchange a second design piston between second and third design housings, but you don't want to put a third design piston, which has no legs on it, into a either first or second design housing.
Clear as mud, right?
Okay, 10 millimeter on all valve body bolts except for three, which I'll point out in a second if you don't already know.
Starting in 2004, the pan changed.
They did away with the standalone dipstick stop, and the pan had a contoured beveled edge in them, and that served as the dipstick stop.
So you're going to retro that pan to any year for L60E, as long as you run the appropriate filter, and as long as you're going to retro a late 2004 and up pan, you do not also install a dipstick stop.
Alright, if you should happen to round one of these bolts off, and if it's going to happen, chances are it's going to be one of these three bolts here.
These are 8mm, whereas the rest of them are 10mm.
What you can do, and that was stuck in the little clip there, what you can do is you can take a die grinder,
You can take a die grinder and cut a slit in the bolt wide enough for your flat blade screwdriver or impact driver bit and then once you have the slit cut go ahead and come with a manual impact driver and the flat head bit and you can take it right out.
A lot of times the heat will break the bond and one or two smacks and the bolt will come right out.
So just another tip for you if you run into that problem.
I'm going to throw my sockets around.
All right.
So these three bolts right here have to go back in these locations.
Do not put them anywhere else.
They're a little bit longer than the rest of them.
And if you put them in, you know, anywhere else, like say here or here or here,
you'll probably lock up your sun shell.
You'll protrude into the case and interfere, you know, kind of get in between the lugs and interfere with the rotation of the shell.
And that's obviously no good.
Alright, seven check bolts behind the valve body.
Make sure I got all my bolts out.
Pressure switch manifold assembly, no good, gets replaced.
I mean, I don't know if that one's no good or not.
I'm just saying, just generally speaking, it's no good to reuse them.
You can test the pressure switch manifold by using a multimeter.
Looks like I forgot to take those off.
I'm on.
By a multimeter, and it will indicate whether or not your continuity values are where they should be or whether they are off.
8mm here on the reverse hold down plate.
Alright, no reverse after overhaul is sometimes caused by whomever rebuilt it not torquing these bolts.
All the bow body bolts and all these bolts here, including these bolts, get between 98 and 108 inch pounds.
Alright, spacer plate.
All right, most of that gasket came off.
Let's check the other one.
All right, most of it got a sliver here.
See if I can get that off real quick.
Yes, I can.
Very good.
All right, these little filter screens will come in the kit.
The one I'm working on now is gonna be for shift solenoids.
Sometimes they're stubborn, they won't come out.
This is going to be for your EPC.
So EPC filter and shift solenoid filter.
So already we have a common problem that we can take a look at.
Okay, the ball is stuck in the plate so we'll need to use the fitsole repair kit.
Basically the procedure is to get rid of the check ball that's in there.
And then we're going to drill this out to a quarter of an inch, you know, quarter of an inch bit.
And then we're going to install a ductile iron sleeve from the Fitzall repair kit.
And that will restore this plate so that it can be reused.
So you want to check your other locations too.
If the plate is worn to such an extent where you've got to pretty much repair all of them,
My recommendation would be to just get the Transgo 4696 plate for anything 96 to 06.
They also make a plate for the 95 units, as well as 93, 94, 07 and 08, and 09 and up.
So, Transgo has you covered when it comes to spacer plates.
Alright, when you go back with this unit, it's my recommendation that you A, replace this 3-4 accumulator piston,
And B, install it upside down with the spring going in first.
So, put it in like this.
First the spring, then the piston.
Make sure you reinstall your pin as well.
These will always be replaced because they wear here heavily.
Alright.
10mm on your lock-up solenoid.
if the lock-up solenoid is bad it is bad that the rest of the transmission is functioning normally and you don't want to replace the harness um what you can do is splice into the wires right here and you know splice in a new lock-up solenoid from fitzall i think there's one or two other companies that make them as well but you can do that and it'll work just fine
that you would just replace this whole harness.
I mean, this is the original harness.
It's a Delphi harness.
I don't know if these are still in production.
I use Rostra.
It's primarily what I prefer to use.
All right.
15 millimeter on the Rooster Kuhn, the selector shaft nut, 13 millimeter on your parking pole guide plate bolts.
All kind of stuff's falling on the ground today.
It's a Sunday.
I don't have much of anything else to do, so just getting a head start on the week's work.
Alright, my hands are filthy, so I'm going to be dirtying up my tool chest drawers.
Not good.
Check balls everywhere.
So, seven check balls.
If you so desired, you can omit this check ball right here.
That's the Coast Clutch Flow Control check ball.
That'll give you a little bit more robust apply in that Coast Clutch.
You know, if you're towing and hauling and...
you know maybe it's a work truck or something like that and you know you want that that engine breaking to happen sooner rather than later that's an option for you hey you have a band style spacer here take screwdriver come in like so and then just pry off and out and off it comes
Electric shafts will fight you.
Most of the time, they will not come completely out without a little persuasion.
4L60E teardown video I just did about, I guess, a week ago from your point of view.
That one I had to use a slide hammer to get out.
I mean, it was all kind of problems with that thing.
It's a 4L60E, no fourth gear on stumped or something like that.
And that caused all kinds of grief.
And this one is...
also presenting itself to be stubborn.
So let's see if it cooperates and don't save this for last.
Like don't just skip it and continue to tear down because you really want the whole weight of the case to help you get this thing out.
Okay.
Most of these things have burrs or, you know, imperfections on them there at this, you know, end of the inner inboard end of the selector shaft by the flats.
And as a result, they get hung up on the case.
When you go to put it back in, don't be surprised if you have to tap this in with a hammer, you know, like this.
I'll just choke up on it and tap it.
And you'll see a little bit of shavings come out.
So I'll put my finger here to catch the shavings.
Cope this with assembly lube when you do that because the shavings will stick to the pin and then you can easily wipe them off versus having them go into the case.
And it may be a good idea to have the case vertical so that the shavings just fall on the ground as opposed to into the case if you're doing it with the case belly, you know, face up.
So just some things to be aware of if, you know, you're watching this and you've never rebuilt one of these things before.
And you want to kind of get some insight as to what to do given, you know, dealing with the selector shaft.
So this is typical.
If you watched that other video that was published a week ago, that is not typical.
That is very rare.
I've never had a selector shaft fighting quite like that one did.
All right.
So with the pump, take a pry bar.
and come at it like this.
I like to have the pry bar facing to the rear of the case so that I can keep that reverse input drum from coming out with the pump.
I gotta keep watching the battery life because
This camera doesn't have the best battery duration.
It's not the most, you know, it doesn't have the best endurance, especially in the summer.
In the summer, it's real bad.
You get like 20 minutes, you're lucky.
In the wintertime, spring and fall, you get about a half hour.
It records in 4K, but it's a bitch to upload to YouTube in 4K.
It's also a bitch
to upload from the video editing software onto my files at 4K.
And I haven't seen a significant difference, not enough to be material anyway, to justify loading everything in 4K versus 2K.
But I'm probably gonna upgrade my equipment at some point.
Excuse me.
Probably gonna go with like a
You know, a DSLR capable video camera and a better microphone because this camera is okay, but it's not the best.
My microphone, which is plugged into the camera, is also not the best.
All right, always replace the boost valve.
Never reuse boost valves, okay?
Pressure regulator valve.
You want a vacuum test here, okay?
If this is particularly worn or the bore is worn, you'll have instabilities in the rotor and slide pocket leading to breakup in extreme cases.
Okay, you also want to inspect these lands and test them too.
3-4 burnup will be early and often if it's worn at these locations.
Transgo makes a drop-in valve.
You can put that in there.
That'll mitigate it.
You can also install their oversized valve, you know, if you ream this bore here.
All right, let me see if I can get this lock-up valve out of here.
Dexterity is not going to be real great because I'm wearing two sets of gloves.
And that's another thing I'll make mention of.
I mean, not to be like nanny state about anything.
However, I see a lot, a lot of videos about auto repair in general.
And in those videos, I see a lot of people tearing transmissions down, working on vehicles.
You know, coming into contact with all kinds of dangerous chemicals, hydrocarbons and all this other stuff, like transmission fluid, engine oil, and they don't wear any gloves.
Like they do everything, they do everything with their bare hands.
And you know, years and years of that, you know, could expose you to things like cancer.
So again, not to be in any state, I'm certainly not, trust me, but at the same token, you don't want to put yourself at risk either.
Stator working surface looks good.
You'll do your final inspection once this is clean.
Check in here for sealing ring groove wear.
The sealing rings on the input shaft, the later models tend to kind of bind up and they will cut ring grooves in here and that'll result in you having to replace the stator.
Check around here too.
The casting number is going to be 4705.
That's the last four digits, 13 vane pump.
All right, this has a dual spring set up here for the slide.
It's also known as a priming spring.
04 or 05, they went to a single spring setup, which you can retro if you want.
Rotor guide, that'll be replaced.
Veins will be replaced.
The body will be machined.
We don't like to have wear on the body.
When it goes back, you don't want to have any clearance issues between your rotor slide and your pump body deck surface, which is here.
Rotor slide deck clearance should be 1,000 to 1.5 thousandths.
The slide to deck should be 1 to 2 thousandths.
If you're outside of that, have the pump machine, especially if you're rebuilding this stuff for, you know, money, you know, you're doing it as a shop, as a profession.
Um, I mean, if you do, you don't really need me to tell you that, but you're thinking of getting into the profession.
That's how you fix these pumps the right way.
Get rid of these veins.
I don't know that.
I don't think that was in there.
Alright, this is going to be your little pivot pin and spring.
This one looks like it's stubborn.
So pivot pin.
And then there's a little spring in here that you do not want to lose.
Hopefully you can see that.
If not, trust me, it's there.
Okay, high performance.
You're going to have a drain back.
It's gonna be this location here on this side, and it's gonna be right in here behind the seal.
Drill it to 5 16ths so that you can create more efficiency in sump drain for your fluid and not have it pool in behind that seal.
4L60Es don't typically have a problem with front seal blowout like the 4L80Es do.
Early 4L80Es were susceptible to that.
And for all 4L80Es,
My practice is to drill out the drain back and those pump bodies to a quarter of an inch.
I don't think you need to do it five-sixteenths like these, but 700R4s, 4L60Es definitely benefit, but it's not mandatory unless you're going to be high RPMs.
Okay, that band anchor pin doesn't want to cooperate.
I want to make sure I'm actually off of this thing before I pull... before I pull that stuff off.
Or try to pull this stuff out, rather.
Alright, there we go.
Because if not, you're gonna be fighting with the band to allow the drum complex to release.
Alright, band.
If you watched that other video,
Well, I won't spoil it, but just pay attention to this area.
I've seen bands come in literally in half where the band anchor pin side on this side usually is broken, so it breaks right around here.
That's what I've seen.
I think I have another teardown video where that happened.
But the band wear itself looks about normal to me.
I mean, you can clearly see it cracking here along the entire surface, basically.
That's normal.
Normal in that, you know, it's just time to replace the band.
And overall, that's what we do.
Okay, the drum.
Check the mouth of the drum, the lugs.
Make sure they're not bowed out.
Okay, again, something that I was confronted with recently that I hadn't previously been looking for.
And I hadn't noticed it during caregiving.
You can reuse these drums, too.
It's not the end of the world.
If they're in good shape, if the lug's here in good shape, they're not too worn, a file can straighten them out.
And if this band surface is not severely warped, 400 grit sandpaper all the way around will salvage the drum.
Check here for ring groove wear.
You can see the witness marks where the sealing rings for the pump go, but you should not be able to feel anything.
If you do, this drum has to be replaced.
All right.
So here's your stack.
So you got your Belleville style cushion plate.
And then this is going to be bottom steel.
Bottom steel should have witness marks on it.
I think it does, I guess there.
This clutch is rarely worn out.
Usually if you have a problem with slipping in reverse, no reverse, it's the low reverse clutch pack that's burnt because of that machine cut seal in the very inboard position on the piston gets hardened and will allow fluid to blow by.
I see that all the time whenever there's a no reverse condition.
And like I said, I would say 99 times out of 100, my personal experience is due to
The reverse piston's inboard-most sealing ring, or lip seal, rather, or machine-cut seal.
Yeah, there you go, third time's a charm.
Failing and getting hard and, you know, allowing all the blow-by.
All right, let's get this bearing out of the way.
And then we have our selective spacer.
Looks like we have a number 71 spacer.
If this drum goes back in and no other hard parts are replaced, I will likely need to put a number 72 spacer in.
And that will allow us to tighten up the front end play a little bit.
Before you disassemble this drum, we have to test it to make sure it's actually reusable.
Depending on how bad the 3-4 clutch is burned, that may inform me as to whether or not I decide to reuse it or just scrap it.
Check here too.
The reverse input clutch likes to wear deep grooves into these lugs.
And then check the splines.
I see these worn often.
A lot of times you'll get almost like a valley from here to here.
It'll be normal, but then everything in between, it's clearly either the splines themselves are thinner or the spline height is worn down.
Like I said, I'm not even going to bother looking at this until I have the opportunity to clean it off.
That's assuming that it's not already leaking where the drums press into the shaft.
Let me turn the air on.
We'll go ahead and test it.
And then I'll also punch out that piston in the 1-2 accumulator housing.
Okay.
We have a bench cleaned off a little bit, a little bit of fluid in the pocket.
So this is our 2-3 feed.
This is where I see most common leaks here at the base of the shaft.
What we're going to do is put air in here.
You don't need a whole ton of air.
50 psi is sufficient.
And we're going to look for bubbles here at the base of the shaft.
And if we see that, then we know that this drum is no good.
At least it cannot be reused as is.
Some guys will press the shaft out, put either Loctite high temp sealing compound or RTV, and reinstall the shaft.
And sometimes that fixes it, but I'm not a fan of doing that because I just have no confidence in it.
All right, it's over here so you can actually see.
So you're going to have to charge a circuit a few times before bubbles will appear.
And take your finger off the trigger, but keep the nozzle on the feed port.
Okay, I don't see any bubbles, which is a good thing, a good sign.
and his lug wear is very, very minor, very minimal.
I mean, like I said, I don't do my real inspection until after all the parts are cleaned, but so far, so good.
This is forward.
Okay, you don't need a ton of air.
See how air is staying trapped in that circuit?
That's perfect.
That's what you want.
When you go back together with it, you want that exact same result when you air check the drum dry.
Alright, now we're doing post clutch.
Always put your finger on the forward feed, otherwise air will come out of there.
Alright, this drum appears to be in good shape.
Let's see what we got going on here in the 3-4 clutch.
I already see a nice and toasty clutch pack.
Burnt to a crisp basically.
Okay, you're going to have load release springs in behind here and they're going to kind of want to fight you a little bit.
Put tension on the snap ring.
That's my design so that they can keep the 3-4 clutch from dragging while you're driving through first and second gear.
Alright, he said it was starting to slip in third.
And now we know why.
Alright, so...
When we see stuff like this, a lot of times it's just simply, you know, nature the beast, but...
Sometimes it's not.
Sometimes it's worn pressure regulator valve on those two intermediate lands.
Sometimes it's the drum leaking.
In this case, I don't believe that's the driver here.
Sometimes the third accumulator check ball capsule is leaking, though that's very rare.
Put these over here.
There's other 3.4 clutch pack, you know, failure causes or drivers, excessive clutch clearance, even from the factory.
Hey, these things are smoked, so I'll put another set in here.
When we go back to it, I like to run my clearances down to between 35 and 45 thou.
That is my preference.
Okay.
You can run a 4L65E spec clutch pack as well.
That gives you an extra 45.
lindered steels, they have that treat coating or what have you.
Okay, this has a lot of clearance in the forward clutch.
Okay, you can see that big gap.
All right, this looks like it's about 80,000 clearance.
Maybe more.
It should have no more than 63,000 clearance.
30,000 to 63,000, I believe is the spec.
Though if you're at like say 25,000, that's fine.
This clutch is always on.
It just can't drag when you're in either park or neutral or come on when you're trying to go in reverse.
You do obviously have a major problem.
So, let's see what we got.
So, this is going to be your coast clutch.
These steels look in good shape.
You can reuse steels in these transmissions other than the 3-4 clutch pack.
I would never reuse those.
But, like, if the steels coming out of your unit look like this, they can go right back in.
They're in perfect shape.
Okay, friction's a little bit of heat that I can see here through the fluid.
Little bit, but, again, nothing outside the ordinary.
You never reuse clutches.
A lot of flat rate shops will put things like forward and coast clutches right back into a transmission to avoid spending the money on the clutch module.
And unfortunately, customers aren't aware of that.
A lot of customers fall victim.
to the, um, you know, the siren song of very low rebuild prices as advertised.
I see that a lot on Facebook where, um, you know, people will be looking for total rebuilds, at least in their mind, total rebuilds and not want to spend more than like 800 bucks, thousand bucks.
And these flat rate shops are meeting that demand.
Okay.
BorgWarner clutch.
These look okay.
We'll have to do something about the clearance.
This backing plate is selective.
There's like four or five different thicknesses available.
So this one's probably a little too thin.
I will get a thicker one.
So yeah, just be aware of that.
You know, you don't want to be thinking you're getting a complete total overhaul.
like eight or nine hundred bucks because i'm sorry that's just not realistic unless you have a friend in the business if somebody says yeah i'll do it for 800 bucks it's your cousin or you know a good personal friend you know something like that or maybe somebody owes you a favor then maybe they're just gonna kind of comp the labor for you and just charge you the parts because the parts alone are going to be around 1100 bucks for
do a proper overhaul if you don't then yeah there'll be less like see this sprag this thing's wore out i could tell um hard to describe it but like a new one would look nothing or feel nothing like this one i don't know um i don't really have the right words to describe what i'm you know feeling there but just take my word for it and always replace your forward sprags
Okay, the new sprags will come with these retainers for the front and the rear of the sprag.
And then you want to check this race once I finally get this damn thing off.
You want to check the race itself.
Make sure it's mirror-y smooth.
If it's grooved, there's scoring in it, just dump it, get another.
Those bushings will be replaced for your outer race.
You want to see cross-hatching here.
320 grit sandpaper is what I've been using lately.
It's a little bit more effective than 400 for reintroducing the cross-hatching.
So, you know...
400 is fine as well, but I prefer 320.
Alright, 3-4 backing and pressure plates.
Let me just real quick come back.
Don't ever reuse plates that look like these.
Alright, these are scorched.
The metal is compromised.
They may break apart if they go back in.
And you'll be doing this again.
So, all that crap is going into the scrap bin.
Same with this, same with these.
Alright, your Coast Clutch hub, check around here, make sure there's no cracking.
This has some scoring, as you can see.
I'm probably going to replace this too.
Scrap bin.
Alright, let's real quick circle back to the accumulator.
So accumulator has two springs, and it looks like we got a broken spring, so this would explain a very harsh one-two shift, which I think he did sight, now that I'm recalling.
So anyway.
This is a second design housing.
We'll replace this with an aluminum piston.
And I have plenty of these springs, so I'll just give them an inner spring.
It's usually the outer spring that breaks, but you will have issues sometimes with the inner spring.
right so that's the story with the drums i know i still have uh guts inside that uh forward clutch drum if there's time at the end of the video i'll pull that stuff out and we can look at that if you have a lot of hissing coming from your forward piston when you do the pressure test then really scrutinize the inner diameter of the forward piston housing
I've seen those just simply worn.
And if that's what you have, especially when you go and air test that thing, when you put it, you know, you're going back with it, and you hear that kind of faint hissing sound coming from the draw, that's a telltale sign that that forward piston housing is worn out.
All right, we have a snap on there that requires 90 degree pliers.
And we'll grab those.
So this is what you want for this snap ring and the low reverse clutch snap ring.
So it looks like it's roughly the nine o'clock position relative to the top of the case.
Alright, for whatever reason I'm actually better with these in my right hand.
Alright, planet.
So front planets, this captured bearing can fail.
I've seen it more times than I can count, more times than I can recall.
So the telltale sign that this is collapsed or this bearing has failed or that bearing that goes in the pocket there on the forward drum is that you have like a quarter inch worth of end play.
Both the output shaft and the input shaft will move about that distance.
So if you're shopping for a used transmission, which I never recommend you do, okay, check these lines, check the structure, check here for heat, especially in, you know, massive 3-4 clutch failure.
You want to check here for heat soaking or bluing or whatever.
But yeah, I would never recommend you buy a used transmission.
All too many people are trying to do that these days.
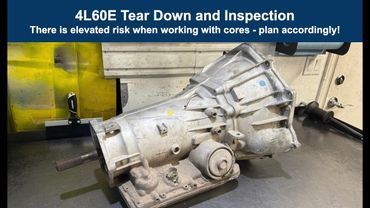
Yeah, I get it's cheaper, but you're taking on a lot of
intermediate near to intermediate term risk for you know just to save a few bucks versus a proper overall i mean if you do the break-even analysis on it you're going to be upside down like the break-even curve if you will in terms of the timeline will be inverted where you're being you're going to be paying a lot more
to remediate the situation in the very near future compared to if you would have invested the money in a good rebuilt transmission or a quality remanufactured transmission, which there's not many available.
All right, check here.
Check splines, the reaction shaft, O3 and up.
These changed.
They took a bearing here.
All right, check in here.
All right, you see you have the beginnings of spline wear.
All right, this is borderline.
I'll have to really scrutinize it, but more than likely I'm going to have him replace that.
Check the lugs here for teeth wear, the 3-4 clutch.
This is the 3-4 clutch hub.
All right, we're seeing a little bit here.
You see the chatter, you know, the witness marks.
So again, both of those things will have to be carefully scrutinized and, if necessary, replaced.
All right, here's our sunshell and our washer for our inner race and the center support.
Sometimes that's broken.
No big deal.
Put another one in.
You want to understand why it broke.
This is, I think, a heat-treated shell.
Let me see.
Let me see.
Maybe it is, maybe it isn't.
I don't know.
I mean, sunshows get replaced.
This one superficially appears to be fine.
What usually happens is the splines will strip where the neck will separate from the body and you'll have no second, fourth gear or reverse.
All right, center support and sun gear.
Let me grab that sun gear real quick.
Get it with my hands.
I don't think that's going to happen.
My hands are so slippery and these gloves offer no dexterity.
So before I start messing with the support, I want to get that sun gear out of there.
This bushing will walk on you.
Okay.
As you can see, it's already kind of moving around.
A wide rear sun gear bushing is a good move.
Sonics makes it.
It's like $6 to $8, wherever you get your parts, maybe $10 at most, and it's a good investment to prevent that from happening.
So I've been doing that most, if not all, of my 700s and 4L60Es.
Okay, center support.
Let's see if we can get this snap ring out of here.
Alright, I'm gonna try a technique that one of my viewers, Larry, has shared with me, and what that involves is taking snap ring pliers, you come in with the snap ring pliers, and you basically look for your anti-clunk spring, which is gonna be right here, and you basically collapse the spring
then put air in the low reverse feed passage and then that will force everything including the center support forward past the anti-flunk spring sometimes it works sometimes it doesn't so we're going to try that all right let me get my air ready all right we got air ready and i'll put pliers
I think it may have worked on this one.
Yeah.
So that's how you get the center support past the clunk spring without a lot of drama associated with banging on the output shaft.
So here's your top friction and the steel.
Check this surface.
This freewheels clockwise, locks counterclockwise.
This is the little roller clutch.
Not a high rate failure item, to be honest.
I mean, I always replace them just because, you know, if it does fail, I could show the customer and say, hey, here is the little roller clutch.
The parts receipt shows, plus my picture of me installing it.
And the customer can see that that's what happened.
So then it's like, it's not so much a bad judgment call on the rebuilder, it's a manufacturer parts defect and kind of, you know, shit happens.
So again, more risk mitigation tips for you.
You know, part selection, build strategy is so crucial when it comes to transmission rebuilding.
You want to make sure that you're mitigating your risk appropriately.
And the risk you're really mitigating is the risk that the unit comes back to you because of something you either did or didn't do.
You know, an unforced error, so to speak.
Okay, check this surface here.
Make sure it's nice and smooth.
If it's not, replace the race.
I install a lot of Sonic Smart Shells.
They come with their own race.
So I have a whole cocoon of good use races in my inventory that I can... that I can swap in if need be.
I'm using like two different freaking hammers to get this thing out.
ring gear.
Sometimes the ring gear and the output shaft will kind of be, you know, hard and fast together here on the splines.
It's actually a good thing.
If it's too loose, then you'll have issues.
So for example, on your front planet, you want to check the relationship.
Okay, this is normal.
Those splines won't strip.
You know, as long as nothing crazy happens, no lubrication failures.
Okay, the front planet will be a little bit looser than the rear.
I'm sorry, what am I doing?
Ring gear, not planet, ring gear for the rear.
All right, we have our bearing.
Let's try that again.
There's another bearing here.
That's going to be your case thrust bearing.
Okay, that feels good.
If you have play, replace either the ring gear and or the output shaft.
Check these splines.
Again, hard to tell what fluid.
You may have some witness marks or you may have genuine wear there.
I'm hoping it's just witness marks.
I say I'm hoping because I really don't like to have situations where customers have to pay all extra money for hard parts.
I mean, I've never had somebody abandon a job because they needed one or two extra parts, but you know, you may have customers that are kind of right on the edge with respect to their budget, and that transmission needs a whole ton of parts.
Then, you know, they may be in kind of a pickle.
The other thing to consider is if you have, you know, you have a grenade job where, you know, it's going to cost a customer another four, five, six hundred bucks just to replace parts individually, it's best to just go get another core and start over with that core.
Between two bad transmissions, you may be able to make one good unit.
So here's the anti-clump spring.
This sometimes gets bent, and that will really, you know, that will really complicate your attempts to get the center support out.
You know, really fighting with it, and it will be very stubborn.
It will not wanna come out.
All right, I gotta get that stupid thing out, and then I have to position and set up my,
low reverse piston compressor, you know, return spring compressor tool so I can get that out and punch the piston out with shop air.
So let me do that and then we'll resume.
Alright, I have the tool in position.
I got rid of that band anchor.
We'll look at the pin location in a minute, but here is where the two ends of the snap ring are.
Depending on what unit you're working with, this can go real easy or it can, you know, be a pain in the ass.
And it seems like it literally goes by case by case.
Alright, that one was really easy.
Alright, the one that I have on the channel that No Force Mysterium stumped, that thing was fighting me tooth and nail.
Okay, if you're wondering where I got this tool, it was made by an eBay company called Transmission Jobber Supply.
It's actually very well made.
They also made my three-legged clutch spring compressor.
So...
If the return spring assembly doesn't want to come out on its own, just take something long, it could be the output shift, it could be something like this or a screwdriver, and smack it a few times and it'll come right out.
Alright, same spot as far as where you want to put air for low reverse piston as we did when we took the center support loose.
pop the piston right out for you.
Sometimes the piston will get hung up.
If this machine cut seal here is hardened, then more often than not, it won't actually pop out because that stupid seal there will hang it up.
And that gets real frustrating because you're fighting with it.
And I occasionally will have to come with two very long pair of pliers to get the damn thing out.
Alright, these obviously come in the overhaul kit.
Do not ever reuse these seals because they will harden.
It's not a matter of if, it's a matter of when.
And it goes for all, you know, soft parts.
Okay, so if this number was 725, these last three digits here, we'd have to replace this.
ATSG manual has a blurb about it in their 4L60E manual.
Alright, so check here, make sure there's no wear in the accumulator piston bore.
Same with the servo, you're going to check.
Okay, check the inside of the band anchor pin location as well.
And then for your third accumulator check ball capsule, it's gonna be right here.
When this case is clean, what you're gonna do is you're gonna pour some fluid in here.
I like to use a solution that consists mostly of acetone with a little bit of transmission fluid mixed in it for color.
and you're going to see with the case literally positioned just like this, you're going to look for leakage here.
If you do see leakage, spray brake cleaner into this cavity here and then take a drift punch and tap on it smartly with the hammer.
That will a lot of times reseat and reform the bottom of the capsule and that will fix this from leaking or stop it from leaking, I should say.
Check threads for a case to pump or pump the case.
Now is the time to do your helicoil repairs if you need to, same with bell housing, same with valve body and pan bolts.
Pan bolts are most often what I see stripped.
And sometimes if you don't deliberately check, you won't notice until you're about to bolt the pan back on and ask me how I know.
All right.
700R4s always use a 4L60E Viton.
I would also retro the bonded pistons into all 700R4 transmissions.
I do.
You'll want to use this return spring.
This is the dual retainer style.
Other than that, there's nothing different you have to do.
Unless you're running the Sonics
drum reinforcement kit they have their own piston that they have you install and you won't be able to install the coast clutch piston you know the bond coast clutch piston you will swap that piston for the sonics piston all right let me back this out so we can kind of summarize what we found
All right, I think that's good.
So all in all, fairly clean, at least so far.
Like I said, I won't be doing any real inspections until I have all this stuff cleaned off.
But what we found so far matches what the customer has reported to us in terms of drivability symptoms.
The slipping in third gear was, well, burnt 3.4 clutch pack.
No identified driver or proximate cause for that yet.
I may not find that until I test the pressure regulator valve on the vac test machine once the stator support is all cleaned off and we can see if there is impairment there or if we have sealing integrity issues at that intermediate land or two lands.
We'll also check the third accumulator check ball capsule just like I described.
Valve body will get its usual updates.
The hard parts for the rest of the case appear to be in good shape.
The drum appears to be okay for now.
I mean the forward drum, the reverse drum, same deal.
Like I said, we won't know for sure until I have everything cleaned off.
Broken accumulator spring, we'll just put a new inner spring in there or a replacement one, no big deal.
Spacer plate will need to be repaired.
and then a complete overhaul will follow.
So, as always, if you have any questions or comments, go ahead and leave them below.
If there's anything else you want me to see or want me to feature in these 4L60Es, I do them all the time, obviously.
Go ahead and leave a suggestion for a video, and I will accommodate it as soon as I can at the earliest possible opportunity.
Until then, guys, thanks so much for watching.
As always, greatly appreciate it.
If you're new to the channel, please subscribe.
Subscribing helps the algorithm, and it helps me produce more content for you guys, so it's kind of like a
you know, win-win for everybody.
All right.
Thanks again.
Talk to you soon.
Until then, have a great rest of your day or evening, and I look forward to seeing you in the next one.
Similar videos: Teardown and Inspection
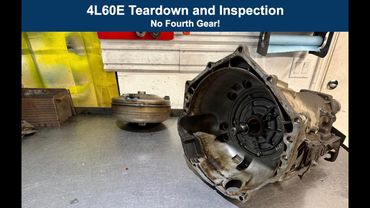
4L60E Teardown and Inspection - No Fourth Gear: I'm Stumped!
4L60E Teardown - Smoked Forward Clutch!
4L60E Teardown and Inspection - 5.7 Small Block Chevy Engine
4L60E Teardown and Inspection - The Frankenstein Monster!
700R4 Teardown and Inspection
