The IMPOSSIBLE PC - 4x dual radiator ITX build
Download information and video details for The IMPOSSIBLE PC - 4x dual radiator ITX build
Uploader:
Linus Tech TipsPublished at:
6/23/2021Views:
2.4MDescription:
Video Transcription
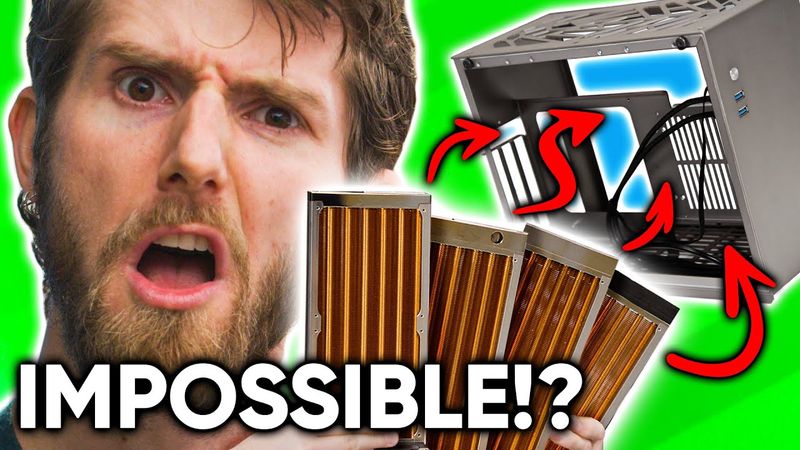
Four dual fan radiators is more than enough cooling for even the most powerful gaming systems today.
But who can afford both the kind of monstrous case that can hold them and the team of people required to move it around?
That
That's where you come in.
You wanna be a star?
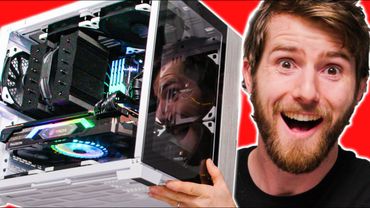
By the time this video is over, this tiny $80 mini ITX case that I've never even heard of before is gonna have four RADs, a 12-core CPU, and an RX 6900 XT crammed in it, all for your viewing pleasure.
I promise this is not gonna be easy.
But telling you about our sponsor is easy.
Antlion Audio makes the ModMic wireless microphone that delivers best in class audio quality, 12 plus hours of battery life, and it magnetically mounts to almost any headphones.
Get 15% off the ModMic wireless and other ModMic products at the link below.
In late 2020, Intel China sponsored a contest that all the large tech creators on Billy Billy got involved in making cool builds and some crazy mods in the Vector One case.
And after seeing King of Wings impossible quad radiator build, we had to do it for ourselves.
So King of Wings sent us not only a case, but also some of the
a very specialty hardware that he knew that we'd need to make a Western clone of his Chinese design and see if it can hold up to the worst abuse we can put it through.
Did that just cut me?
Of course, we don't wanna build exactly the same computer.
So since we're not sponsored by Intel, we're gonna be building an all AMD machine, starting with an upside down CPU install.
Oh yeah, I don't need that gravity for that.
There we go.
Now, most elements of this build are pretty bog standard.
So I don't wanna spend a ton of time talking about the Gigabyte Aorus X570 ITX motherboard or the Samsung 980 Pro SSD or the Crucial Ballistics DDR4 memory or what have you, because the big focus for me today is the case.
The base version of this puppy only has acrylic side panels.
So if you want metal ones, like the ones that we've got, they're gonna cost you an extra $20.
And considering how much of the overall case material would be the side panels, that's actually quite reasonable.
In fact, I'd say the pricing is really reasonable overall.
These kinds of niche small form factor cases tend to go for 200, 300, even 400 plus dollars.
So why is it so cheap?
Well, Andy informed me that cases like these are in very high demand in China, where a lot of university students will need a good PC for their work or, well, to game on, but they might not have a ton of space in their rooms.
Of course, though, space savings without adequate cooling is worthless.
Let's talk water cooling.
Our finished build will have plenty of room around the CPU.
So we've gone with the beautiful, but otherwise pretty conventional EK velocity strike RGB.
What we need to do first is get two of these Kaze 1212 crazy slim 120 millimeter fans installed in the bottom of the case.
So paying particular attention to our cable orientation, we're gonna get them over on the motherboard side.
We're gonna use these as intakes, both for the case itself and to cool the radiator that is going to be in the bottom of the case.
Now you might look at this and go, gee Linus,
You can barely get a fan in there.
How are you gonna get a radiator?
Well, we're gonna cheat.
We're gonna use this one and we're gonna put it here.
And then we're gonna use the fittings we put in it as feet.
Oh my God.
This just rubs on the bottom of the case.
Okay, I think I have a solution.
We'll just use the anti-vibration pads that are included with the fan.
Let's see if that does it.
Yeah, that does it.
Jeez.
Okay.
What this also means is I think I can just go ahead and use regular fan screws on this because as long as they've got a nice flat head on them, they shouldn't interfere with mounting the rad.
As long as they don't...
cause it to rub.
Are you kidding me?
Screwing it in is all it takes to make the blades rub.
That's fine, I don't even care.
I got anti-vibration things for days.
Here, why don't we use some of these OG orange ones?
I would not recommend trying this at home.
The odds that your build will end up delayed for three weeks by some stupid part you don't have on hand seems very high.
Okay, yeah, it's in.
Let's just make sure the gravity of turning it now like this doesn't cause it to rub.
Oh, you piece of crap.
Don't even think about it.
It is too.
Okay.
That's okay.
We have a solution to this problem.
Here we go, ladies and gentlemen.
I am going to take this screwdriver and I'm just gonna go like this.
Perfect.
We're using a very loose definition of installed when we talk about fans being on the radiators here.
These are not the same size.
They're not right up against it.
They're not actually mounted to the radiator, because, hold on, where'd it go?
There it is.
Goes in.
a little something like this so we get these two nubbins that's an issue we had before getting the fittings to actually seal when there's sheet metal in the way and then the fans just kind of you know they just kind of sit here oh uh hello oh are you kidding me okay that's fine i have an idea i'm gonna use washers okay it wasn't clean enough we gotta make the build cleaner
That's all we needed.
Just this much.
Fantastic.
Get it?
Okay, cool.
We've got both of them in.
They both spin freely, thanks to using both the rubber grommet things and washers on both of them.
Perfect, a mint.
Now,
We just gotta put this on here because otherwise cables are gonna get stuck in it.
There we go.
Absolutely flawless victory.
Now we can pop these little extensions, which are gonna help our fitting seal through the holes that we made in the case.
There we go.
Now we didn't quite get the holes perfectly lined up, but we can get at least six screws into the radiator, which is lots.
Now we can move on to the power supply.
And there's a couple of cool stories here.
This is a pretty special power supply.
It's fully modular.
It's SFX.
Look how small this thing is.
And it's 850 Watts with an 80 plus gold efficiency rating.
It's uniqueness is why we had to wait like how many months to get it?
like two and a half months to get it, because there's kind of a global shortage right now.
But it's the only way to get the kind of power that we're gonna need for these components in such a small enclosure.
My second cool Storybro moment is about this bracket.
Now by default, there's actually kind of an overhang here.
It comes out a little bit, but in order to get this radiator mounted next to it, where we're actually using this fan as an intake for the rad, we had to shave that down.
One pro tip, I would strongly recommend installing the modular cables before you screw in the power supply, because otherwise it's kind of hard to get your fingers in there.
Another pro tip for you, make sure that the EPS connector goes into the far right eight pin socket.
Otherwise it's not gonna reach all the way over there.
Jeez.
I swear to you guys, everything about this build is unconventional.
We've barely even started and now we're putting in the graphics card already.
So we take our PCI express riser, plug that bad boy.
Right into the PCIe slot right there.
And then we've got two screws.
There we go.
We're gonna put it right there.
Oh, gorgeous.
For our GPU, we've gone full sex appeal, ladies and gentlemen.
That's right.
We've gone RX 6900 XT.
Nice.
You know, cable management doesn't even look that bad yet.
It will.
The idea here is that we're configuring both the top and bottom radiators as intakes.
So we're gonna have positive air pressure inside the case.
And I guess if we were smart, we'd put an air filter on it or something like that, but we didn't think of that.
with the whole assembly put together.
So this bracket comes pre-installed in the case.
Take the whole thing and wow, the clearance between this fan on this radiator and the IO over there, like boy.
By the way, this is what's known as a five head move.
God, that looks so good.
Love copper rads.
There's no actual benefit to using copper for the fins.
It just looks so cool.
Fun fact, copper conducts heat better than aluminum, but aluminum dissipates it to the surrounding air better.
What?
Okay, so now's probably a good time to start figuring out some of this fittings situation.
Good Lord, I can't believe we're putting two more radiators in this.
Now, normally I like to use compression fittings for my water cooling.
They are more secure and in my opinion, they look better.
But they also take up marginally more space than a barbed fitting.
And in a build like this, every cubic millimeter matters.
Oh yeah, look at that.
No problem.
Now this is a funny one.
Normally, if you use a right angle, it's really nice to have a rotary one like this that has an O-ring internally so you can kind of spin it around to whatever direction works.
But yeah, we can't do that.
For the CPU, in order to have enough room for the radiator to sit next to it, we really did need that extra few millimeters.
So we're going with fixed 90 degree fittings.
Got to get this exactly right, because we can't really have any play in this puppy.
All right, hey, that's not bad.
Not bad at all.
Oh, wait, we have a zip tie cutter.
What am I using scissors for?
Like a pleb.
This better be the greatest zip tie cutting experience I've ever had in my life.
Oh, no.
Now you guys thought this build was interesting already, right?
Now it gets interesting because this radiator has to mount to these slots on the side panel and close somehow with the tubing attached.
So we can't put fans on it because there's no clearance between the CPU block and this side.
And basically it seems like we're just gonna have to kind of wing dang doodle it.
done runs this short but never in an environment like this like never with a curve in it and i'm going to try something that i've never done before i'm actually going to intentionally cut the tubing at an angle to see if that helps me get it in a little bit more easily okay ha it's perfect it's actually perfect which is amazing because i was not expecting that but it gets better because now we got to do this
See this GPU here?
It's gotta connect to that other fitting way over there.
Oh my God.
Oh my God.
Oh yeah.
Look at that.
Got the cooling.
Can't be cool without cooling.
So what you do is you just screw it into the panel.
You punch through and screw in the radiator and then it's closed.
Yeah.
GPU is now half plumbed and the whole rest of this look at this we can see the finish line ladies and gentlemen Except that there's one more obstacle That's right.
We got to put another radiator in we're working on fan power right now And I used a total of four Y splitters to get a total of six connectors off of the two fan headers on the motherboard Then we're gonna use that SATA power connector to run the pump.
That's the plan
There's a small problem though, and that is that this creates so much cable bulk that we're gonna need another fan grill just to make sure this fan actually spins.
Except that we had to screw this fan into this 140 millimeter adapter, and now the screws, they're not gonna, you can't screw it in from both sides because the fan is so skinny.
It's a little skinny chicken fan, that's it.
That's as far as it goes.
That's okay though, because we are clean boys.
And the answer is more washers.
There you go.
Three quarter inch machine screws and these nuts.
Got that on there real good.
And, see?
Yeah, no clearance issues with that solved.
Now I got a little trick to show you.
We're gonna take, that's right, this here 90 degree.
And instead of screwing it into a hose barb, we're actually gonna screw it into a quick release.
Oh, now it's getting real interesting.
Cause you guys are probably thinking, gee Linus, where's your reservoir?
I don't have one.
We do have a problem though.
Right now, I don't see any way to get our tubing from here to here.
It's too short.
Like that basically lines right up, which wouldn't be an issue except that I can't get my hands in there to like screw anything together.
This is quite possibly the dumbest thing I've ever seen.
Like that's the actual answer.
You know, like that's not, that's not an answer.
That's a, that's an abomination.
Okay.
It's an efficient abomination.
I'm not sure if this is a good idea or not, but hear me out.
We take a 45 degree fitting.
Okay.
See, like that.
And then we like angle the tubing over there a bit.
So it has a bit more clearance.
It's in.
It's actually in.
I got to plug in these fans still, do a little bit of cable management, but it's in.
It's time, ladies and gentlemen.
It's time to find out if she leaks.
This is a little disconcerting.
Even with a DDC+, this flow rate is not very fast with all these slimline radiators in here.
Do, do, do, do, do, do, do.
This is a lot of water for a small form factor system.
That's it, we're bled.
So this is where things get really cool.
We're gonna take this quick connect and go pop.
And then we're gonna take this quick connect and we're gonna go up, up, up, pop.
And this goes right on here.
and the loop is now full, no air bubbles.
I feel like on a build like this, it would be extremely bad GBs to not post test it before we close the panels.
Let's go ahead and do that now.
Here it goes.
That's a lot more bubbles than I was expecting given that the loop was pre bled.
Please output.
Anytime you're ready.
Yes!
Oh my god!
Okay.
Hold on, we're not out of the woods yet here, ladies and gentlemen.
I'm gonna make sure all the fans are spinning.
Yes, yes.
Yes.
Yes.
These ones, I actually have no idea how I'll access.
I'm not gonna try and move it at this point.
I think, surely they're spinning.
Okay.
Whew.
I mean, there must be.
We're gonna, yeah, we're gonna.
Frickin' A, man.
All right.
So we need a, we need a drill.
Three hands.
We've got enough layers.
We need more hands up.
Where'd it go?
Well, the system didn't reboot, which means we didn't short it out.
That's good.
Let's turn it off real quick.
Here we go.
This is the last thing.
As long as this goes on, we are done.
Oh my God.
Look at that case.
It's just so tiny.
It's fricking heavy.
This is dense with two S's.
D-E-N-S-S. Red, visible, no matter how you look at it.
Like just look, like it just has, it just has so much inertia.
You know, the funny thing is now that it's done, it really doesn't look that small.
There we go.
That's more like it.
So one thing that is undeniably big about this system, even if it is pretty small, is the cooling potential.
We have a whopping 32 threads of smallest FFT running in Prime95 here.
We've got Furmark running at 3440 by 1440.
And with this thing running for the last, what, hour, hour and a half?
We have peaked at 86 degrees on the CPU.
That is a mere 73 degrees on the die.
Oh no, 77, 77 on the die.
And our GPU maxed at 60 degrees.
And the best part of this is, oh, just about tripped over the tripod.
I don't even think we've got it configured in the most optimal way here because with cool air being drawn in the bottom and the top and hot air radiating out of the sides like this, we actually end up with it rising like you can feel this sphere of heat around the system and you can actually feel the intake on this rad.
It's not very cool.
So to go back and do it again, what I probably would do is go intake at the bottom
intake on this side.
Remember, that's where we've got the dual 140 millimeter rad that's acting as an exhaust right now.
So I'd go intake on this side, then I'd go exhaust here and passive exhaust out this side and see if that ends up a little bit better.
That would put hotter air right around the motherboard though.
So no, cause the bottom would be an intake.
Should be fine-ish, maybe, I hope.
I don't know.
Point is, it freaking works.
Let's play some vidya games.
4K ultra nightmare everything motion blur off.
Sound good?
Oh, let's turn HDR on.
Yeah, I'm really, really impressed.
King of Wing.
King of Wing designs a pretty sick system.
Shout out to King of Wing.
Shout out to our viewers on billybilly.com.
Blah, blah.
See you later, buddy.
What are we getting?
200 FPS?
I mean, yes, this game runs on a toaster, but not at 200 FPS.
It's freaking awesome.
This system is freaking cool.
It's so cool.
And it's barely even like hot like it was before when you're just playing games.
God, it's so cool.
One big problem is that the adhesive does not stick on these nubbins on the radiator down here.
Just, especially when it gets warm, it just comes right off.
But that's okay.
Because if you were a discerning buyer, you'd be buying from like Puget Systems or
origin or something.
So there it is, lttstore.com, the one and only king of wing Linus clone edition.
Brought to you by our sponsor.
Grammarly is the digital writing assistant that there is just no excuse not to use.
They help you with your grammar and with spelling suggestions and all you gotta do is install the browser extension, log in and start typing.
There's also Grammarly Premium, which provides more in-depth feedback on your writing and has advanced features to help you feel more confident in your writing and save you time.
We recommend checking out the vocabulary and clarity suggestion tools.
They help you make your writing more compelling by finding synonyms for any overused words and completely removing unnecessary words and sentences.
These features make it super easy for any job hunter to save time and make a great first impression on every application or introductory email.
A few people on our business team actually use Grammarly to help make their workflow more efficient when they're working on important emails and documents.
So don't wait, go to grammarly.com slash LTT to sign up for a free account or sign up for Grammarly premium and get 20% off.
There's just no excuse to have your emails and everything else that you write not be good anymore now that Grammarly exists.
If you guys are looking for another video to watch, maybe check out our craziest cooling project ever.
It's a ride.
I mean, if you enjoyed this video and made it this far, you'll like it though.