Tutorial: Quick Smooth Camera Movements in Blender
Download information and video details for Tutorial: Quick Smooth Camera Movements in Blender
Uploader:
PolyfjordPublished at:
3/10/2020Views:
2MDescription:
Video Transcription
Hello, my name is Asbjørn and today we are going to make really smooth camera movements ridiculously fast.
So we are gonna be animating our camera in real time just by recording our camera movement and then smoothing the keyframes.
I've been doing this for almost all my projects recently.
It's such a nice way to just rapidly prototype your scenes.
So select your camera, go to view,
Cameras, active camera.
The hotkey for this is numpad zero.
So you can scroll to make it full screen and right click, camera lens angle, and then let's do 20 millimeter.
There we go.
And now we have a wide angle camera.
So we wanna just look around and move using WASD.
So go to view, navigation, walk navigation.
Now you can look around with your cursor, you can move around using WASD, you can move up and down using Q and E, and you can press G to turn on gravity.
Right click to cancel, and let's set up a hotkey for this.
So view, navigation, and when you hover your mouse over walk navigation, right click and go assign shortcut.
And I wanna do Shift F, just, I mean it was the old hotkey, so.
Shift F. Now when you press Shift F, you can look around.
So, how do we record this?
Well, press Auto Keying, press Space, and then you press your custom hotkey, which is Shift F, and then you can move around, and you're making keyframes.
Let's take a look at this in the Graph Editor, because that's really cool.
Right click down here, and go to Vertical Split, and split the viewport in half, and set this right panel to Graph Editor.
And let me show you, these will show up in real time.
It's really cool.
So press space and then shift F. And when you're moving around, we are drawing key frames in real time at whatever frame rate you're on.
so these keyframes aren't exactly really smooth so go to key smooth keys and they just get smoother but if you see here we didn't record any keyframes here so it's not really possible to make it smooth
So what you can do is you go to key, sample keyframes, and it will create keyframe where you didn't have one.
So to fill the gaps, just use sample keyframes.
That's the trick.
And now you basically know everything about this method.
Let me show you.
Delete everything.
Space, shift F, move around.
Let's do 360 degrees.
Let's move around like this.
And there.
Let's stop it there.
select all your keyframes they are selected by default go to key sample keyframes so shift alt o and then alt o look at that you can just hold alt o 37 times it just goes automatically and then it becomes really smooth look at that
Okay, cool.
One last trick until we're ready to go to an advanced scene.
So, delete the keyframes, press space, shift F, let's move around, up and down,
zoom in zoom out and to make the start be a lot smoother go to the first keyframe press I for insert and press available now we have a keyframe at beginning you might see where I'm going with this so let's go to 180 frames press I and select available so now we have keyframes at the edges too so when you press shift alt o for sample keyframes you get keyframes all the way to the beginning and to the end so now you can just hold alt o again
34 times and when you look at the animation it starts really smoothly
And this is just really powerful.
I mean, look at all the times we have just deleted all the key frames and we're just making stuff.
It's such a powerful tool.
So let's take a look at this in a more advanced scene.
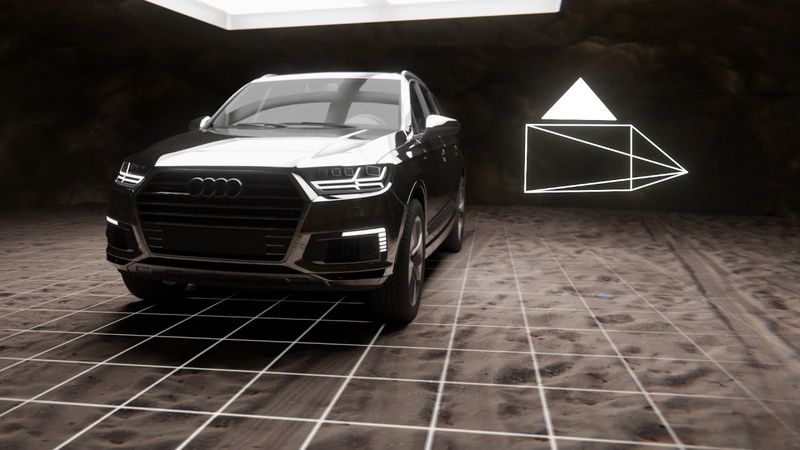
Here I have a car and this is not sponsored by Audi.
I just, this is just an amazing looking vehicle, okay?
So I made a cave using some textures linked below.
They're free, Creative Commons zero.
So this car is in a cave and I've set up my camera here.
By the way, to make it cinemascope you can go output properties and set the resolution to something more scopey.
So select the camera in the outlander.
Let's go shift F and let's just move around and see what this scene looks like.
I'm not recording right now I'm just looking and when I'm walking around you can see I'm getting awfully close to the ground and I don't want that I want this to be like a Steadicam operator that is 170 centimeters tall or so what you can do you can press G and it's going to follow the ground and you can press V to jump and
And this is really powerful because now we have a walking cameraman in the cave with a really expensive car.
So let's just back out here.
Okay, I want to start.
Okay, so I want to start here.
Yeah, I want to start here.
So turn on auto keying.
Press space and press shift F and then press G. Now we have turned on gravity and we're looking with our camera.
So let's move into the car.
See, go forward, go around a little bit.
go that's slow and steady let's pause here for a second let's go fast and then let's see the logo and then let's go back okay i i think i just made it yeah okay we're good let's see what it looks like when it's not smooth
There we go.
Holds up a little bit there.
Okay, nice.
So let's split the viewport.
Right click down here, go to vertical split and set it to graph editor.
And here are our keyframes.
Let's go to the first keyframe.
Make sure the camera is selected.
Press I and insert available.
And then to the last keyframe.
Well, we're almost at the last, but anyways, 23 seconds.
Press I and select available.
And now let's go Shift-Alt-O for sampling and then just hold Alt-O.
So I'm gonna hold it for a little bit.
Let's do, I have my screencast keys so you can see, okay, 88.
It's probably a lot, but let's take a look.
So it starts slow.
think that's really cool I mean this is so little work to just get smooth movement and it takes so little time yeah so it stops a little bit too soon you know what let's just extend the animation and let's make a new keyframe last frame insert available and let's just smooth it a little bit more so now at the end oh I forgot to add a sample yeah so smooth a little bit more
Yeah, and you know if you want to do another version of this, just delete everything and it's going to take you 23 seconds and 19 frames to record a new animation.
And once you're getting used to doing the sample keyframes and smooth keyframes, that's a couple of seconds in addition to the recording of the movement itself.
So I hope you see the value in this workflow and at least try it out.
It requires no specs.
It works with all render engines.
You can do this in Blender, export the camera to Alembic and export it to any other software.
It's just such a powerful way to animate the camera.
So I'm going to show you some of the work that I've done with this now and you can let me know what you think and subscribe if you want to see more.
Thank you.
Thank you.
So if you're still here, here's something that's so dumb, it might actually work.
Take a picture of a Steadicam operator, make a cutout and parent it to the camera.
So when you move around, it will follow the camera.
And then in the reflection of the car paint, you can see this subtle, just glimpse of technology.
Which might be enough to throw your viewer off.
Is this real?
Is this a render?
So this is really stupid and you probably shouldn't do it.
Thanks for watching.
Similar videos: Tutorial
Blender урок для абсолютных новичков. Часть 3: Материалы и UV
Как легко анимировать все в Blender, используя Shape Keys

Silky Smooth Rotations - Animation in Blender
Creating CGI Ads and VFX videos in Blender is Easy | Blender tutorial
Tone Tutorial: Skillet - Whispers In The Dark 🎸