Wireless Pods Blender Animation Tutorial | Polygon Runway

Download information and video details for Wireless Pods Blender Animation Tutorial | Polygon Runway
Uploader:
Polygon RunwayPublished at:
1/14/2025Views:
133.2KDescription:
Video Transcription
Hey everyone welcome to my new tutorial.
Today we are going to create this cool product animation and I really hope you will enjoy this one and if you do please don't forget to leave that like and if you're new around here hit that subscribe.
Now let's jump right into empty blender file and first of all let's select the light press x and delete and we'll actually use the cube here so let's select it and let's press ctrl 2 to add subdivision surface modifier
and let's scale it down a little bit so press s and scale it down because this is two meters wide which is quite a lot for an earphone but i won't be doing like an exact proportions here i just want to make it a little bit smaller like this okay now let's press ctrl a and apply the scale and now before we tap into the edit mode let's go to the modifiers panel and let's apply that subdivision modifier and let's tap into the edit mode now press s then y and scale it on y axis
to create that shape maybe a little bit more like this i think that'll be okay now let's look from the front by pressing one on a numpad and let's select this vertex right here and press o to enable proportional editing right here and press g then x and start moving it and then reduce the fall of radius if it's too large with the mouse wheel
And let's create a shape like this.
Now let's press O to disable the proportional editing and let's enable X-ray view.
Let's select those vertices right here.
You will see it selected on the other side as well.
Press G then X and move it slightly back so it doesn't get in the way.
And now press K for a knife tool.
Click here and press A for angle snap and C to enable cut through.
And you can see it enabled right here.
so now let's just click here and confirm with enter and now we can select all of these vertices here press x and delete those alt click this loop and press f to fill now let's modify the shape even further so press g then x and move it outside a little bit so we get more of this like a raindrop shape and now we want to extrude um the rest of the shape
I will go like this here.
If you feel like this is too fast for you or you don't understand some core concepts, make sure to check out my courses.
I carefully designed them to take you from beginner skills through local illustration all the way to full character illustration, textured environments and much more.
And I build the courses as creative projects, each with its own style.
And every time there's a new technique or something needs explaining, we stop for a while and you get an in-depth explanation.
But in the end, you still get a full project result.
So if you're interested, please check out the link in the description.
So let's step back in.
Now let's deactivate the X-ray view.
I will need to figure out the way how to do that.
So let's press three for face select and select all of these faces right here and hold shift to add to selection on to select all of these and some of these on top as well.
And now let's press I to insert.
just a tiny bit like this and now i'll use loop tools add-on if you don't have it active go to edit preferences and in extensions search for loop tools and you can see i have it installed right here but you should probably have it right there and you just click install button and the loop tools will be active and then you can just right click and in the loop tools menu choose
circle and now let's rotate this way and press G and move it outside like this and a little bit down okay
think that's a good start and now press X and delete all of these faces we just want this opening right here and to better see what we are doing let's add some subdivision surface so let's go here and add subdivision surface modifier with two levels of subdivision and now press 2 for edge select alt click this loop and we can make it smaller of course something like this and rotate it a little bit from the angle
And basically you will kind of need to eyeball this.
You don't want to go too far from your phone.
Something like this should be okay.
And we're basically checking for all sides here how the shape is coming up.
And now let's press E then Z and extrude this down.
Now let's look from this side and press R to rotate.
And we want to rotate this so we get as close to the flat surface as possible.
It doesn't need to be perfect.
And now press S to scale it down like this.
And let's update the rotation a little bit here and there.
Maybe move it outside a little bit.
I think this looks fine.
So now we can press S then Z and 0 to make it completely flat.
And now we can just press E then Z and extrude it down.
Just like this.
okay and now let's press f to fill ctrl b to bevel and let's increase number of cuts with the mouse wheel so we get some support loops like this and now let's press ctrl r and create one more loop so we get some better shading and we can press ctrl r again here to add more geometry there
so now let's step out and let's right click and shade smooth and see how the shape looks i think this is just fine but it needs some tweaks so you'll need to go in and kind of move some of these vertices around so you get a little bit more round connection around here so for example you can select this one
and bring it outside like this and you will see on the subdivided surface how the curve changed but then you probably need to go around and play with those other ones as well so it plays nicely together okay
Yeah, but I think overall it looks great.
So let's step back in.
Press 3 for face select, select the front face here and press I to inset, E to extrude, E to extrude again and I to inset again.
So we get a little bit sharper transition back there.
Okay.
Yeah, I think I like this.
So let's look from the front and press G to move it to the side here off center.
And now we can press Alt D and then X to move another one here and then press S then X and minus one.
So we flip it to the other side, press G then X to move it somewhere here and we can move this one closer.
And now we'll create the docking station for those.
So let's press Shift A and let's add a cube.
tab into the edit mode and just scale it down like this we can enable x-ray view so we better see what's happening there i will probably need something like this here then press s then z scale it down okay maybe g then z and move it down a little bit like this and now of course from the side here so let's press seven on an ampere to look from the top press s then y and scale it
And now let's press control B to create the bevel and press C to enable clamp and now increase number of cuts with the mouse wheel to something.
more smooth like this.
And now since we are overlapping with some of the vertices, let's press A and M to merge and choose by distance.
Now let's look from the front again and let's press control R and create a loop cut right here.
There'll be the place where we basically split this into two parts.
So let's press one for vertex select, hold shift and select all of these other vertices.
Make sure you're in the X-ray mode.
So you select everything.
and press P and separate selection now let's tab out and let's select this part right here tab into the edit mode and we'll press 2 for edge select select this edge hold shift s and snap cursor to select it and now we can tab out right click
and set origin to the 3d cursor so this way if you press r then x you will be able to just flip this like that and now let's toggle the x-ray again and now let's finish with our objects so tap into the edit mode alt click this loop press f to fill
I to inset a little bit like this and E to extrude down.
I won't go into details and create like this curved encasing for those.
I would probably go and do that using booleans or something like that but here for the simple animation very stylized I think this will be more than enough.
and then i will tab out and add a bell modifier with two segments here and let's reduce the amount to something like this and now if you press ctrl 2 you will add subdivision surface modifier and you will see the bell modifier creates those support loops so you get those nice sharp edges right click and shade smooth and let's do the same thing here so tab into the edit mode alt click this loop press f i to inset
and E to extrude.
somewhere here and now we can tap out hold shift select the main one and just go ahead and copy bell modifier and subdivision modifier now select it right click and shade smooth and now this is basically ready so let's press alt r to reset the rotation hold shift select the main one press ctrl p and parent to object now let's select this one press h to hide and select these two by holding shift
and the main case as last and press control p and parent them as well so now if we take this we can move the whole thing and now just to make this a little bit more interesting let's press alt h to unhide and with the cursor still there let's press shift a and let's add a cylinder and i will modify the vertices to 12. tab into the add mode and just scale it down using s and then press r then y
enter 90 and confirm to rotate this 90 degrees and press S then X to scale it up.
So we'll just basically create the hinge.
And now we can press 3, 4, face select, select this face, hold shift, select the other one, press control B and create the bevel and reduce number of cuts with the mouse wheel.
So we have only two loops there like this and press control R and create few cuts in the middle here to have like more evened out shading.
Now tap out, right click and shade smooth.
and this will be our hinge so press g then y and move it inside a little bit maybe we can make it even smaller like this so it's just a tiny detail and let's hold shift select the main part and press ctrl p and parent to object so now we're ready so let's hit zero on an amped for camera view and this is too far so the easiest way to position camera is to press n for the side panel and in the view options you can enable camera to view so now you can use your viewport controls to position your camera
And I'm interested in an angle like this.
And don't forget to disable that.
You can right click and add to quick favorites.
So then if you press Q, you can have the log camera to view right there.
And now with the side panel still open, let's go to the item menu and leave it open.
We'll need this.
And let's create some animation.
So I want this to be 120 frames long.
And in the output settings, let's modify this to 30 FPS.
And first of all, I want to create a rotation with the main body and I want to rotate this around the axis.
So let's right click here and insert single keyframe.
And the reason why I'm doing it this way will be clear to you in a few moments.
So let me select this here, press shift D and duplicate it to the other side.
now let's go to frame 30 and i want to rotate this full circle so 360 let's confirm and right click and insert single keyframe so this is now very simple rotation animation but i want this object to kind of spool up to the other side before the actual rotation so on the frame 10 or 9 something really close
I want to reset this back to zero and go few negative degrees so I don't know maybe something like minus 30 and let's right click and insert single keyframe and this is basically the block out for the animation but I want this to continue rotating a little bit and then you know start again in this movement
So I will basically just select this keyframe right here, press Shift D and duplicate it right there to the end of the animation.
Plus one frame, so 121.
And now if we make this a little bit larger and hit control tab here, you will get into the graph editor and you can use control and middle mouse button to kind of scale this in and out like this.
And now I want to change this animation curve.
to be kind of a little bit more snappy.
So first of all,
here I want this movement to be a little bit more sudden so let's move the handle right there and here let's select this keyframe press V and I want to change this to free so this will allow me to move just one handle like this and now this keyframe I want to move down a little bit so if you remember this is 360 frames but I want to end on that frame so I will press G then Y here and move this slightly down
like this and then adjust the handle so it's more smooth there so we'll get this kind of movement and you will see the whole rotation happens here but then the finish is very smooth and continues until the end maybe we can bring this a little bit lower and make this handle shorter
okay i really like this and then what i want to happen is for the lid to open and you know those spots to fly out for a little bit and then you know um folding back down with the lid closing in a sudden movement so let's go to like frame 15 for example and let's insert the x rotation here for the lid part insert single keyframe and then on a frame 25 let's
rotate this like that so i don't know minus 170 doesn't need to go all the way to 180 right click and insert single keyframe and again at this stage we're just blocking out the animation
let's select this frame right here press shift D then X to lock it on the x-axis and let's just move it here on frame 60 remember this is the keyframe these are only the handles and now basically we just need to select this one here press shift D press X to lock it and do the same thing and move it to frame 70 so this is the movement locking place but again I want to make this a little bit more snappy so let's select this keyframe right there press V and choose free and now I
modify the handle so it's more steep here and let's do the same thing right here so it kind of you know shuts the lid with a sudden movement so press b choose free and do it right there as well but again i want this movement to be sudden in the beginning and then continue a little bit as the animation goes on so let's select this one press g then y
and move it back here so we create this kind of curve right there and now if you play it back it will open and continue the movement a little bit and then shuts down suddenly and now let's press h to hide this object in the viewport
and let's select this one this left one i want this to move first so let's move i don't know like frame 15 is fine and let's right click and insert z location insert single keyframe there and then we'll move to frame 30 because we want to leave the lid a little bit of a time to open so it doesn't like fly through
so on frame 30 we should be somewhere here for example right click and insert single keyframe and if this is close together you can of course use ctrl and middle mouse button to zoom on it but if you press period on a numpad it will zoom just right in now let's do the same thing as before but it will happen a little bit sooner so around frame 50 and 60 so let's select this one press shift d then x
move it to frame 50 and then this one right here and again we'll select these two press v and choose free and now make them a little bit more steep like this and again i want this to be like a continuous movement right there so let's select this one press g then y and move it down slightly like this
So it will fly up and continue the movement until it kind of falls down in a sudden movement.
okay and now i want to do the same thing on the other one so let's move to frame like 25 select this one and let's right click and insert single keyframe here but i won't do that all over again let's just select this one select all of the keyframes press ctrl c and now let's select this one and press ctrl v i will paste the movement on the z-axis
so we will get the same thing but one difference i want to do here is to select these two with the handles as well and press g then y and move them higher up so this one will fly higher and here we can adjust for the curves so let's zoom on it and we can readjust the handles so it matches the value range okay
Now let's press alt H in the viewport and let's play back the whole animation.
Okay.
I think we'll need to figure out the timing a little bit better.
I think the shift between those two is a little bit too late.
So let's just move them five frames within each other.
And I think the rotation might need a little bit of a help.
I think we need to be higher up here with the rotation.
and these might go a little bit sooner so let's select both of those select all keyframes press G then X and just move it to the left a little bit okay and now closing the lid should match the fall of
of the earphones so here it should be already closed so either we can make this longer or we can bring this a little bit sooner so let's just bring this right here maybe even sooner okay and maybe readjust the curve a little bit so it's more fluent
nice i really like this so now um the reason why i only why i'm only doing these keyframes on certain channels first of all um it's much easier to see you know when you have just one animation curve but other than that i can still modify the rotation on y and on x and this will still work so you can still reposition your object you don't have any location keyframes so you can move it around and it will still you know animate
And you can change all of those values except the one that is always already keyframed So yeah, let's let's do a little bit of this rotation.
I think it gives the scene a little bit more dynamic and
like this and now i want to animate the camera a little bit because when they fly up i think this breaks the composition a little bit and i think a little bit of a camera handshake um should look nicely here so let's select the camera and let's just right click and insert keyframes on rotation let's press ctrl tab here and let's go back here
to the timeline and now let's press shift D and duplicate it to the other side and now let's make some keyframes in between so we can enable recording and press R twice and hold shift for smaller increments and do very small adjustments with the camera rotation R twice and hold shift but remember really
small adjustments and now here when it's up we can go a little bit higher so it's centered here and then when it goes down you can press r twice and go back here like this and then finish with you know some
slide movements okay and now don't forget to disable this that could cause a lot of mess if you you know keep moving things around with auto keying on okay works nicely but i think we need to go higher up a little bit sooner so maybe just delete this keyframe right there so we kind of follow the scene a little bit better and then maybe move this
little bit later now let's hold shift reset cursor to world origin and let's press shift a we'll add a plane press r then x to rotate it towards the camera like this and then r z okay and then press g and shift z to move on x and y axis let's make it larger so this will be our backdrop like this and now i'll use you know some
some hdri from polyhaven let me bring in this one and let me switch to shader editor right there and to the world settings and you will see the hdri right here so let's set up some rendering i will switch to cycles enable gpu and the noising
and something like 64 frames for the animation should be fine let's press ctrl b to limit the preview only for the camera and let's preview the rendered um first i want to check the rotation here of the lighting i think i want the windows to be on the left side here so
something like this should work nicely and now i want to reduce the strength because i want only i want this for only reflections and reduce the warmth like this so we get a little bit of a blue light maybe a little bit of a tint there
The HDRIs in this form come from Polyhaven.
When you have the pay that on, I'm in no way affiliated, I just use it like this, you are free to go to Polyhaven, download the same HDRI and create the setup on your own.
This is how it looks right here.
But it's just super convenient, you know, to have this
as a drag and drop into your scene so that's why i purchased the add-on and by the way it's like super cheap for the value you're getting so um yeah definitely get it if you can so i'll press ctrl b here to limit this again and let's press shift a and i'll add some area light to add additional lighting make it larger for some soft shadows and increase the power
like that and for some additional reflections i will press shift a and add a spotlight press g then z move it up here and now press period on a keyboard to switch to 3d cursor for the pivot point or you can do it right here and then press r twice to rotate this around from the side here and do this really strong like 500
and find some nice rim light here.
something like this now we can select the object create a new material and this will be the white one and let's decrease the roughness almost all the way to zero and you will see those reflections from the hdri so this is why i used it in the first place here and here in the back we can make this metal so
let's increase the metallic all the way reduce the roughness a little bit and maybe reduce the brightness but i think this is fine so now if we play back the animation let me bring up the timeline here let's scrub through the animation this should be
the same white material there and if i tab in with this still selected i can press ctrl plus on an umpad and create a new material and hit assign and create a new one there that will be black with full roughness okay looks quite nice i think and now with the background we can create a new material there
and maybe play with the brightness.
Or you can, you know, subdivide this, add some displacement, do like wavy texture or something should be really nice.
I really like that now to make this a little bit more funky we can do some color shifts there so let me switch the material to object mode in the shader editor and let me bring this up a little bit like that and let's press shift a and let's search for hue saturation value and let's find some nice color like this
okay and let's set the hue to zero and just plug it right here okay that'll give us this color right there and on frame 0 we can right click and insert keyframe on the hue and then on 1 21 we can change this to 1 right click and insert keyframe
but remember this will be busier animation and to see those keyframes here you need to have the node selected so now you can see those right there you can hold shift select them press t and choose linear interpolation so they'll change the colors much more in a much more fluent way so we have this you know funky color change there
And I really don't like how I left this open.
So we can either bring this lower down, or we can change the angle so we can just play with this rotation here.
So it's not, you know, visible.
course you're more than welcome to go in you know and model the inside so it looks better okay and i would like to do the same thing on the background here so let's select this node right here press ctrl c and i will select the background and press ctrl v here
But now we don't have the keyframes there because we moved it to another object.
So let's go to frame one and let's set the hue to zero and right click and insert keyframe and again 121.
Let's set this to one right click and insert keyframe and we can plug it here to the background.
so now the background will change as well but it's a little bit too strong for my taste so i think i will just go ahead and reduce the saturation here in the main color and maybe increase the value a little bit so this will give us like a more pastel
color look.
So now the final thing I want to do here is to give this a little bit more punch.
So first of all in the render settings, make sure you enable motion blur.
And in the color management, we can enable higher contrast settings like this.
play with the exposure but you can enable curves as well and and set the bright tones somewhere here and then bring down the darker parts so now if you move this you will see the contrast is more punchy as you move this lower you get this darker shades in the shadows okay and maybe we can add a little bit more saturation to the background
Okay.
yeah it looks quite nice so of course now you can play around with some more lights for example you can try to duplicate this one and create you know some more reflections from different angles but yeah otherwise I really like the final animation so when you're satisfied you can just go to the output settings switch this to FFmpeg encoding choose mp4 choose your folder and then go render render animation wait out your frames
And your animation will be ready.
So I really hope you enjoyed this one.
And again if you did.
Please leave that like.
And if you're new around here.
Hit that subscribe.
Thank you all for watching.
And have a wonderful day.
Similar videos: Wireless Pods Blender Animation Tutorial

3D Coffee and Cookies Tutorial in Blender | Polygon Runway

Blender 3D Headphones Animation Tutorial | Polygon Runway
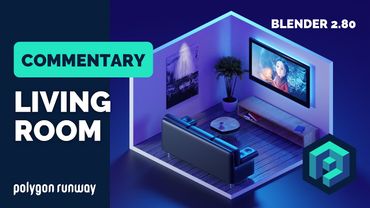
Room Blender Tutorial With Commentary
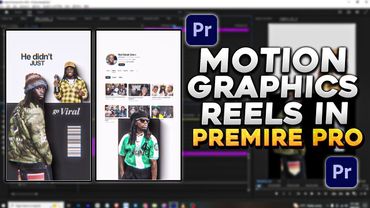
Editing Motion Graphics Reels in Premiere Pro – Full Workflow
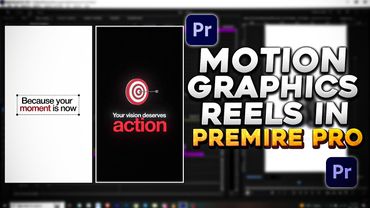
Premiere Pro Motion Graphics Reels – Clean & Smooth Animation Guide
